***When Scheduling a Group Event, you may first want to read the related article 'Scheduling an Event'.
- As a Service Provider, navigate to the Dashboard or Calendar Page through the sidebar menu.
- The Event types that can be scheduled for Groups are:
- Session
- Response to Intervention
- Also, please note when adding Students to Group Events:
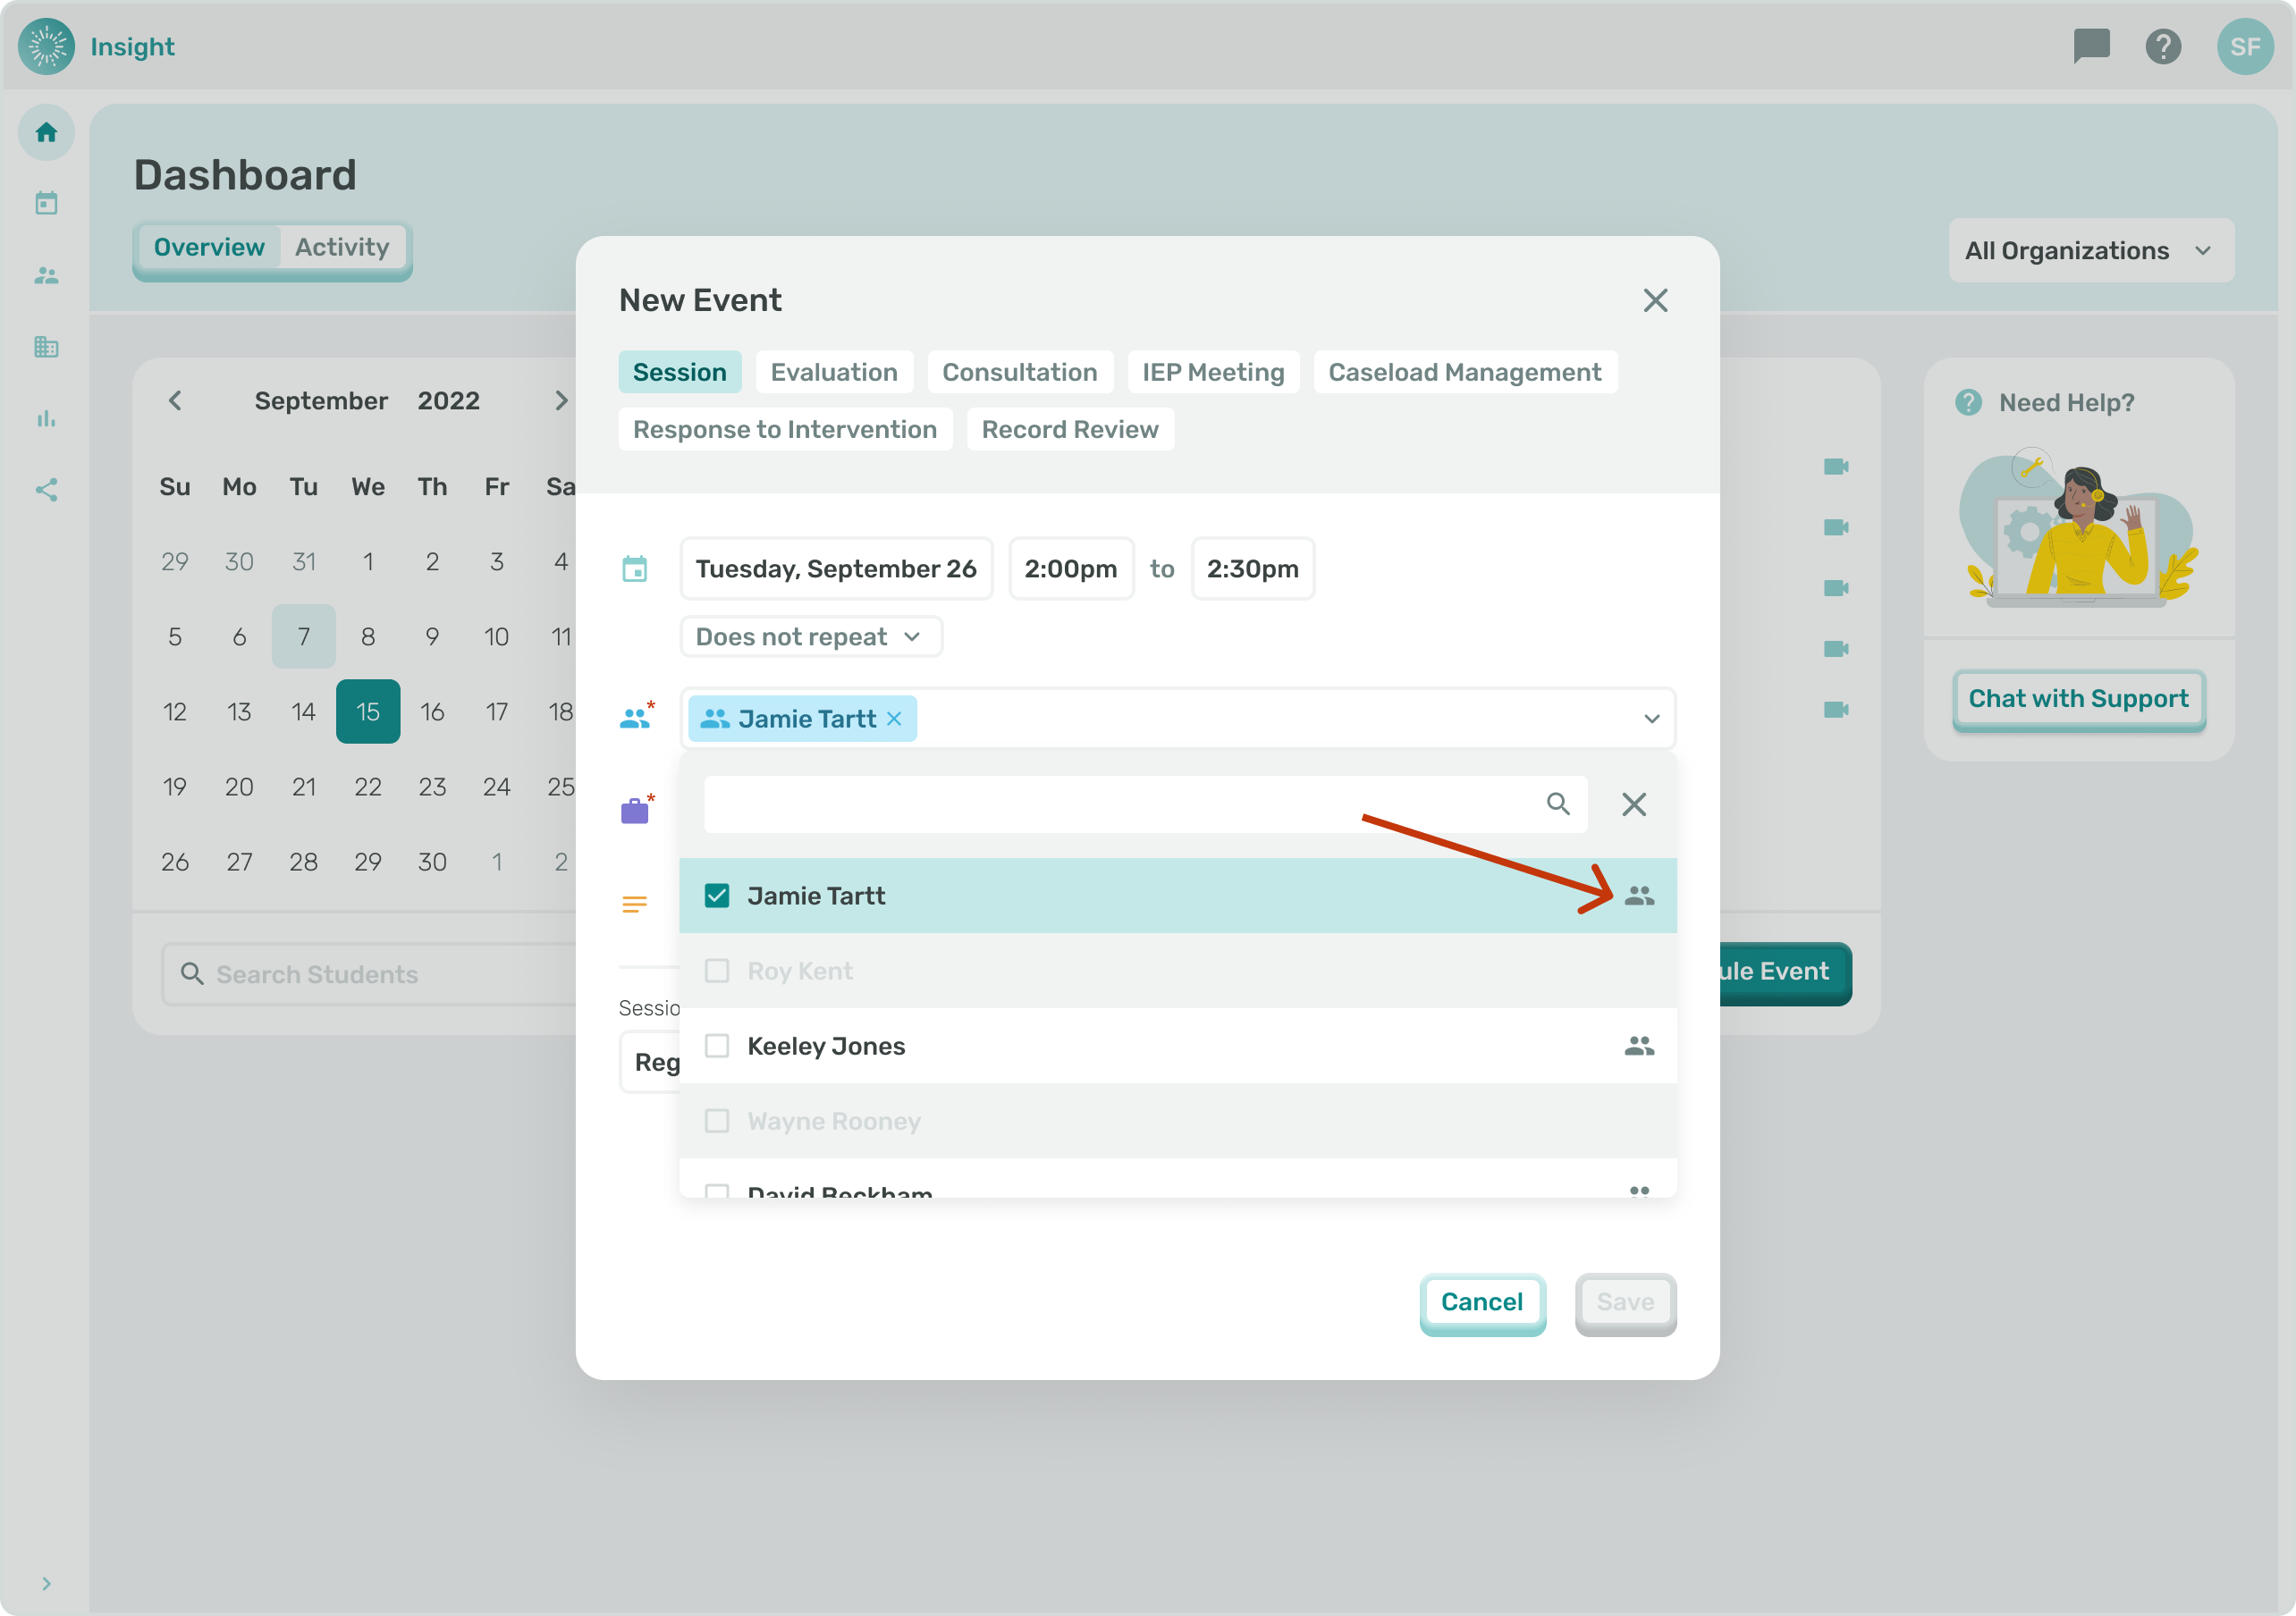
- Not all Students will have the ability to be scheduled for a Group Event. Only if you see the 2 person icon to the right of the Student's name can they be scheduled for a Group Event. The Student(s) need to be selected as "Can Group" in the Service.
- If students do not have the same ‘Discipline’ they cannot be grouped together. As an example, if a Student with a Speech or Language is selected, then all Students with other Disciplines will be removed from the drop down and only Group-able students with Speech or Language as the Discipline will be displayed in the drop down.
- If the student(s) that are selected have a Service Plan that starts after the chosen start date then you will get an error message and you will not be able to save the Event without adjusting the date.
- If the student(s) that are selected have a Service Plan that ends before the chosen end date then you will get an error message and you will not be able to save the Event without adjusting the date.
- Click on the ‘Select Attendees’ drop down box.
- You can either enter the Student's name to search the system or scroll down through the list of names to select the Students for the Event.
- Once selected the Student's names will populate in the box. If you want to remove a Student that you selected you can click on the circle with an "X" at the end of their name.
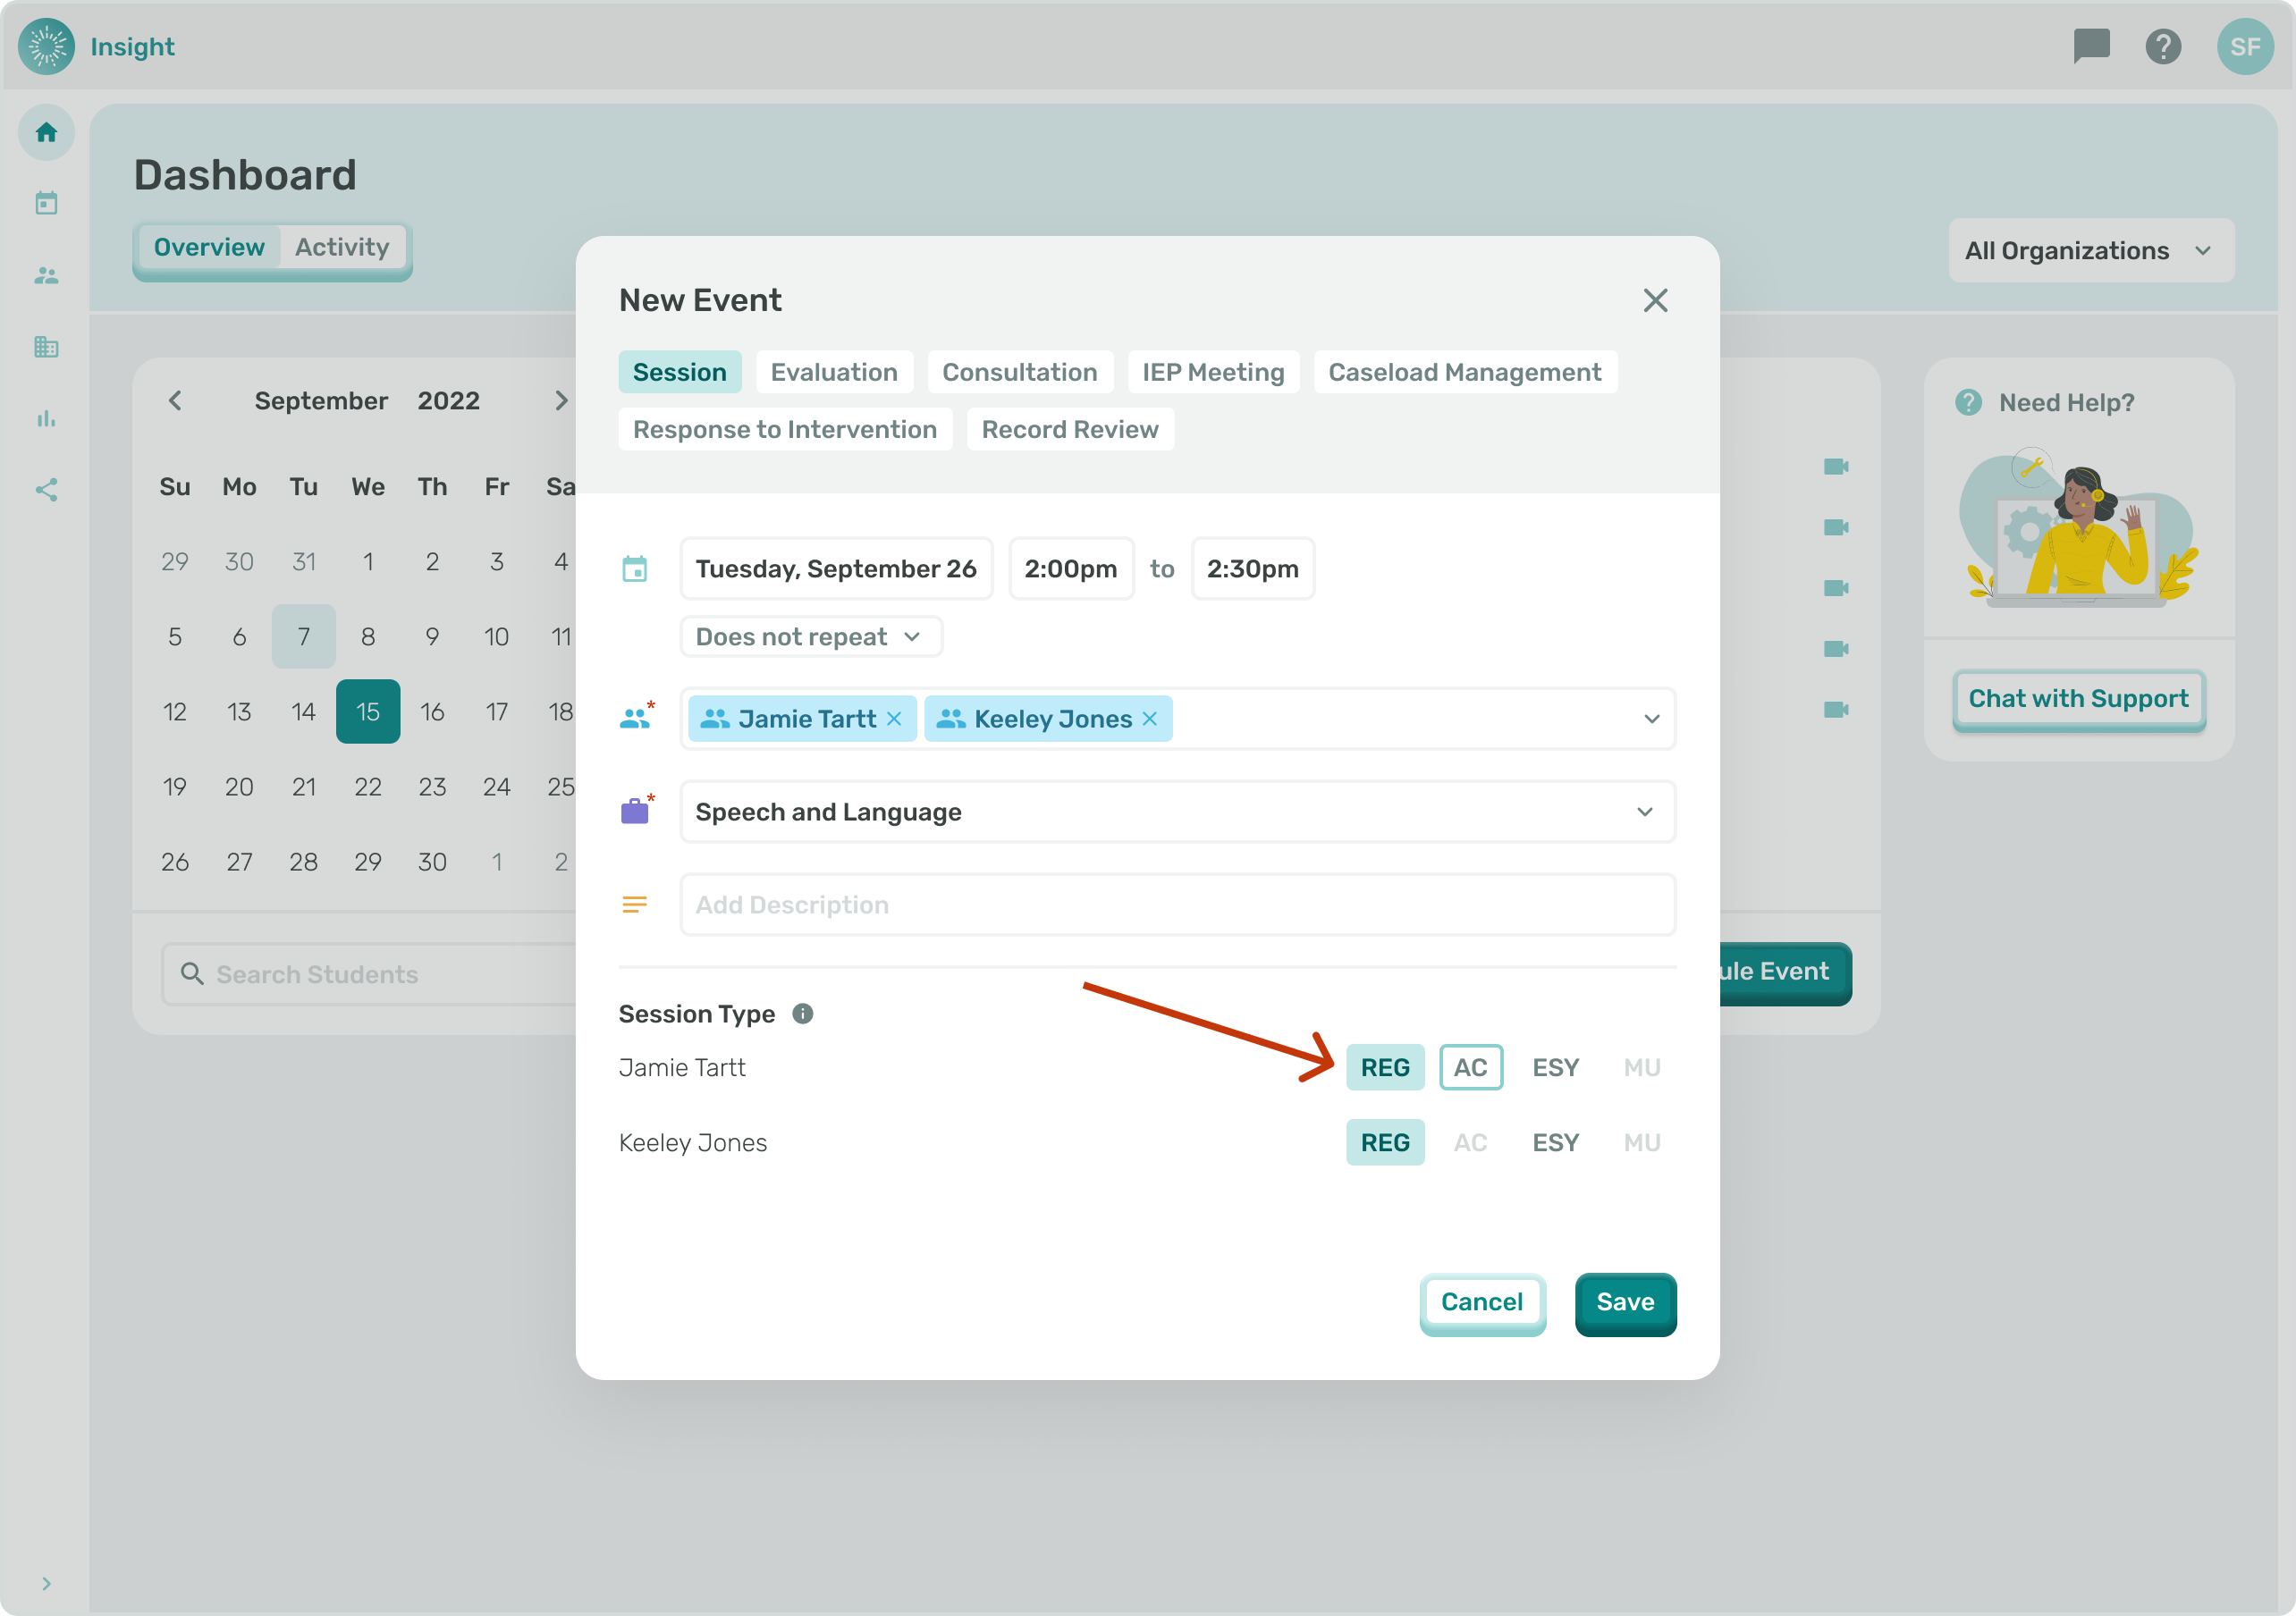
***The Group Event ‘Session Type’ section slightly differs from Events created for one student. Instead of a drop down selection for ‘Session Type’ there are four buttons.
- To select the Session Type for each Student click on the corresponding button:
- ‘Reg’ for Regular
- ‘AC’ for Approved Compensation
- ‘ESY’ for Extended School Year
- ‘MU’ for Make Up.
- This format will make it easier for you to edit the ‘Session Type’ as needed.
- To Exit the Edit Event modal at any time and not ‘Save’ your updates, you can either click the “X” in the top right corner or click the Cancel button at the bottom right corner of the modal.
- Once clicked you will go back to the Calendar without making any updates to your Events.
- The remainder of instructions are the same as outlined in the article Scheduling an Event.