- As a Service Provider, there are two locations where you can schedule an Event:
- the Dashboard Calendar and the Calendar Page.
- Both locations require the same steps to schedule an Event.
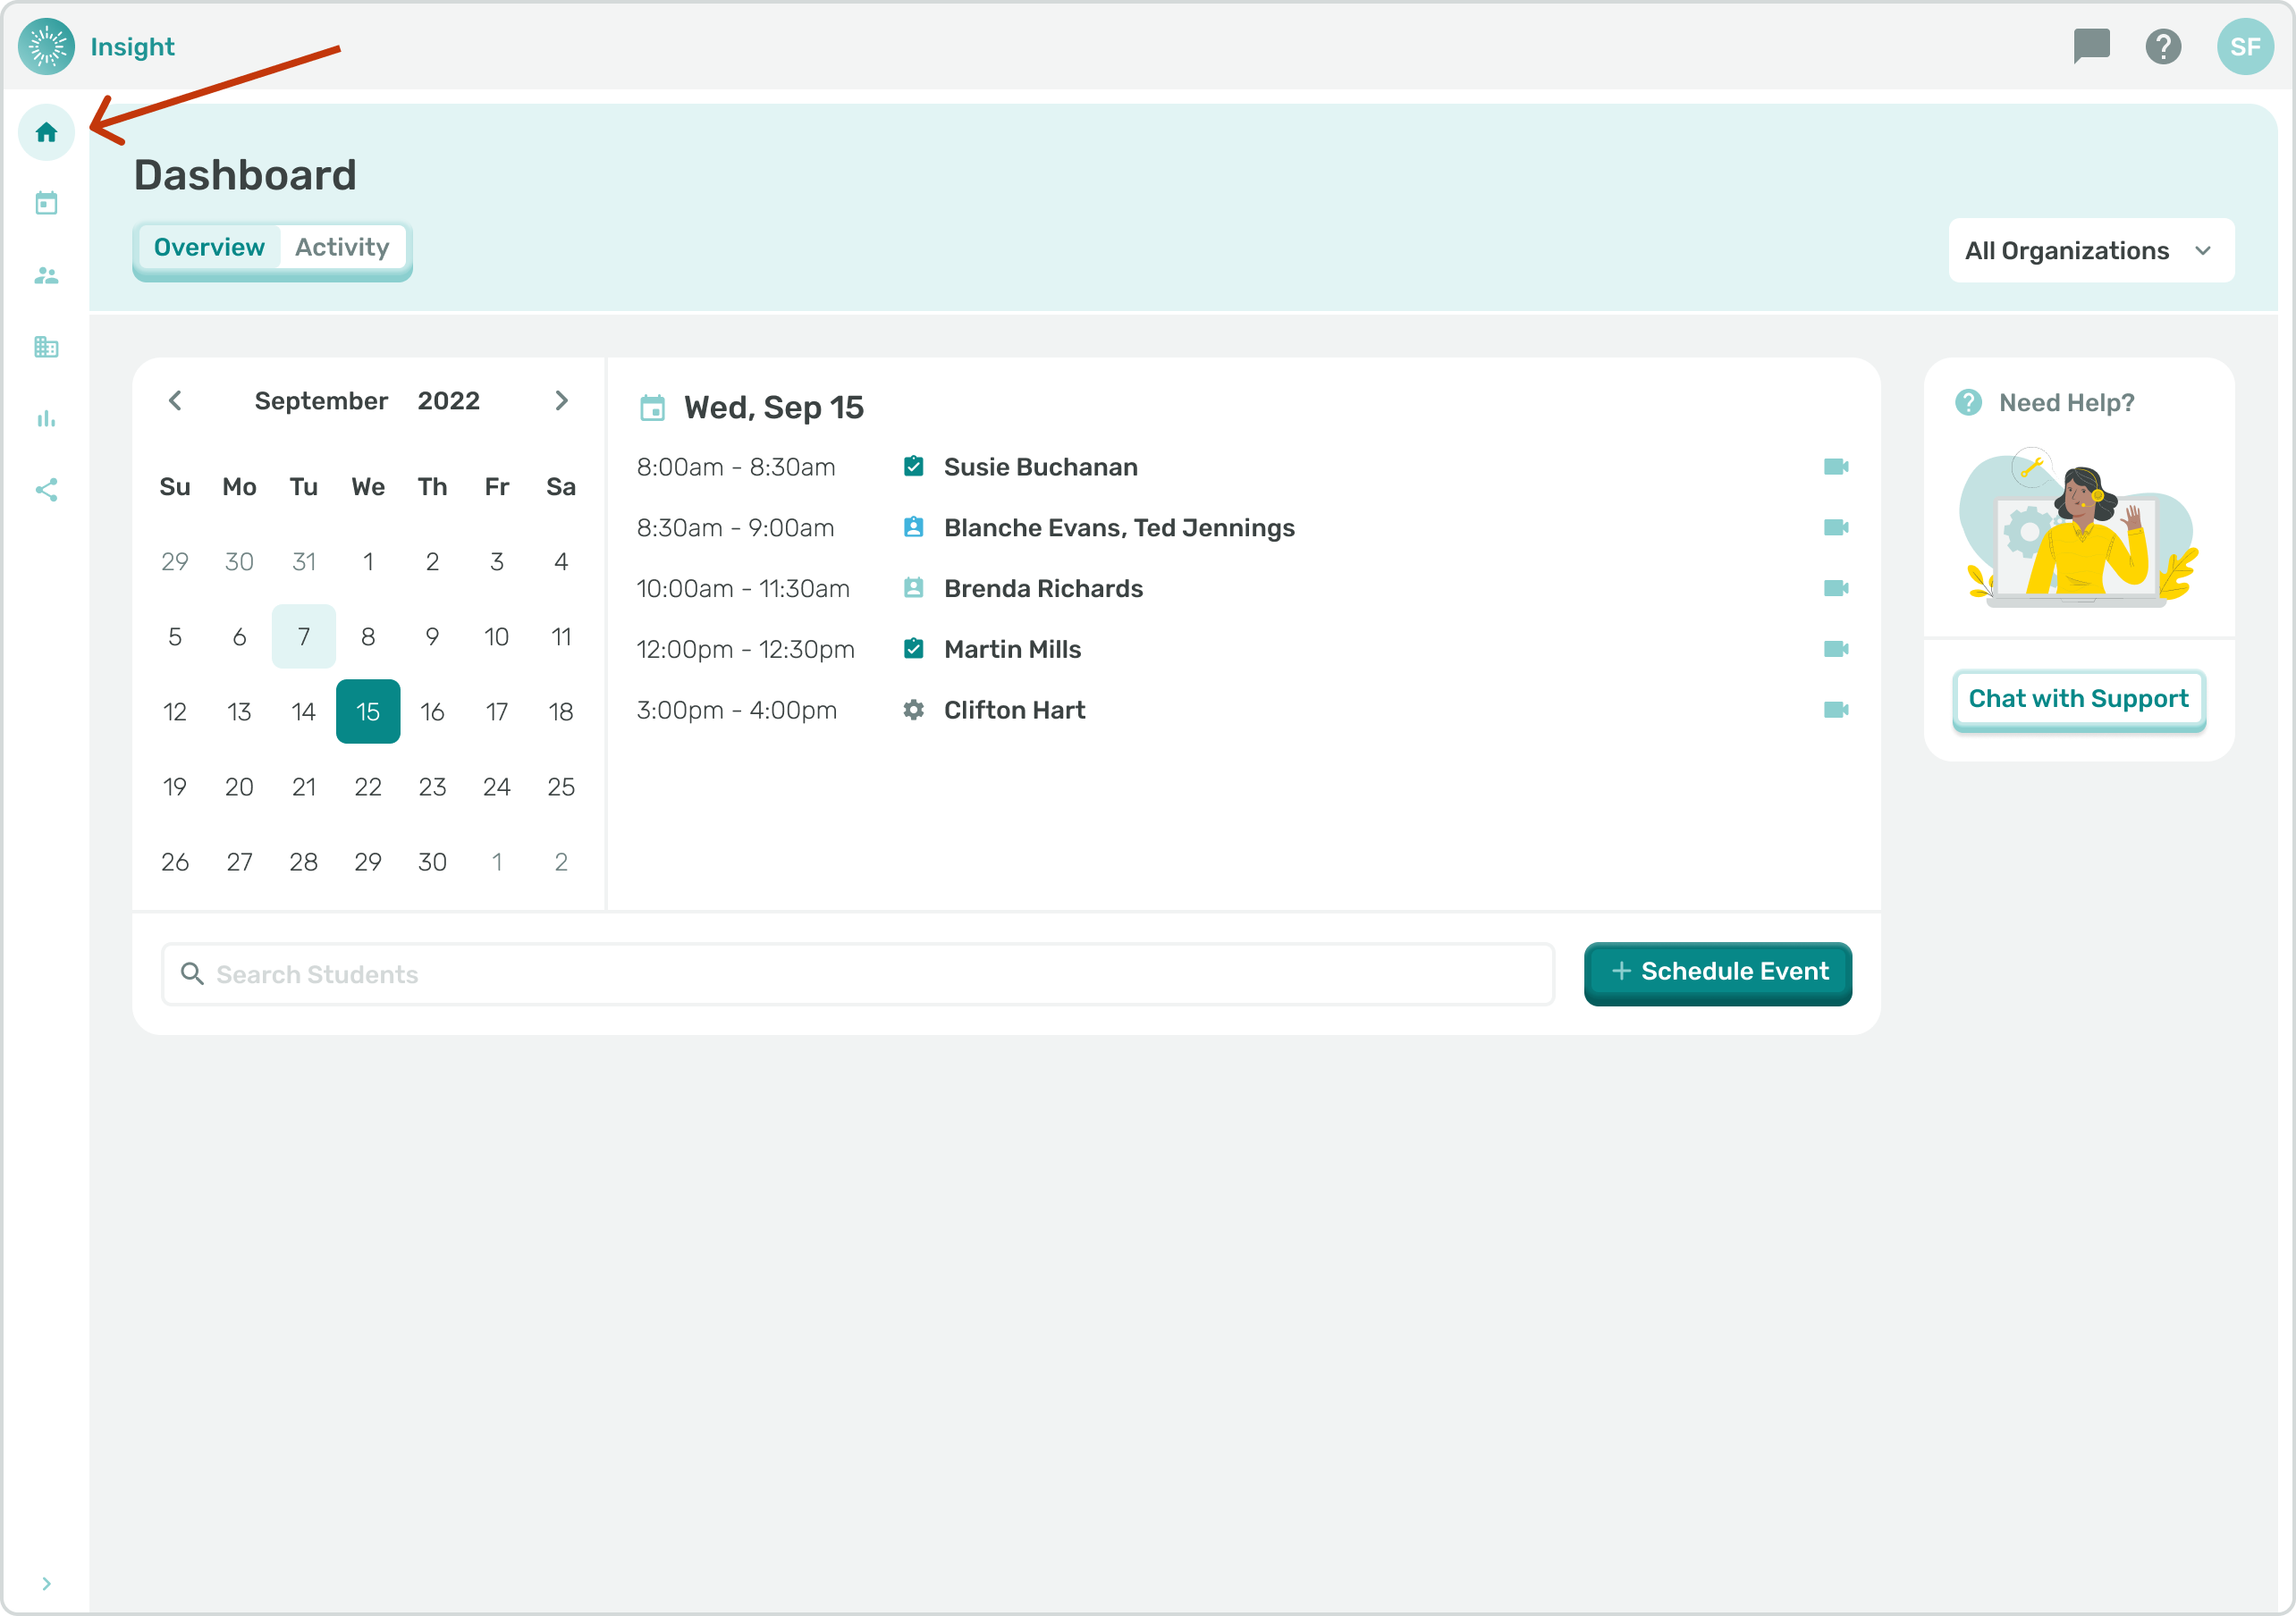
- Click on Dashboard in the sidebar menu to Navigate to the Dashboard.
- Please note when adding a Student(s) to Events:
- In order to Schedule an Event with a Student they must have the selected Event type listed in their Services under Treatment Plan in order for them to populate in the drop down menu.
- If the Student(s) that are selected have a Service Plan that starts after the selected start date for the Event you will see an error message and you will not be able to save the Event without making the necessary adjustments.
- If the Student(s) that are selected have a Service Plan that ends before the chosen end date then you will get an error message and you will not be able to save the event without adjusting the date.
- If you know which Student(s) you are scheduling an Event for you can click in the 'Search Students' box and enter their name(s).
- Next click on the '+Schedule Event' button and the Student name(s) you entered will be pre-populated in the New Event.
- To remove a name click on the circle with an 'X' next to the Name.
- You can also wait to add the Student name(s) for the Event until you click on the 'Schedule Event' button.
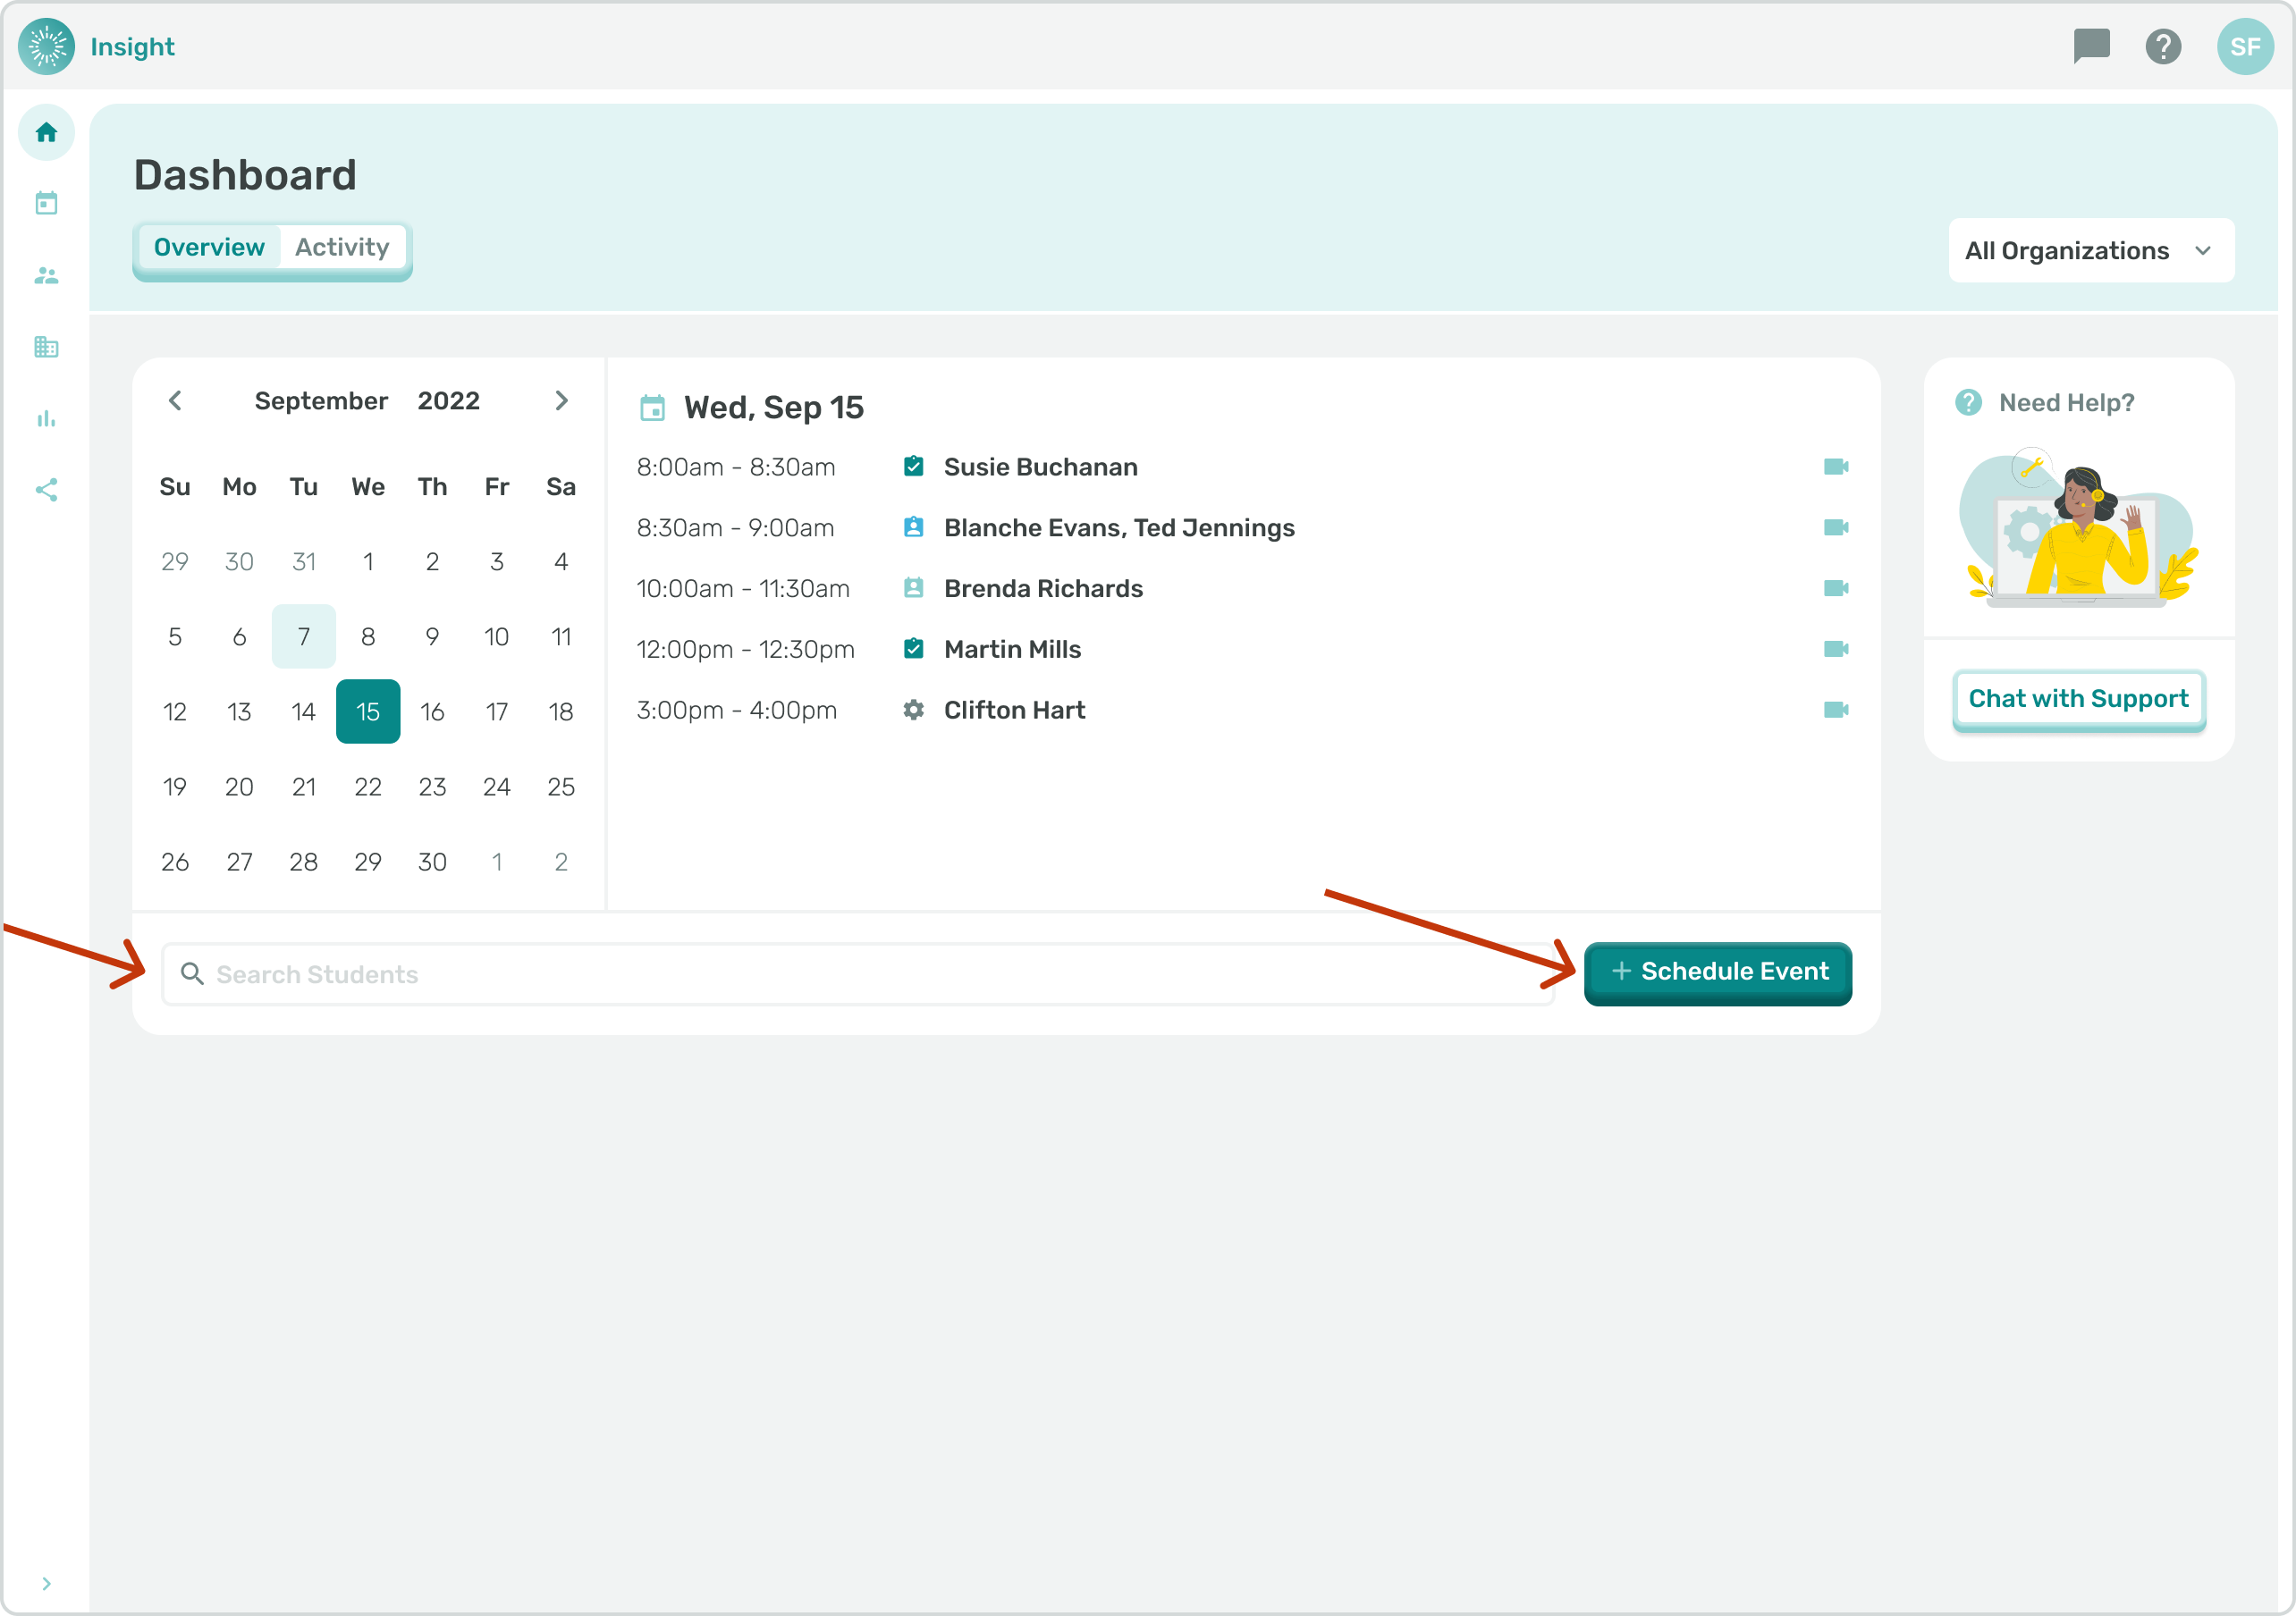
- To schedule an Event click on the '+Schedule Event' button which is to the right of the 'Search Students' box.
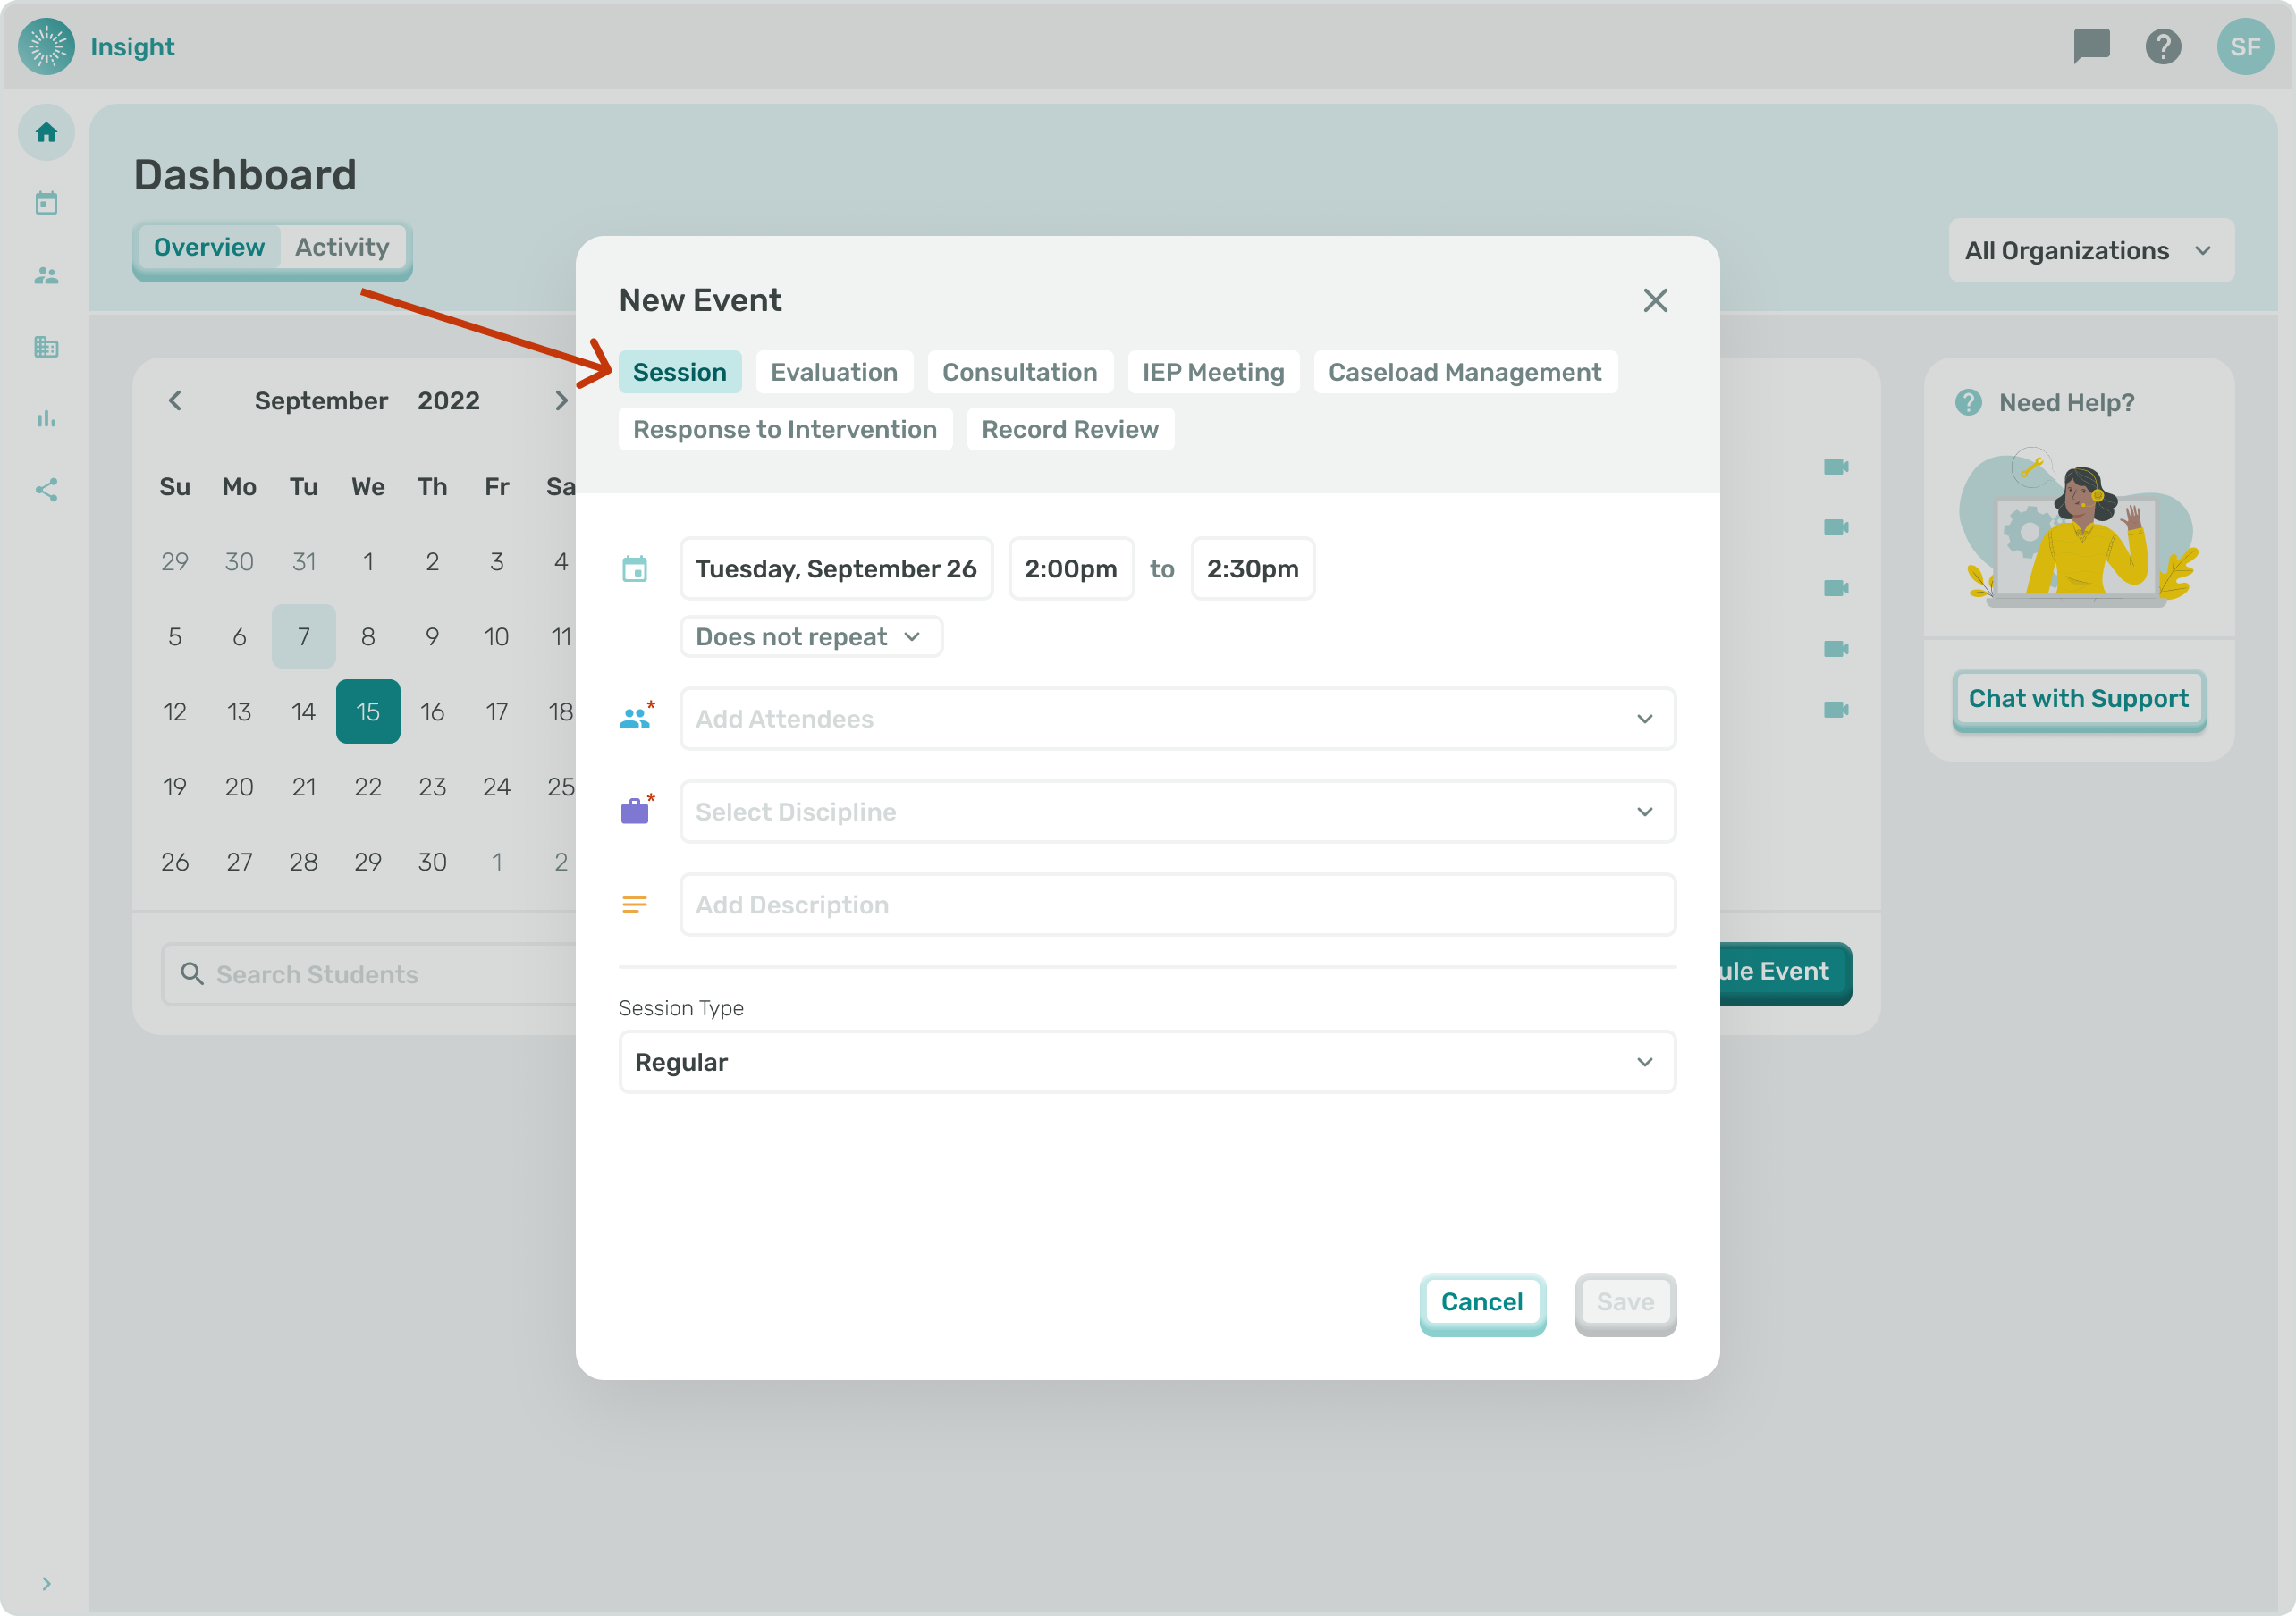
- Select the 'Event type' you are creating by clicking in the gray banner at the top of the modal.
- For all Event types, you select the Day, Date and Star Time/End Time following these steps:
- Click in the Day, Date box. A calendar will open to the current month and a blue circle will appear around today's date.
- To change the month there are arrows on both sides of the month.
- To go forward in time, a month at a time, click on the right arrow and to go back in time, a month at a time, click on the left arrow.
- To select the Event Day, Date click on the Day, Date needed on the calendar.
- Once the Day, Date has been clicked the calendar will disappear and the Day, Date you clicked on will populate.

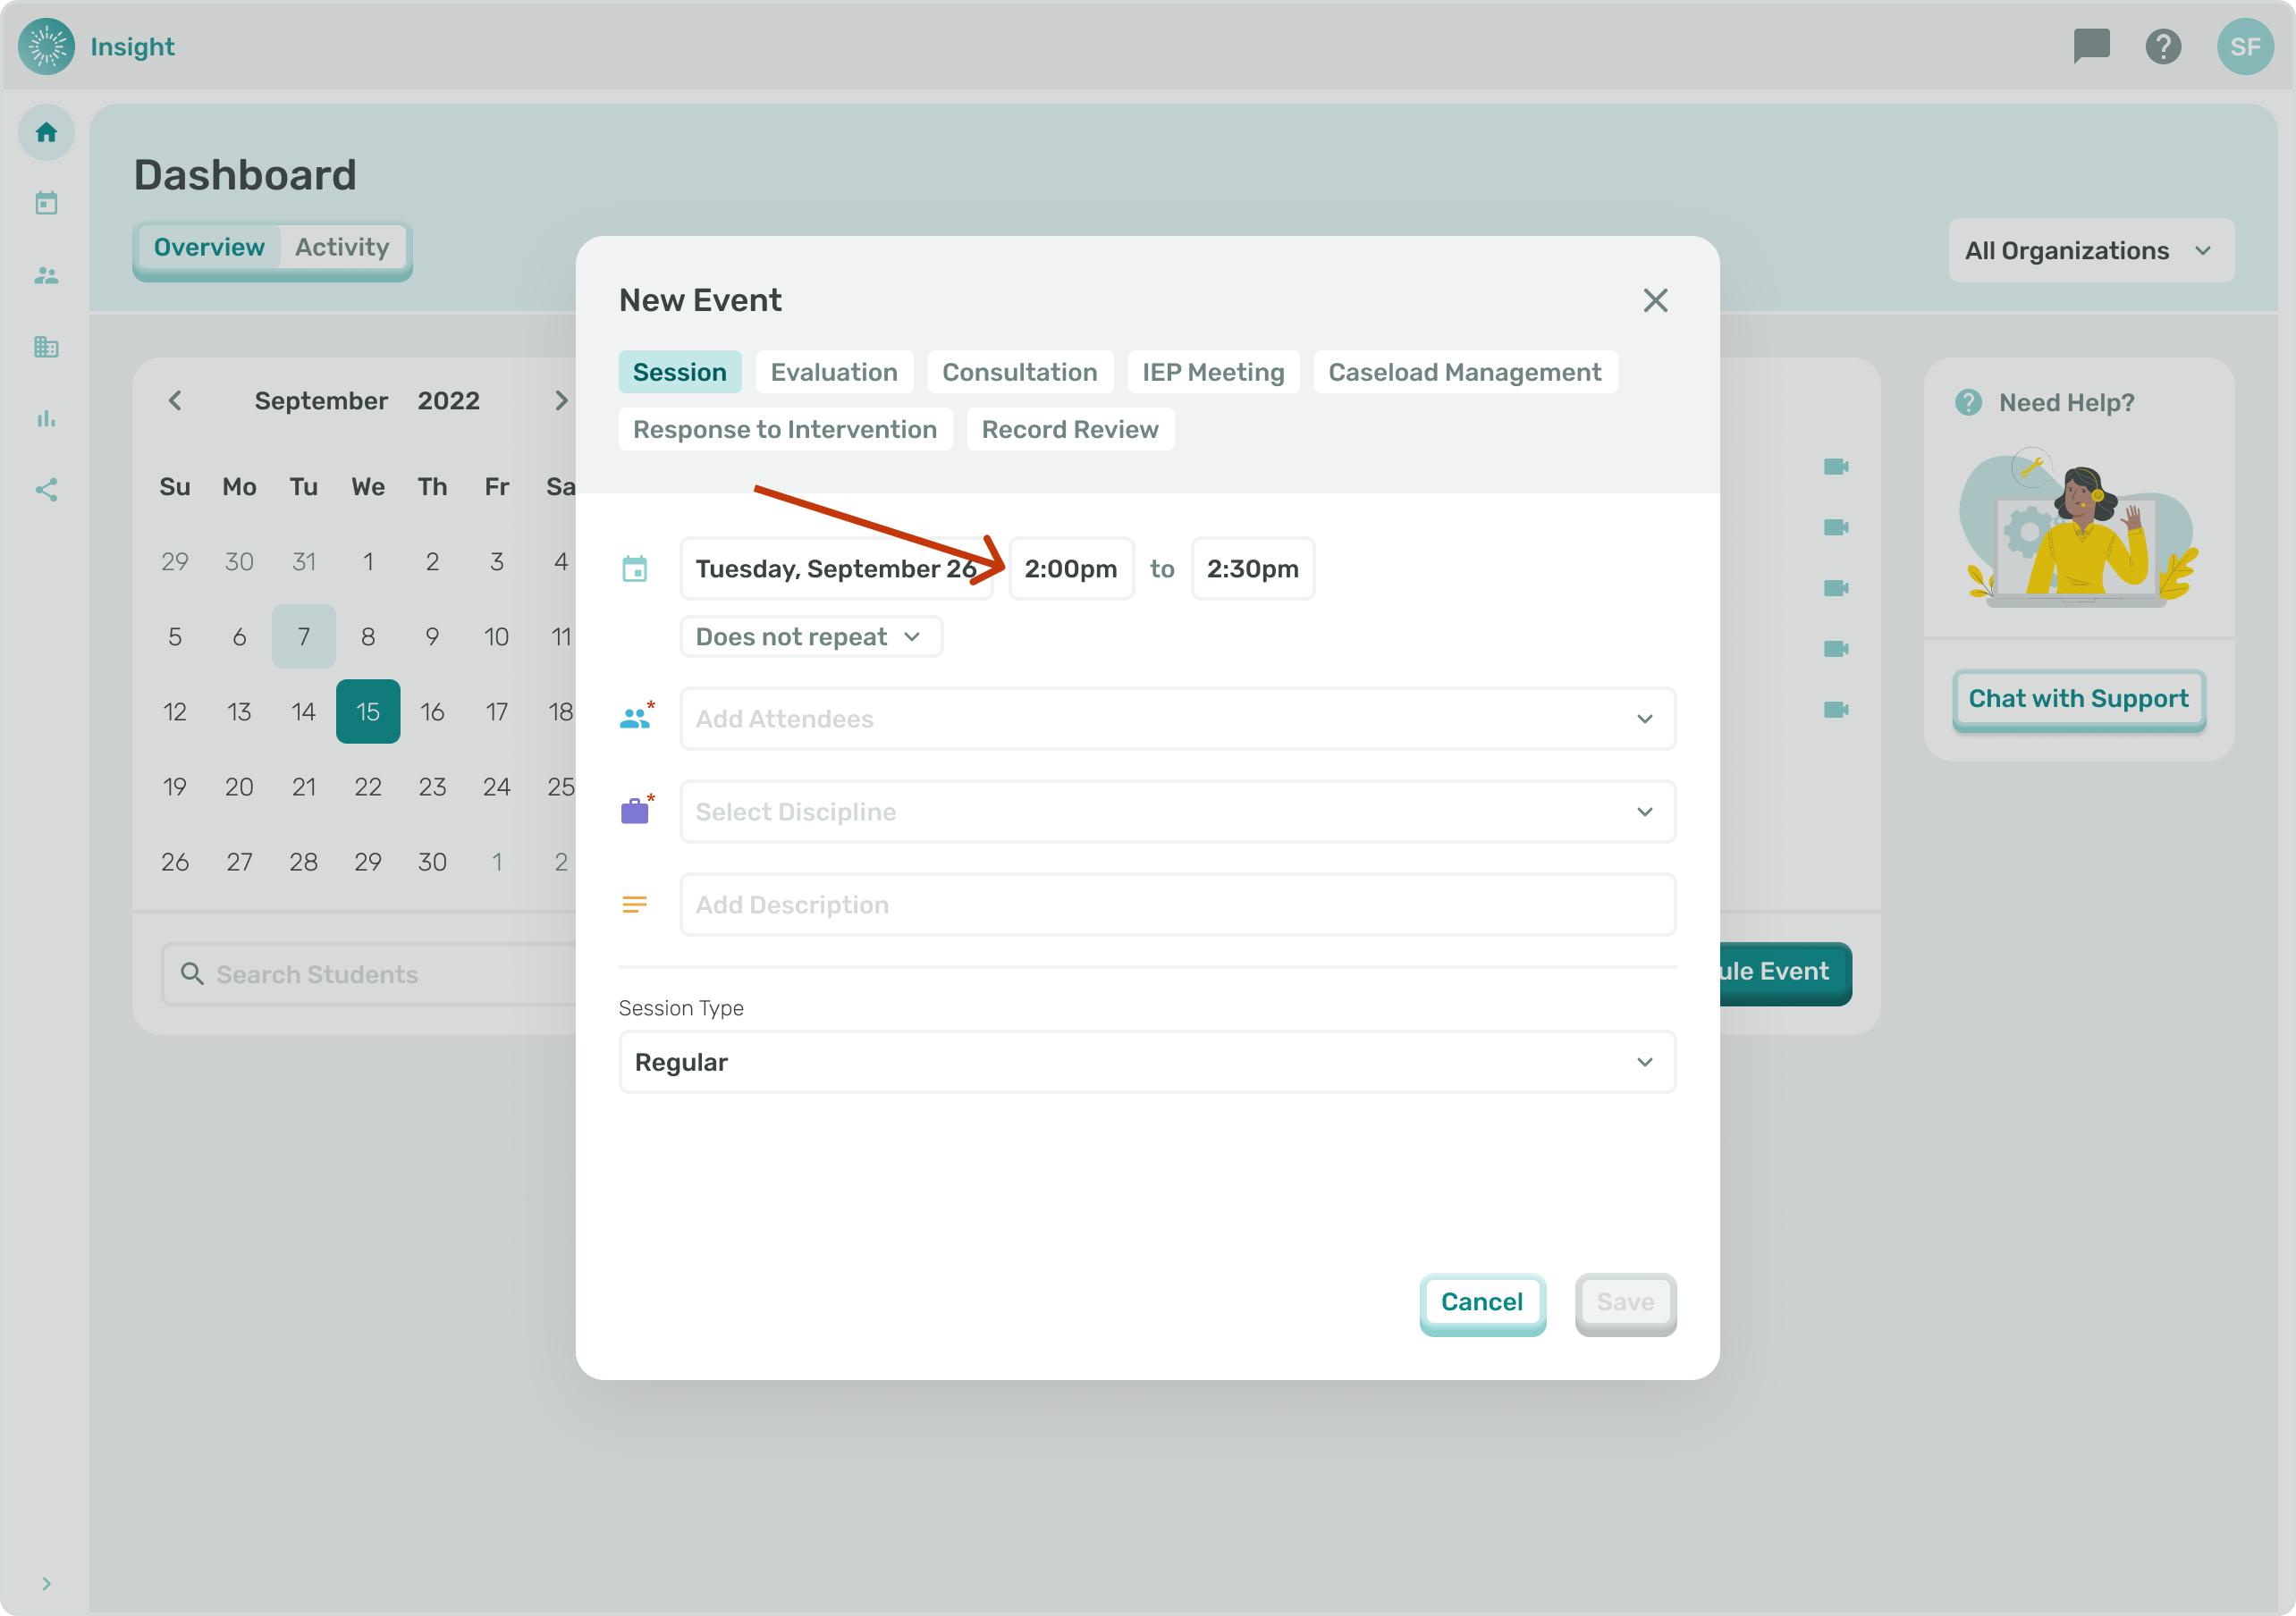
- To determine the starting and ending times of the Event click on the time selection boxes. Once you click in the time box arrows will appear allowing you to make your selection.
- If you select an ending time that is the same as or if it is before the starting time the outer box will turn red indicating an error.
- Once the ending time is later than the starting time the color of the boxes will match.
- For additional instructions go to the related article 'Recurring Event'.
- If the Event type is a 'Session':
- Under the Date, Day there will be a 'Does not repeat' box with a drop down menu for you to determine if this Event 'Does not repeat' or if it is a recurring Event.
- If your Event does not recur no updates are needed in the 'Does not repeat' box.
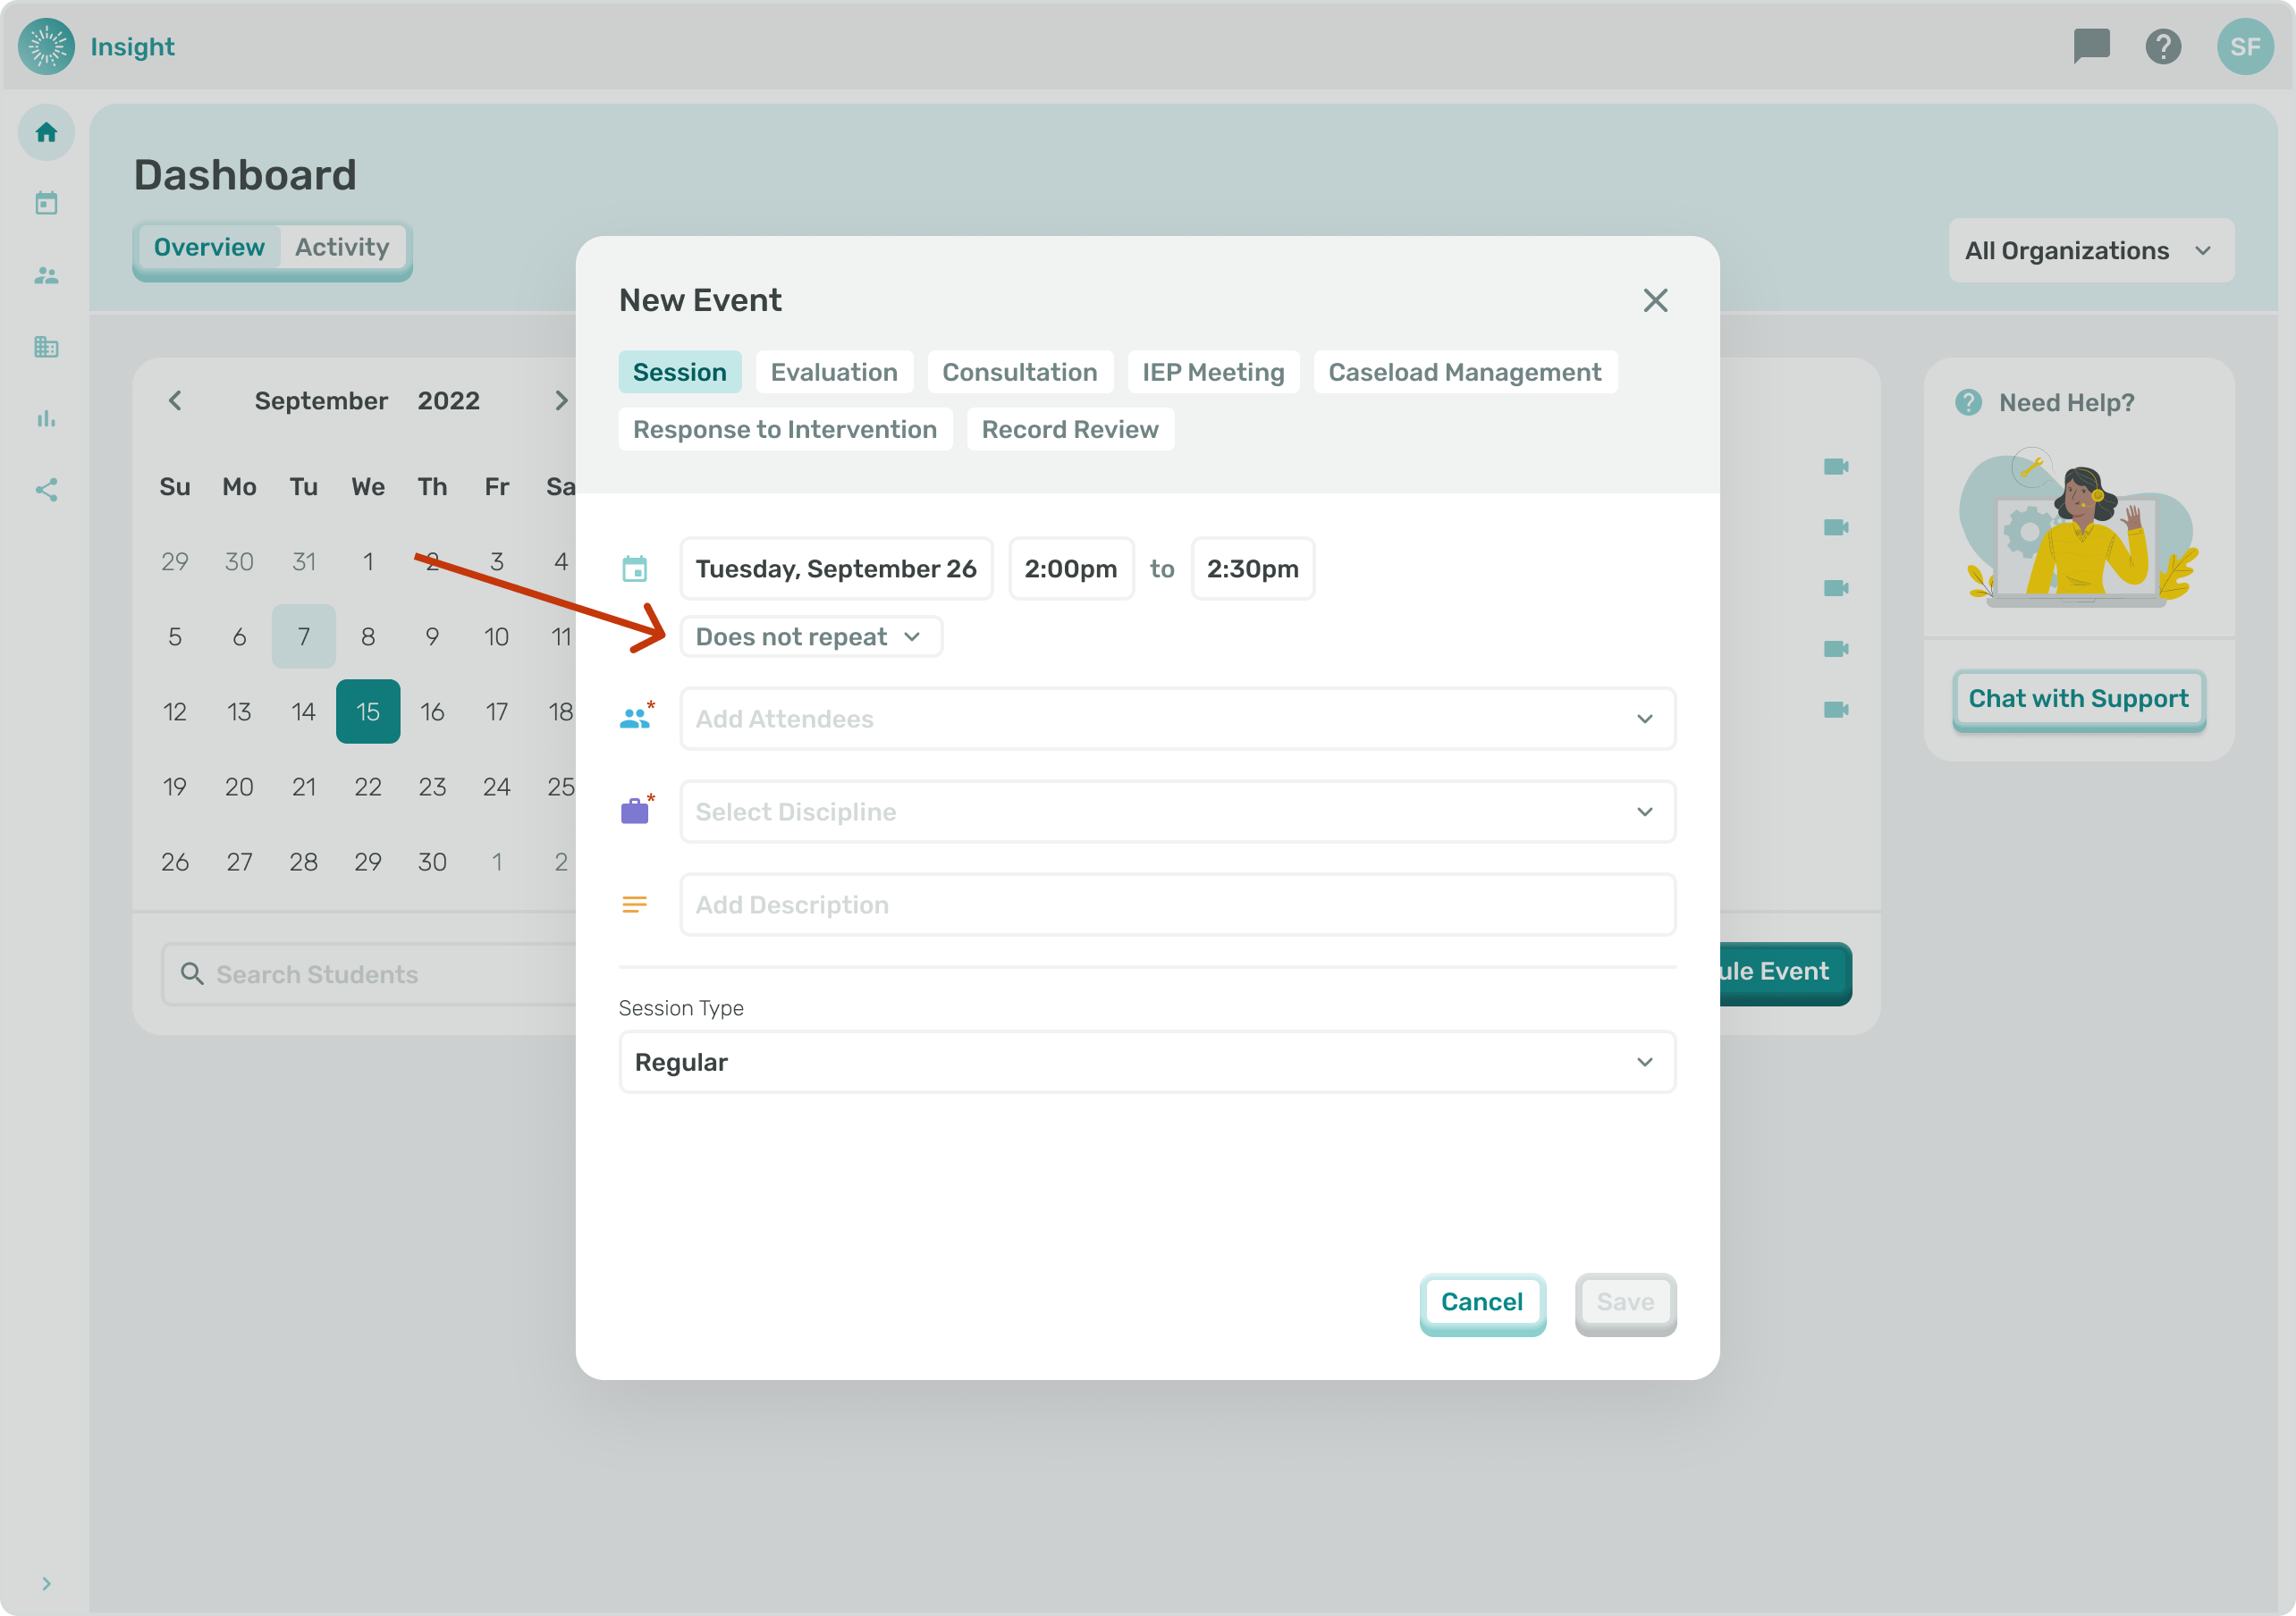
- Go to the related article 'Scheduling a Recurring Event' for additional instructions.
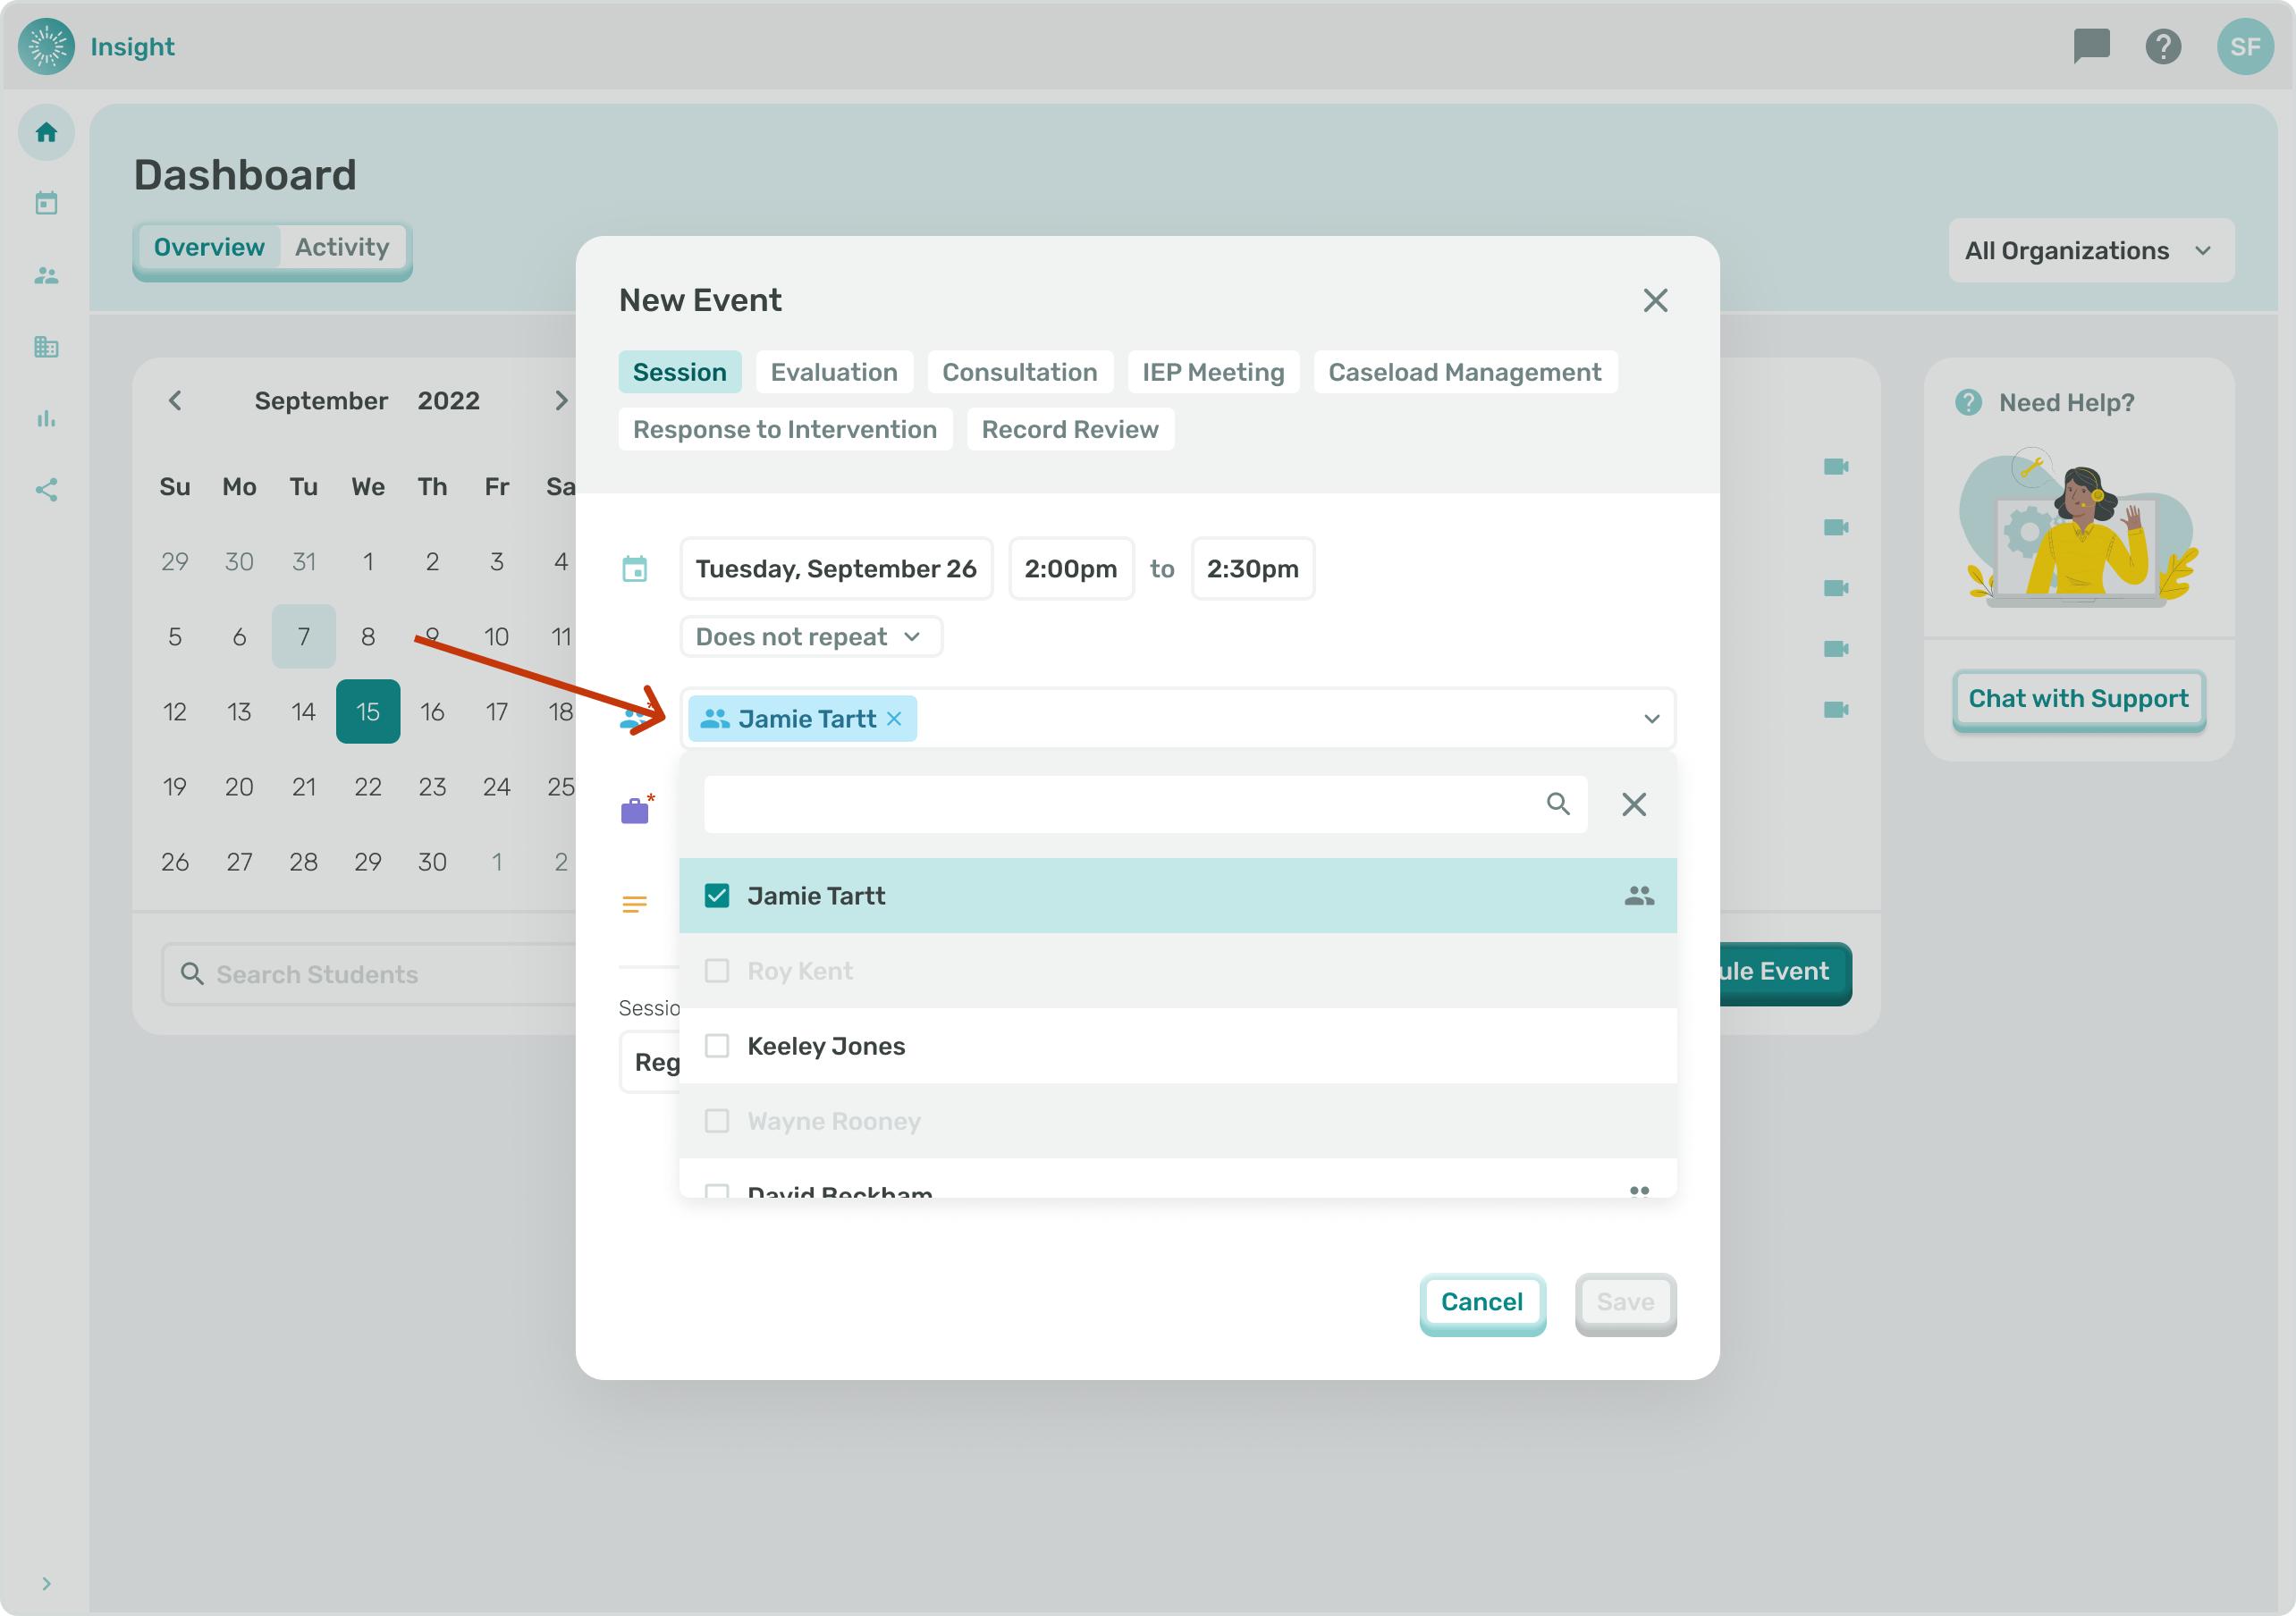
- Click on the 'Select Attendees' drop down box.
- You can either enter the Student's name to search the system or scroll down through the list of names to select the Student for the Event.
- Once selected the Student's name will populate in the box.
- If you want to remove a Student that you selected you can click on the circle with an 'X' at the end of their name.
- In order for a Student's name to be included in this list they need to be Connected to you in both your Profile and their Profile.
- For additional instructions go to the related article 'Scheduling a Group Event'.
- Click in the 'Select a discipline' box and click on the required Discipline for the Event.
- The list of Disciplines will vary for each Student as this is based on each Student's Services and Treatment Plan.
- Depending on the Student's Service(s) in their Treatment Plan the options to select from include:
- Behavioral Intervention
- Occupational Therapy
- Physical Therapy
- Psychology
- Social Work/Counseling
- Speech or Language.
- Click in the 'Add description' box to add details and information about the Event.
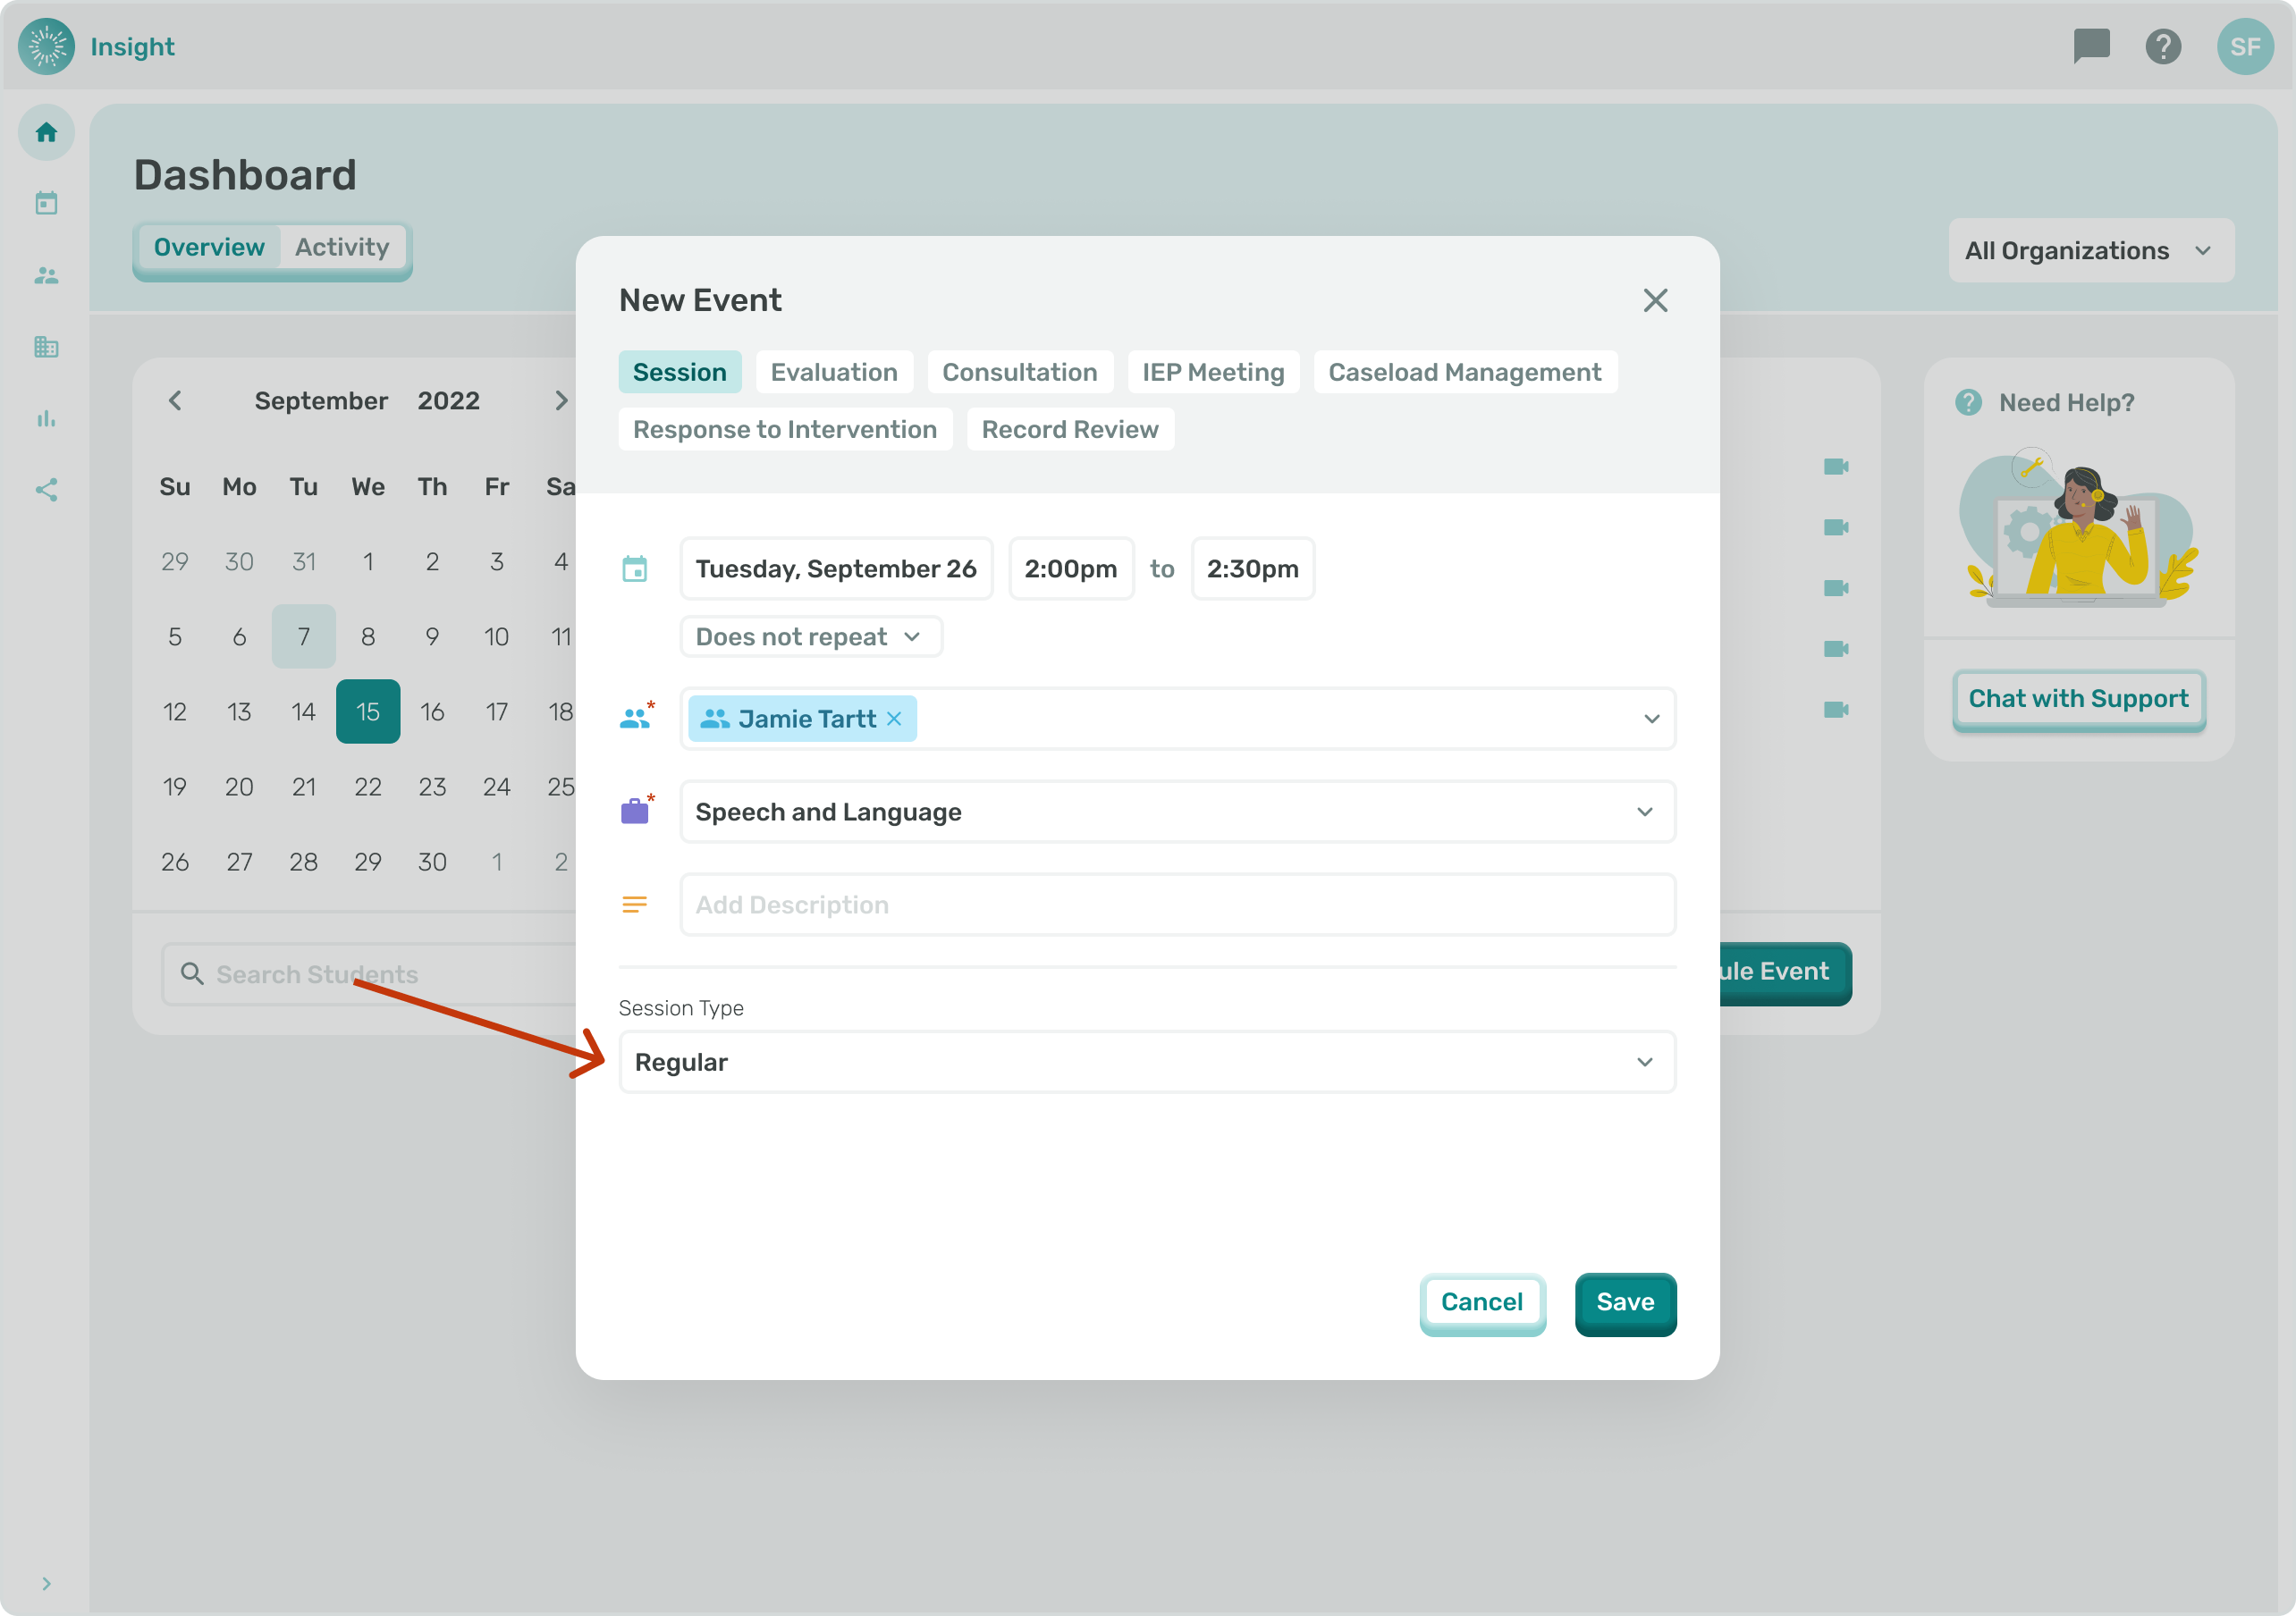
- Click in the 'Session type' box. Depending on the Student's Service(s) in their Treatment Plan the options to select from include:
- Regular
- Approved Compensation
- Extended School Year
- Make-Up
- As an example, if the Student does not have 'Approved Compensation' in their service then the option will not be present in the list.
- Also of note, when selecting Make Up, it does not need to be listed in the Student’s Treatment Plan so we suggest checking with your Supervisor if you have questions of when to use this ‘Session type’.
***If the Event is a 'Consultation' type: Under the Date, Day there will be a 'Does not repeat' box with a drop down menu for you to determine if this Event 'Does not repeat' or if it is a recurring Event.
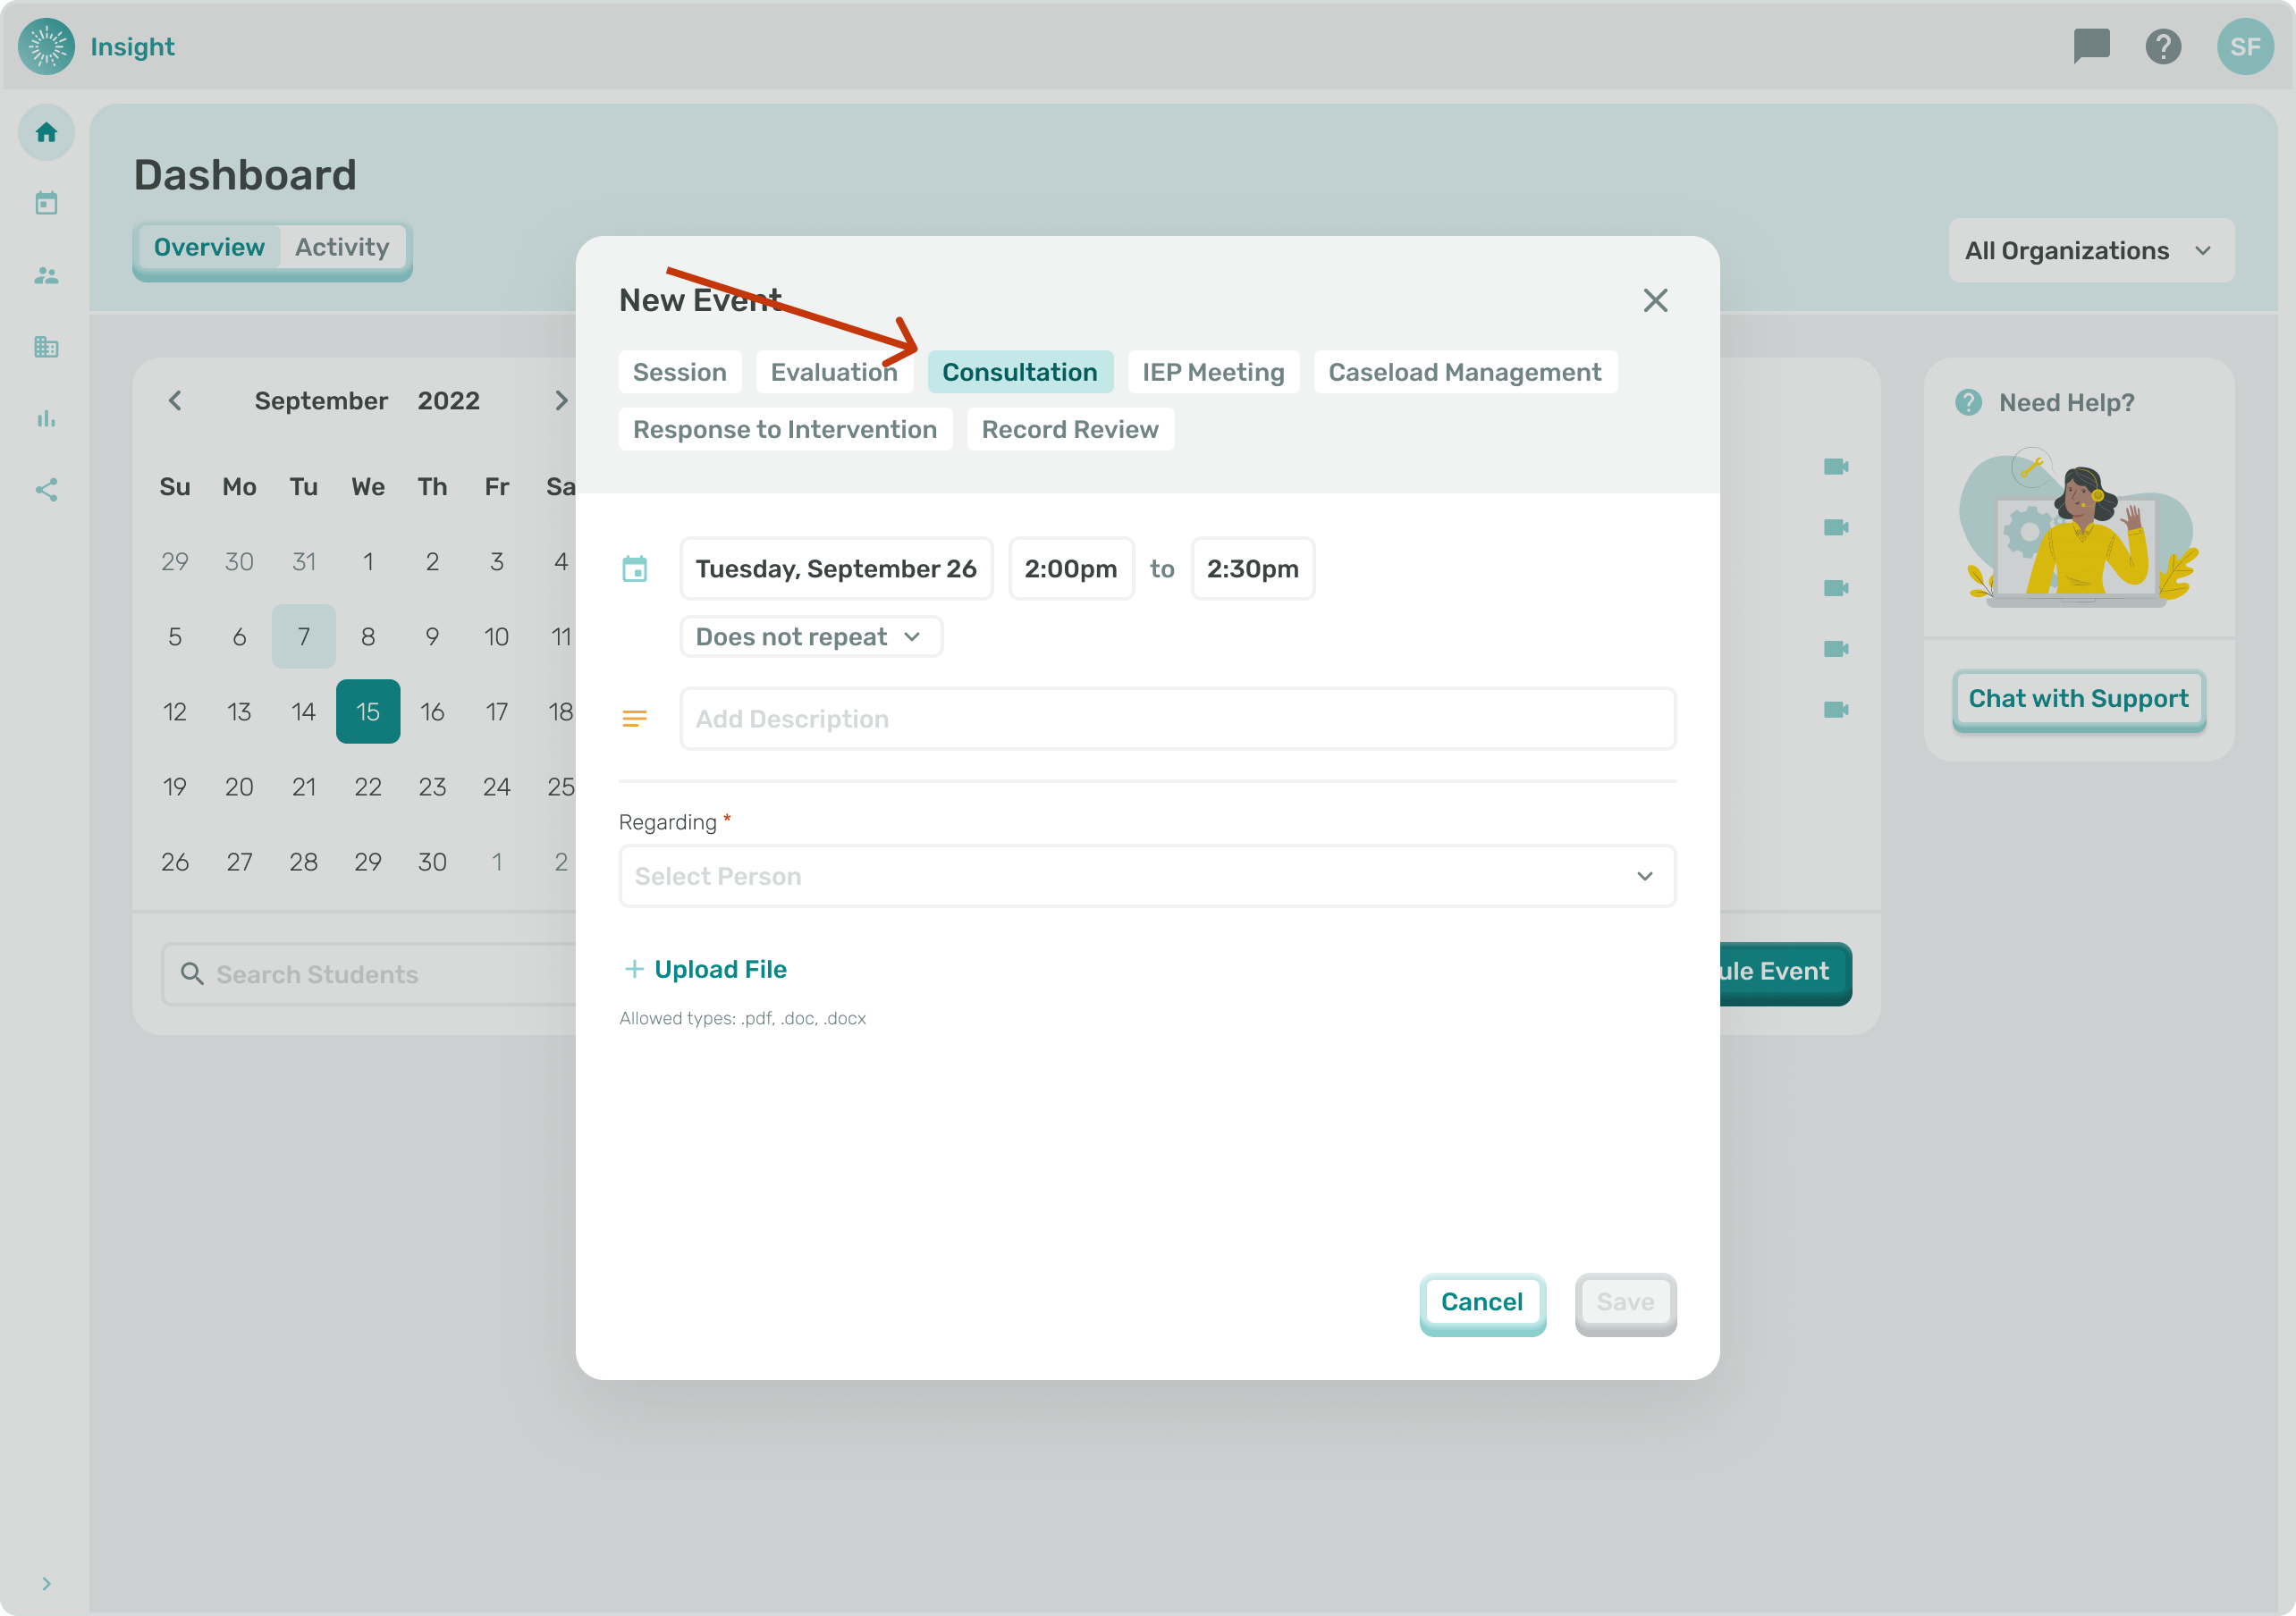
- If your Event does not recur, no updates are needed in the 'Does not repeat' box.
- For additional instructions, go to the related article 'Recurring Event'.
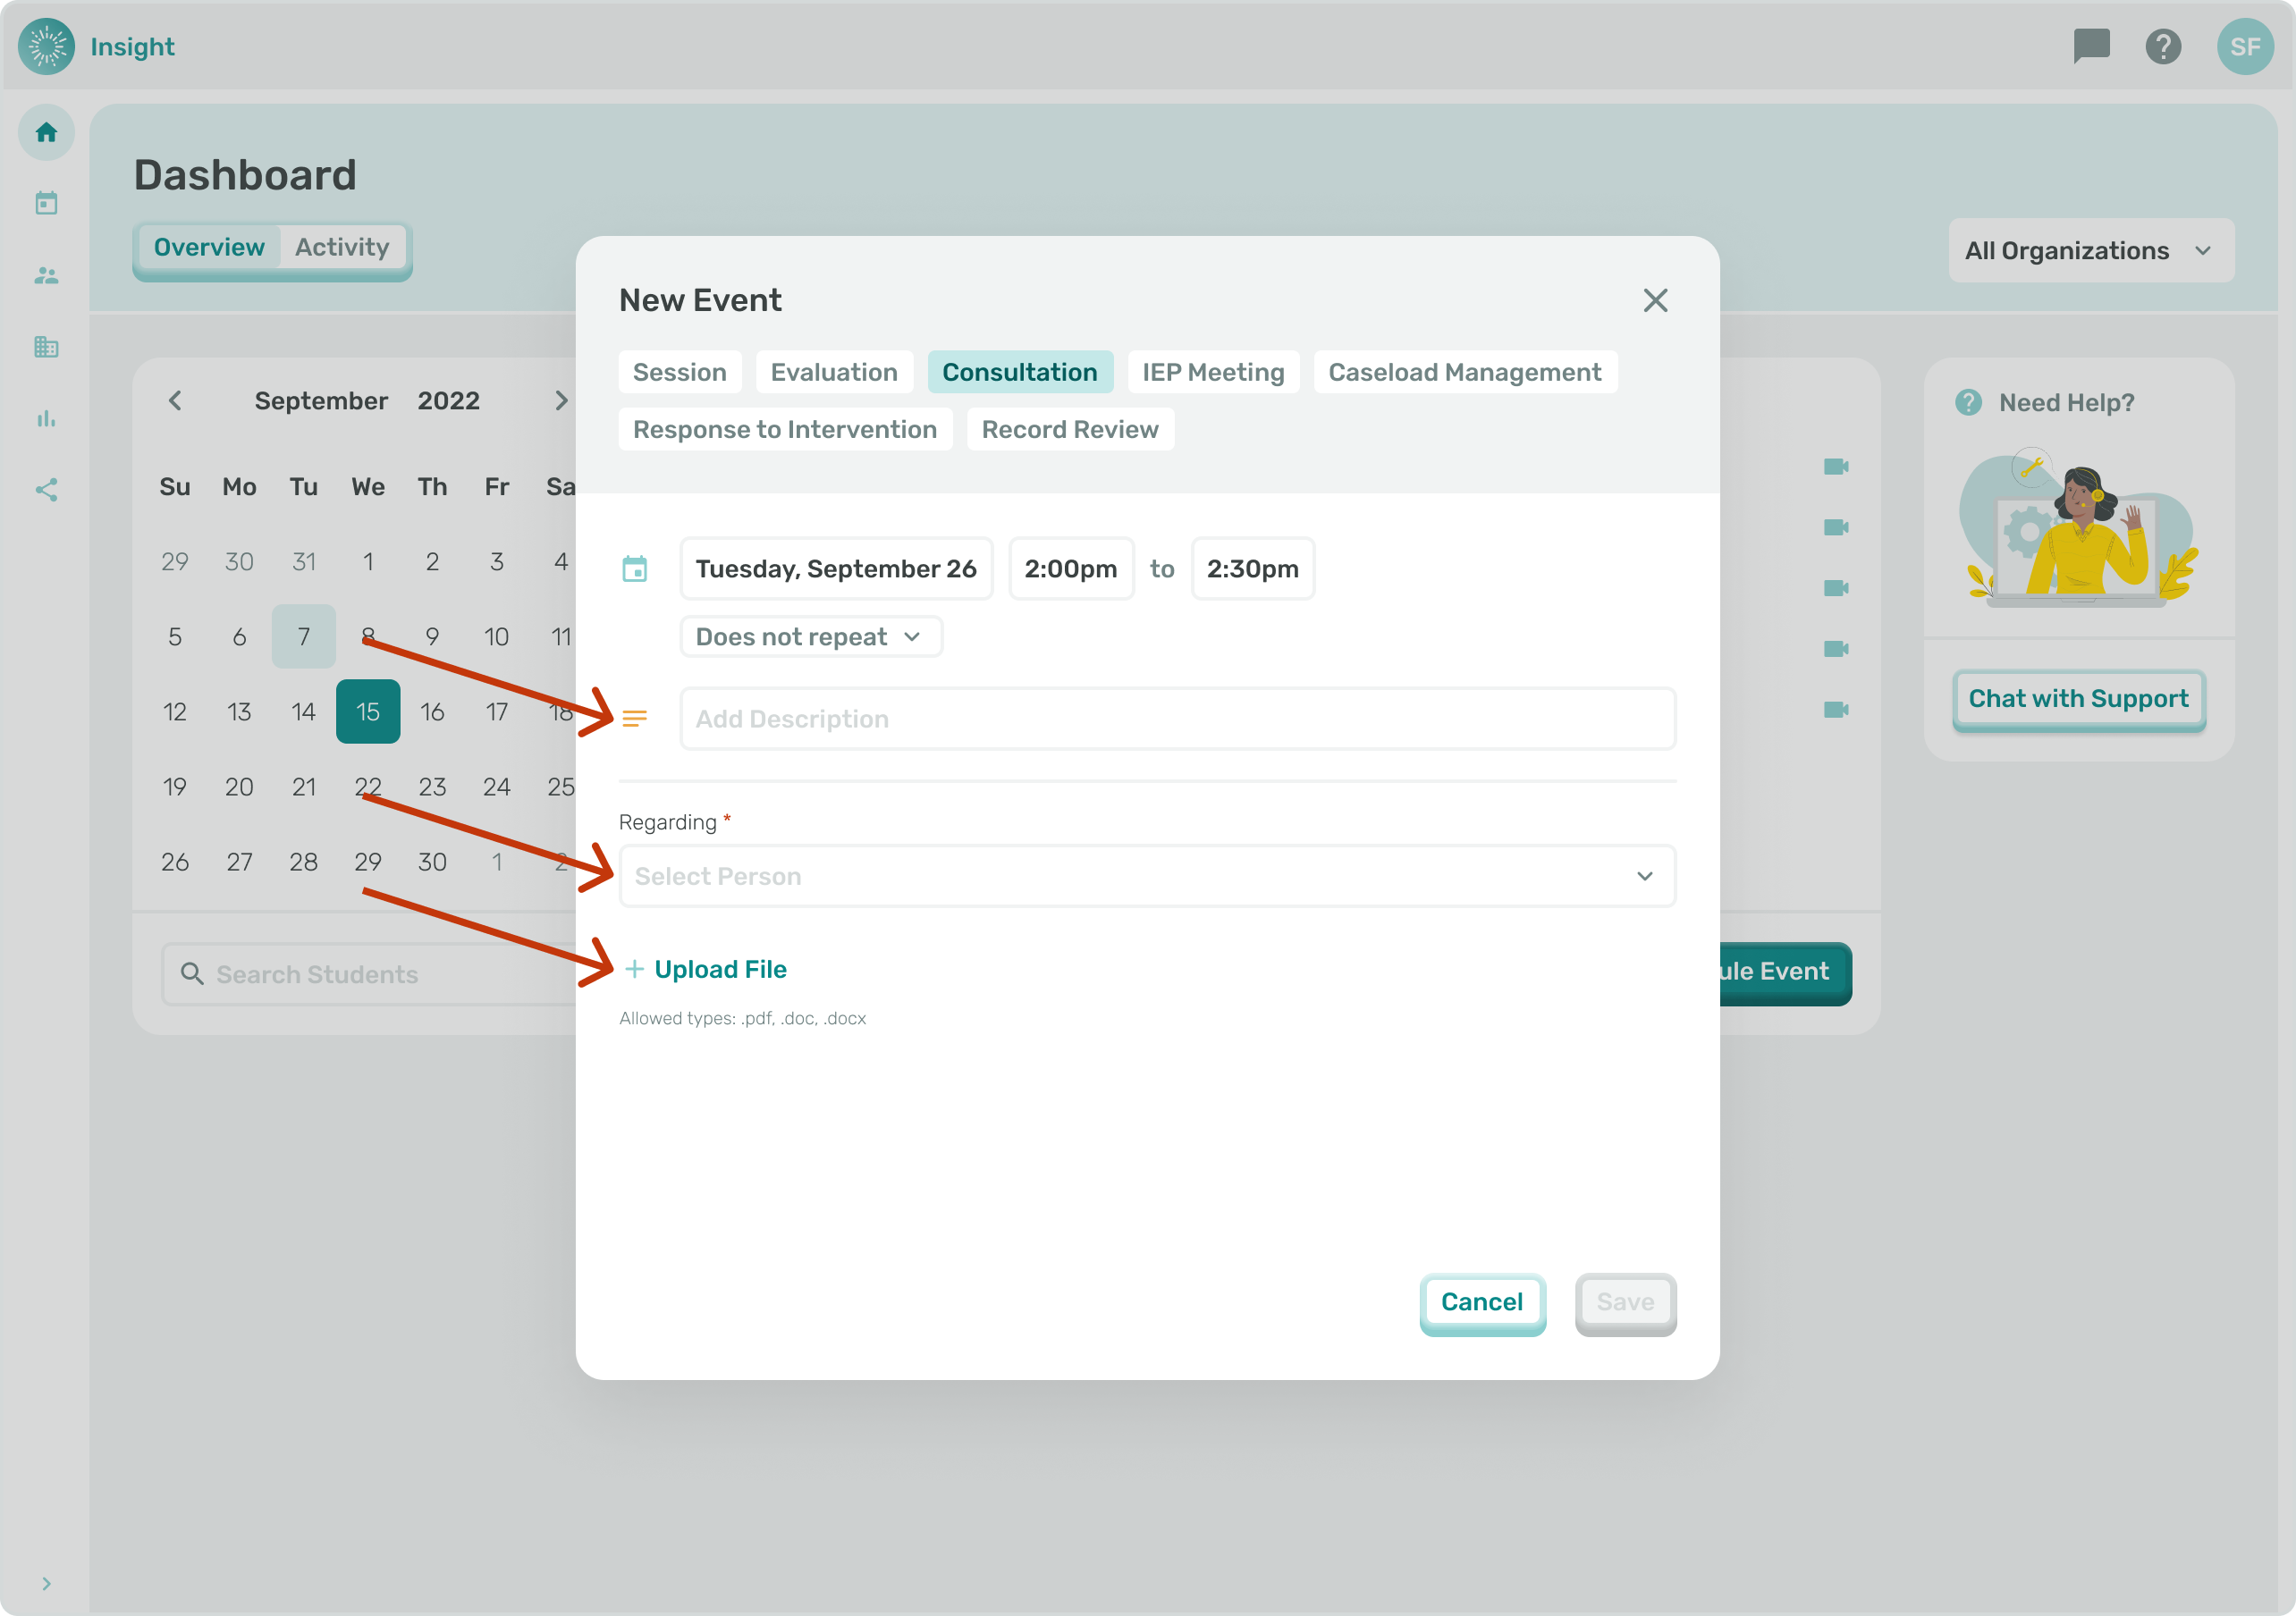
1a. Click in the 'Add description' box to add details and information about the Event.
2a. Click in the 'Select person' box to view the list of available Students.
- You can either enter the Student's name to search the system or scroll down through the list of names to select the Student for the Event.
- Once selected the Student's name will populate in the box.
- If you want to remove a Student that you selected you can click on the circle with an 'X' at the end of their name.
- There is an option at the bottom to 'Upload file'. The acceptable file types to Upload are PDF, DOC or DOCX.
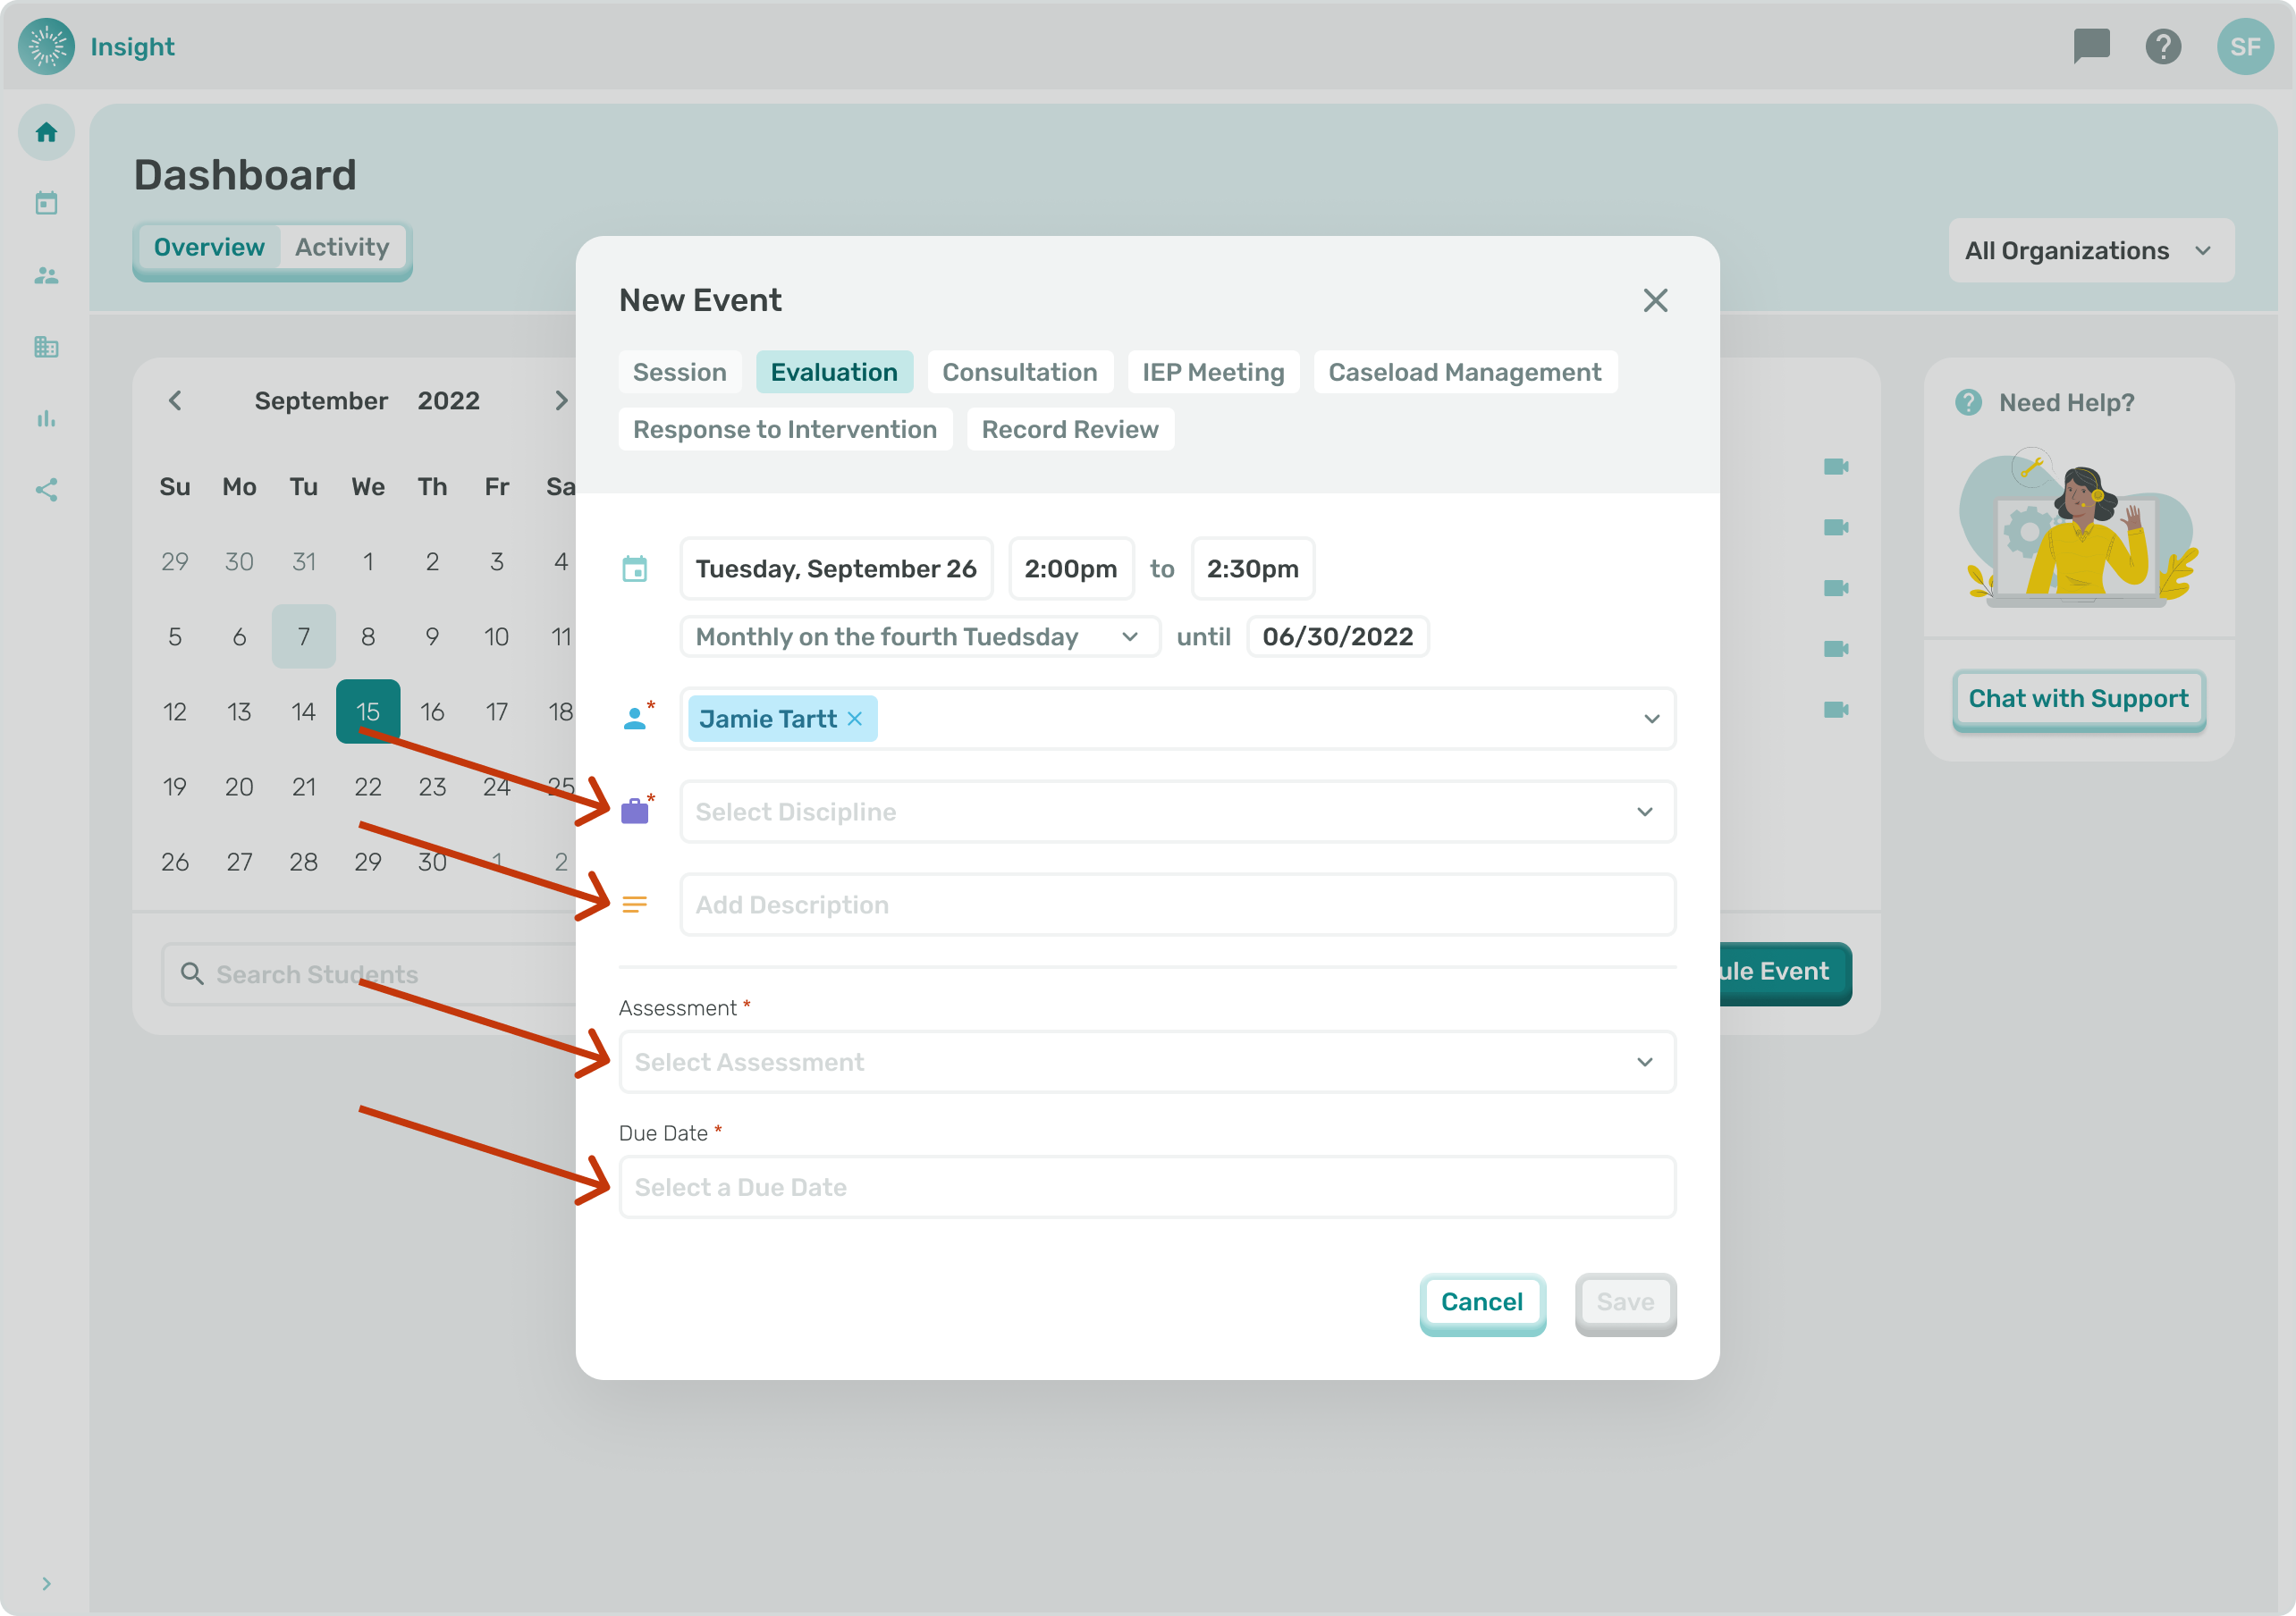
***If the Event is an 'Evaluation' type:
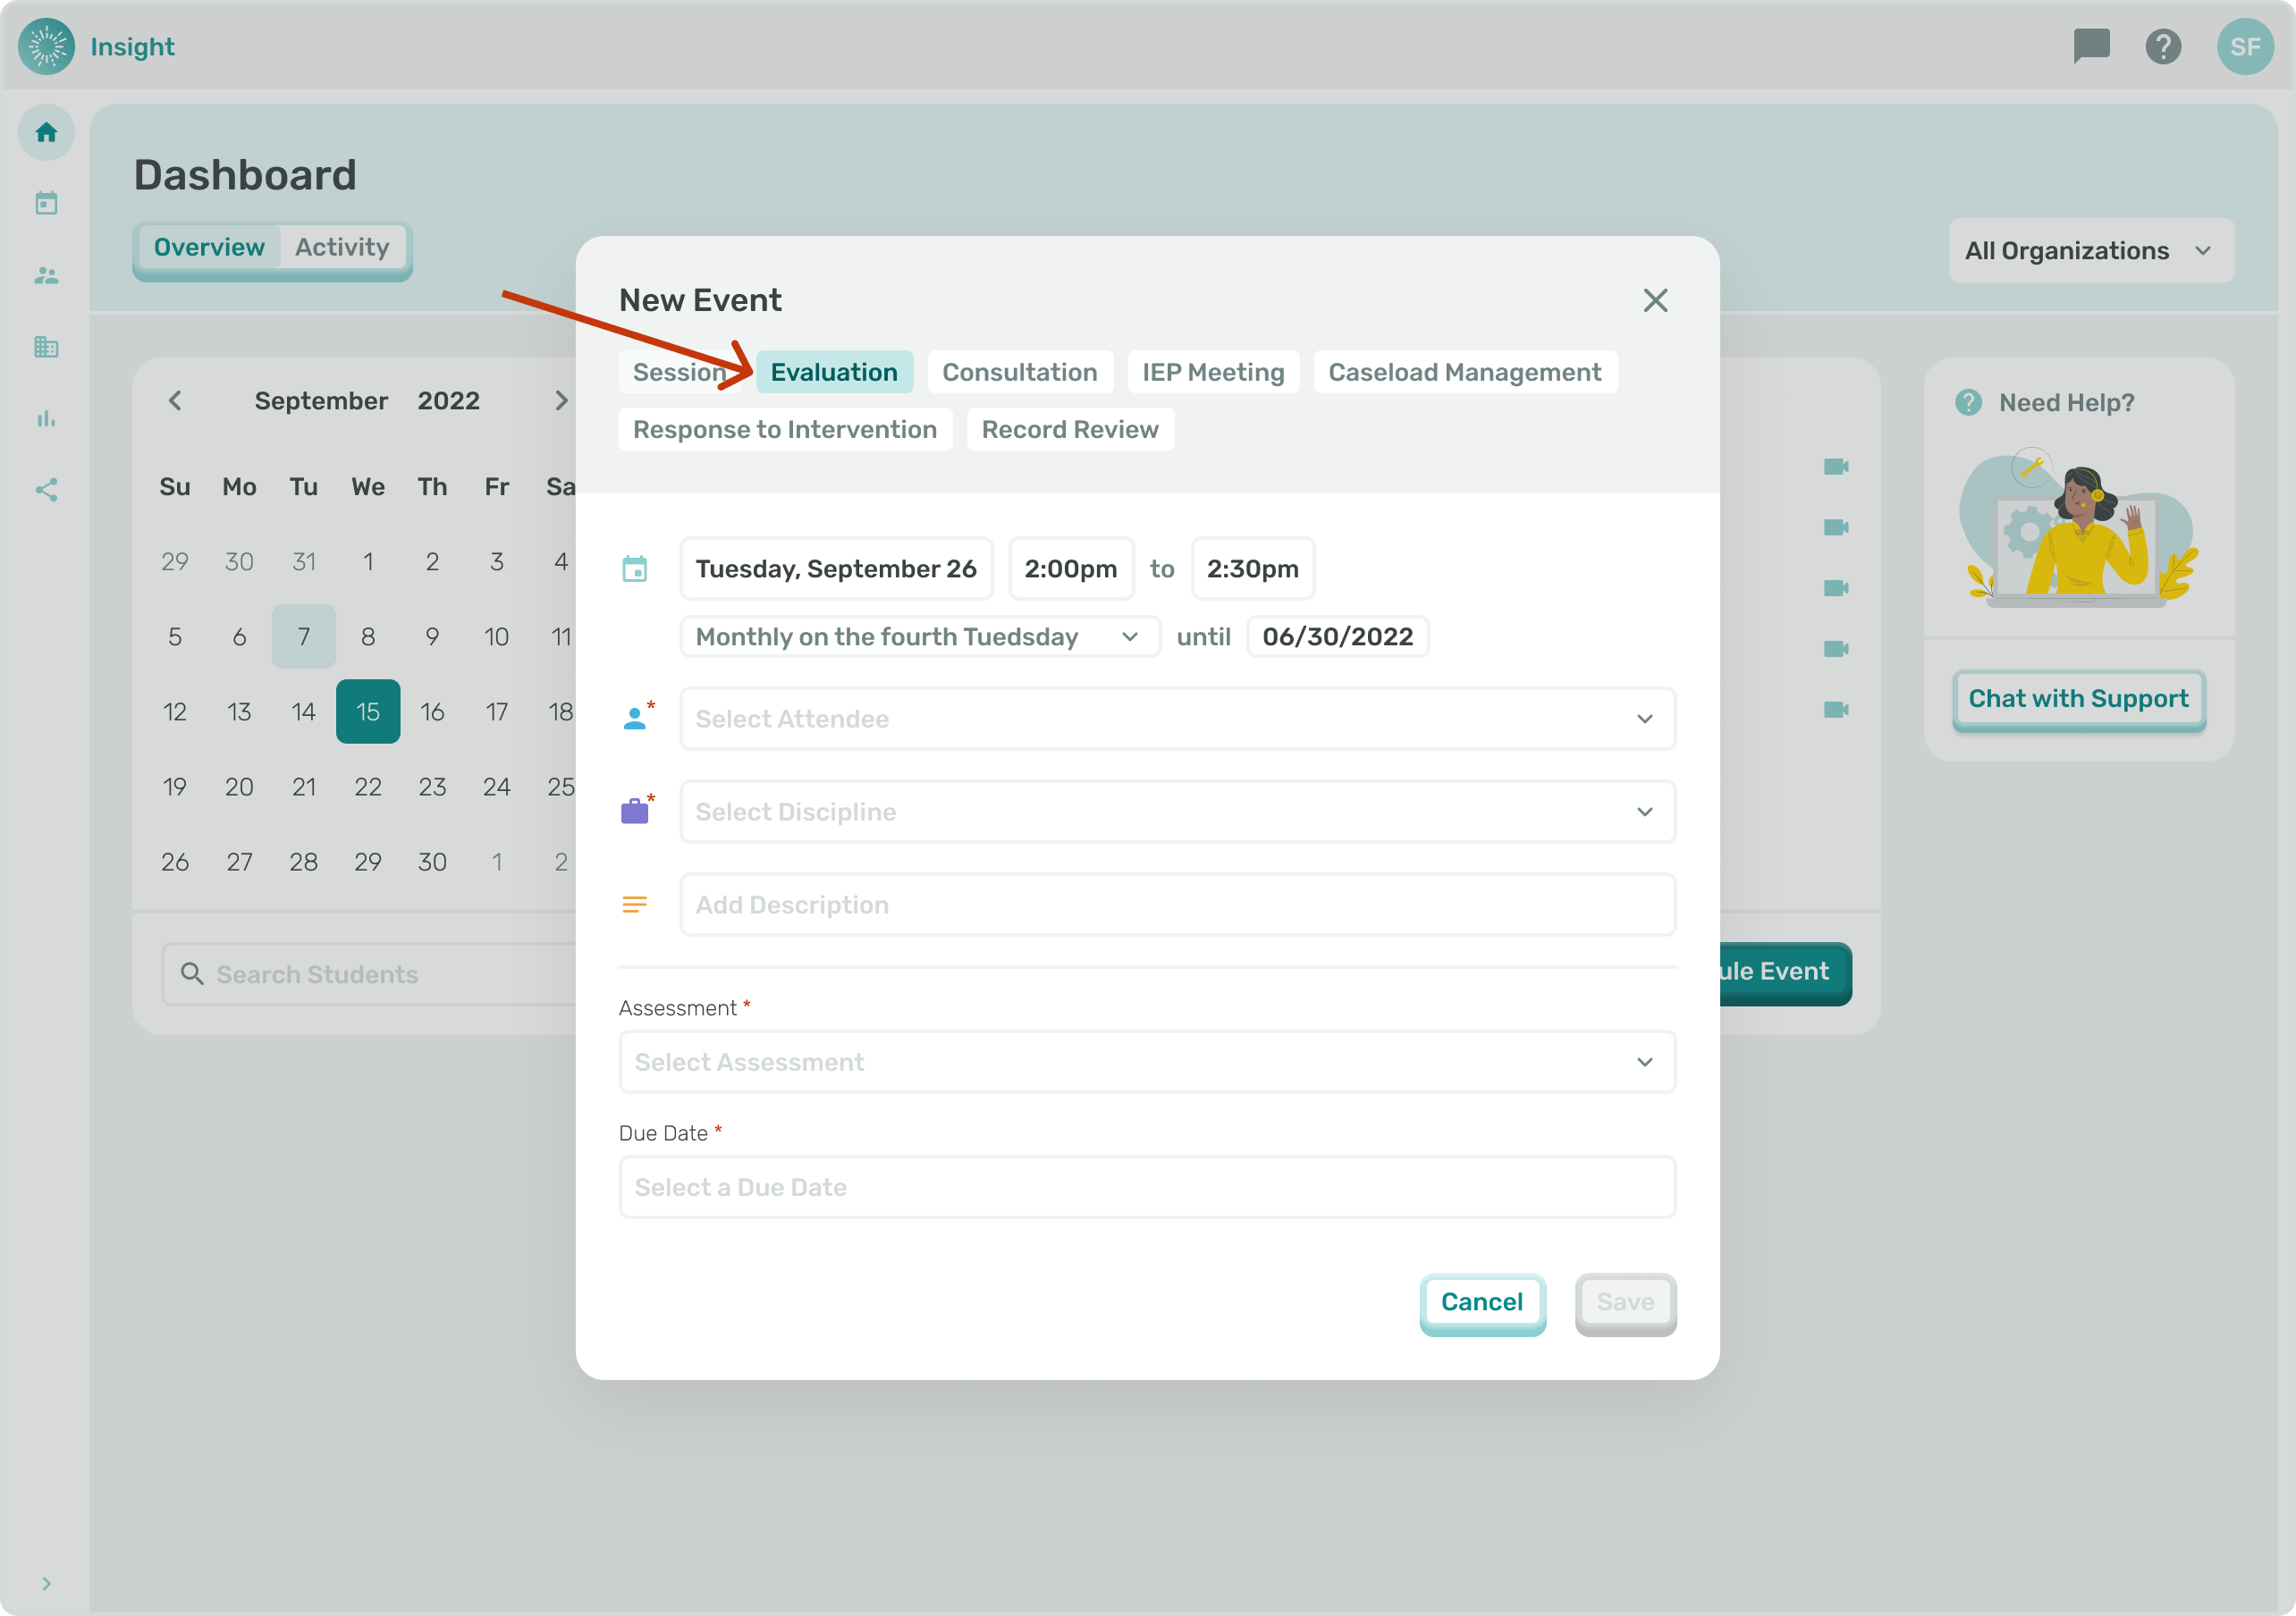
- Under the Date, Day there will be a 'Does not repeat' box with a drop down menu for you to determine if this Event 'Does not repeat' or if it is a recurring Event.
- If your Event does not recur no updates are needed in the 'Does not repeat' box.
- For additional information and instructions go to the related article 'Scheduling a Recurring Event'.
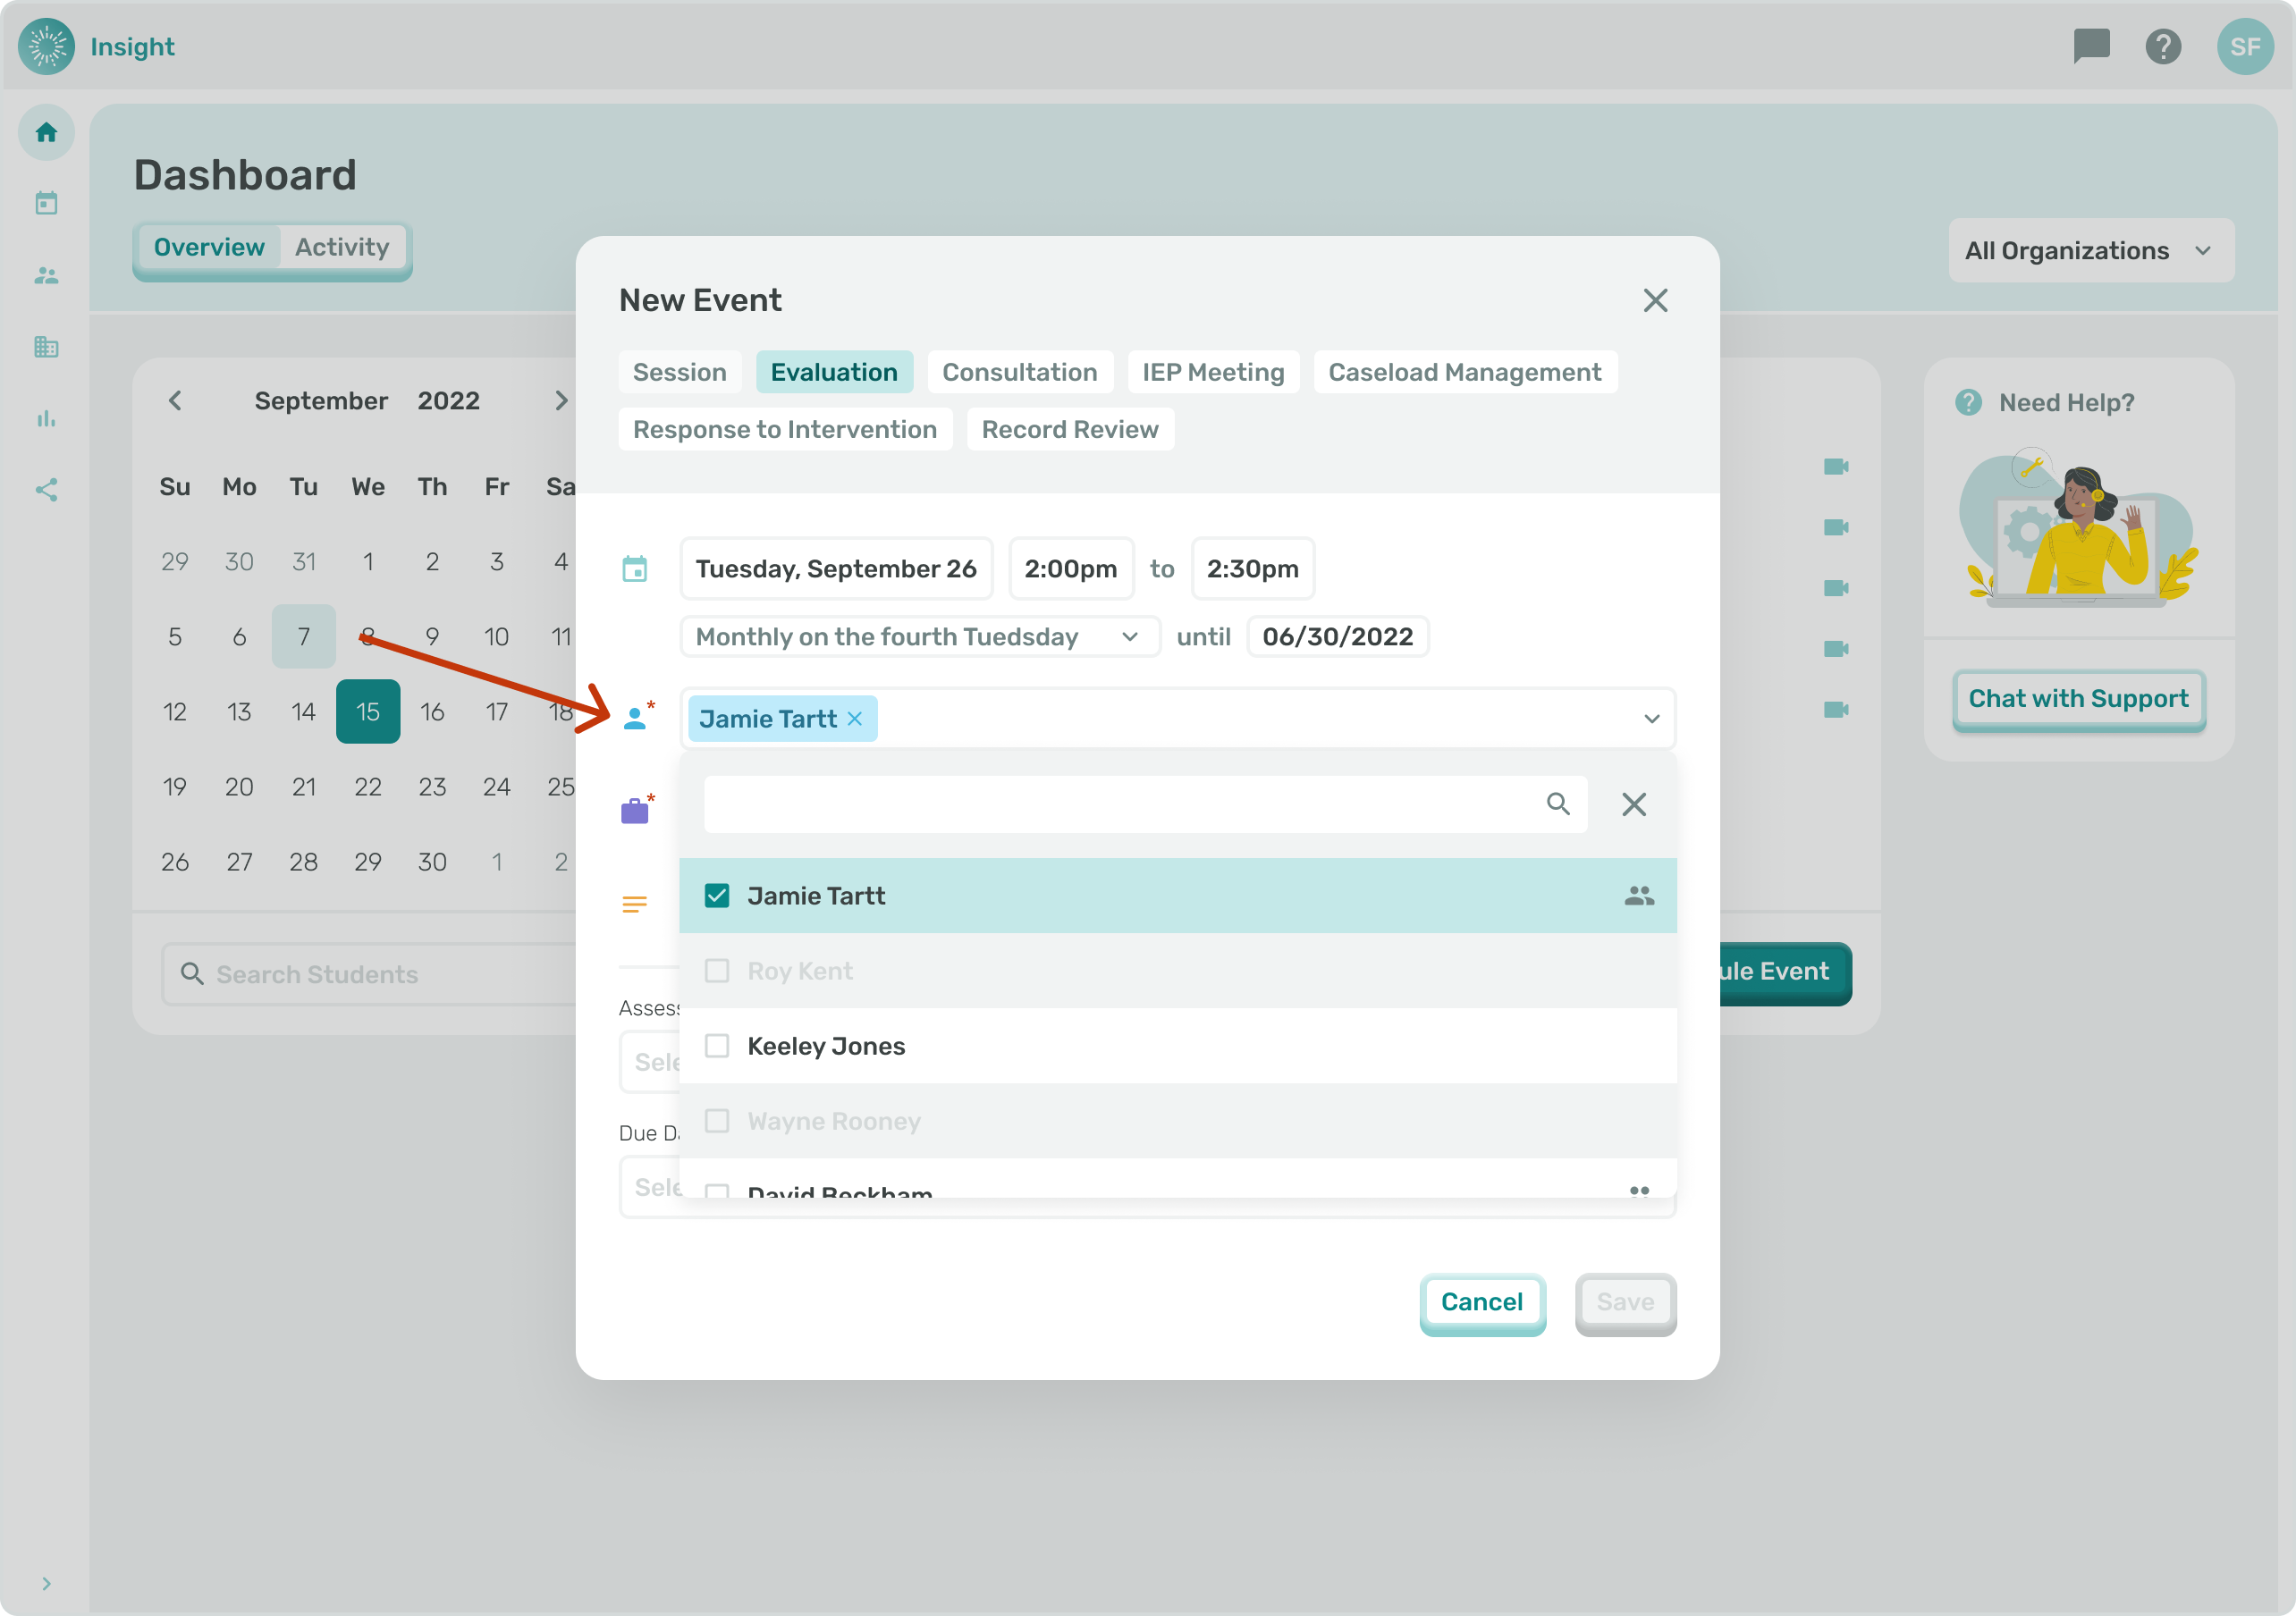
1b. Click on the 'Select Attendee' drop down box.
- You can either enter the Student's name to search the system or scroll down through the list of names to select the Student for the Event.
- Once selected the Student's name will populate in the box.
- If you want to remove a Student that you selected you can click on the circle with an 'X' at the end of their name.
- In order for a Student's name to be included in this list they need to be Connected to you in both your Profile and their Profile.
2b. Click in the 'Select a discipline' box and click on the correct Discipline for the Event.
- The list of Disciplines will vary for each Student as this is based on each Student's Services and Treatment Plan.
- Depending on the Student's Service(s) in their Treatment Plan the options to select from include:
- Behavioral Intervention
- Occupational Therapy
- Physical Therapy
- Psychology
- Social Work/Counseling
- Speech or Language.
3b. Click in the ‘Evaluation type’ box and select the evaluation event to meet the parameters of the tentative evaluation based on your discipline.

4b.Next click in the ‘Assessment’ box.
- The selections will vary depending on the Discipline for this Event along with the Service Provider’s Discipline.
- For example, if the Service Provider has a Discipline of Speech or Language and the Student’s Treatment Plan is Social Work/Counseling, the Service Provider will not be able to add that Student for an Evaluation or access the Evaluations for Social Work/Counseling.
5b. It is required to select the ‘Due Date’. Click in the empty box under the ‘Due Date’ and a calendar will open to the current month with a blue circle around today's date.
- To change the month there are arrows on both sides of the month.
- To go forward in time, a month at a time, click on the right arrow and to go back in time, a month at a time, click on the left arrow.
- To select the Event Day, Date click on the Day, Date needed on the calendar. Once the Day, Date has been clicked the calendar will disappear and the Day, Date you clicked on will populate.
***If the Event is an ‘IEP Meeting’ type: This event type is used for student-specific school meetings. Examples: Annual IEP meetings or eligibility meetings
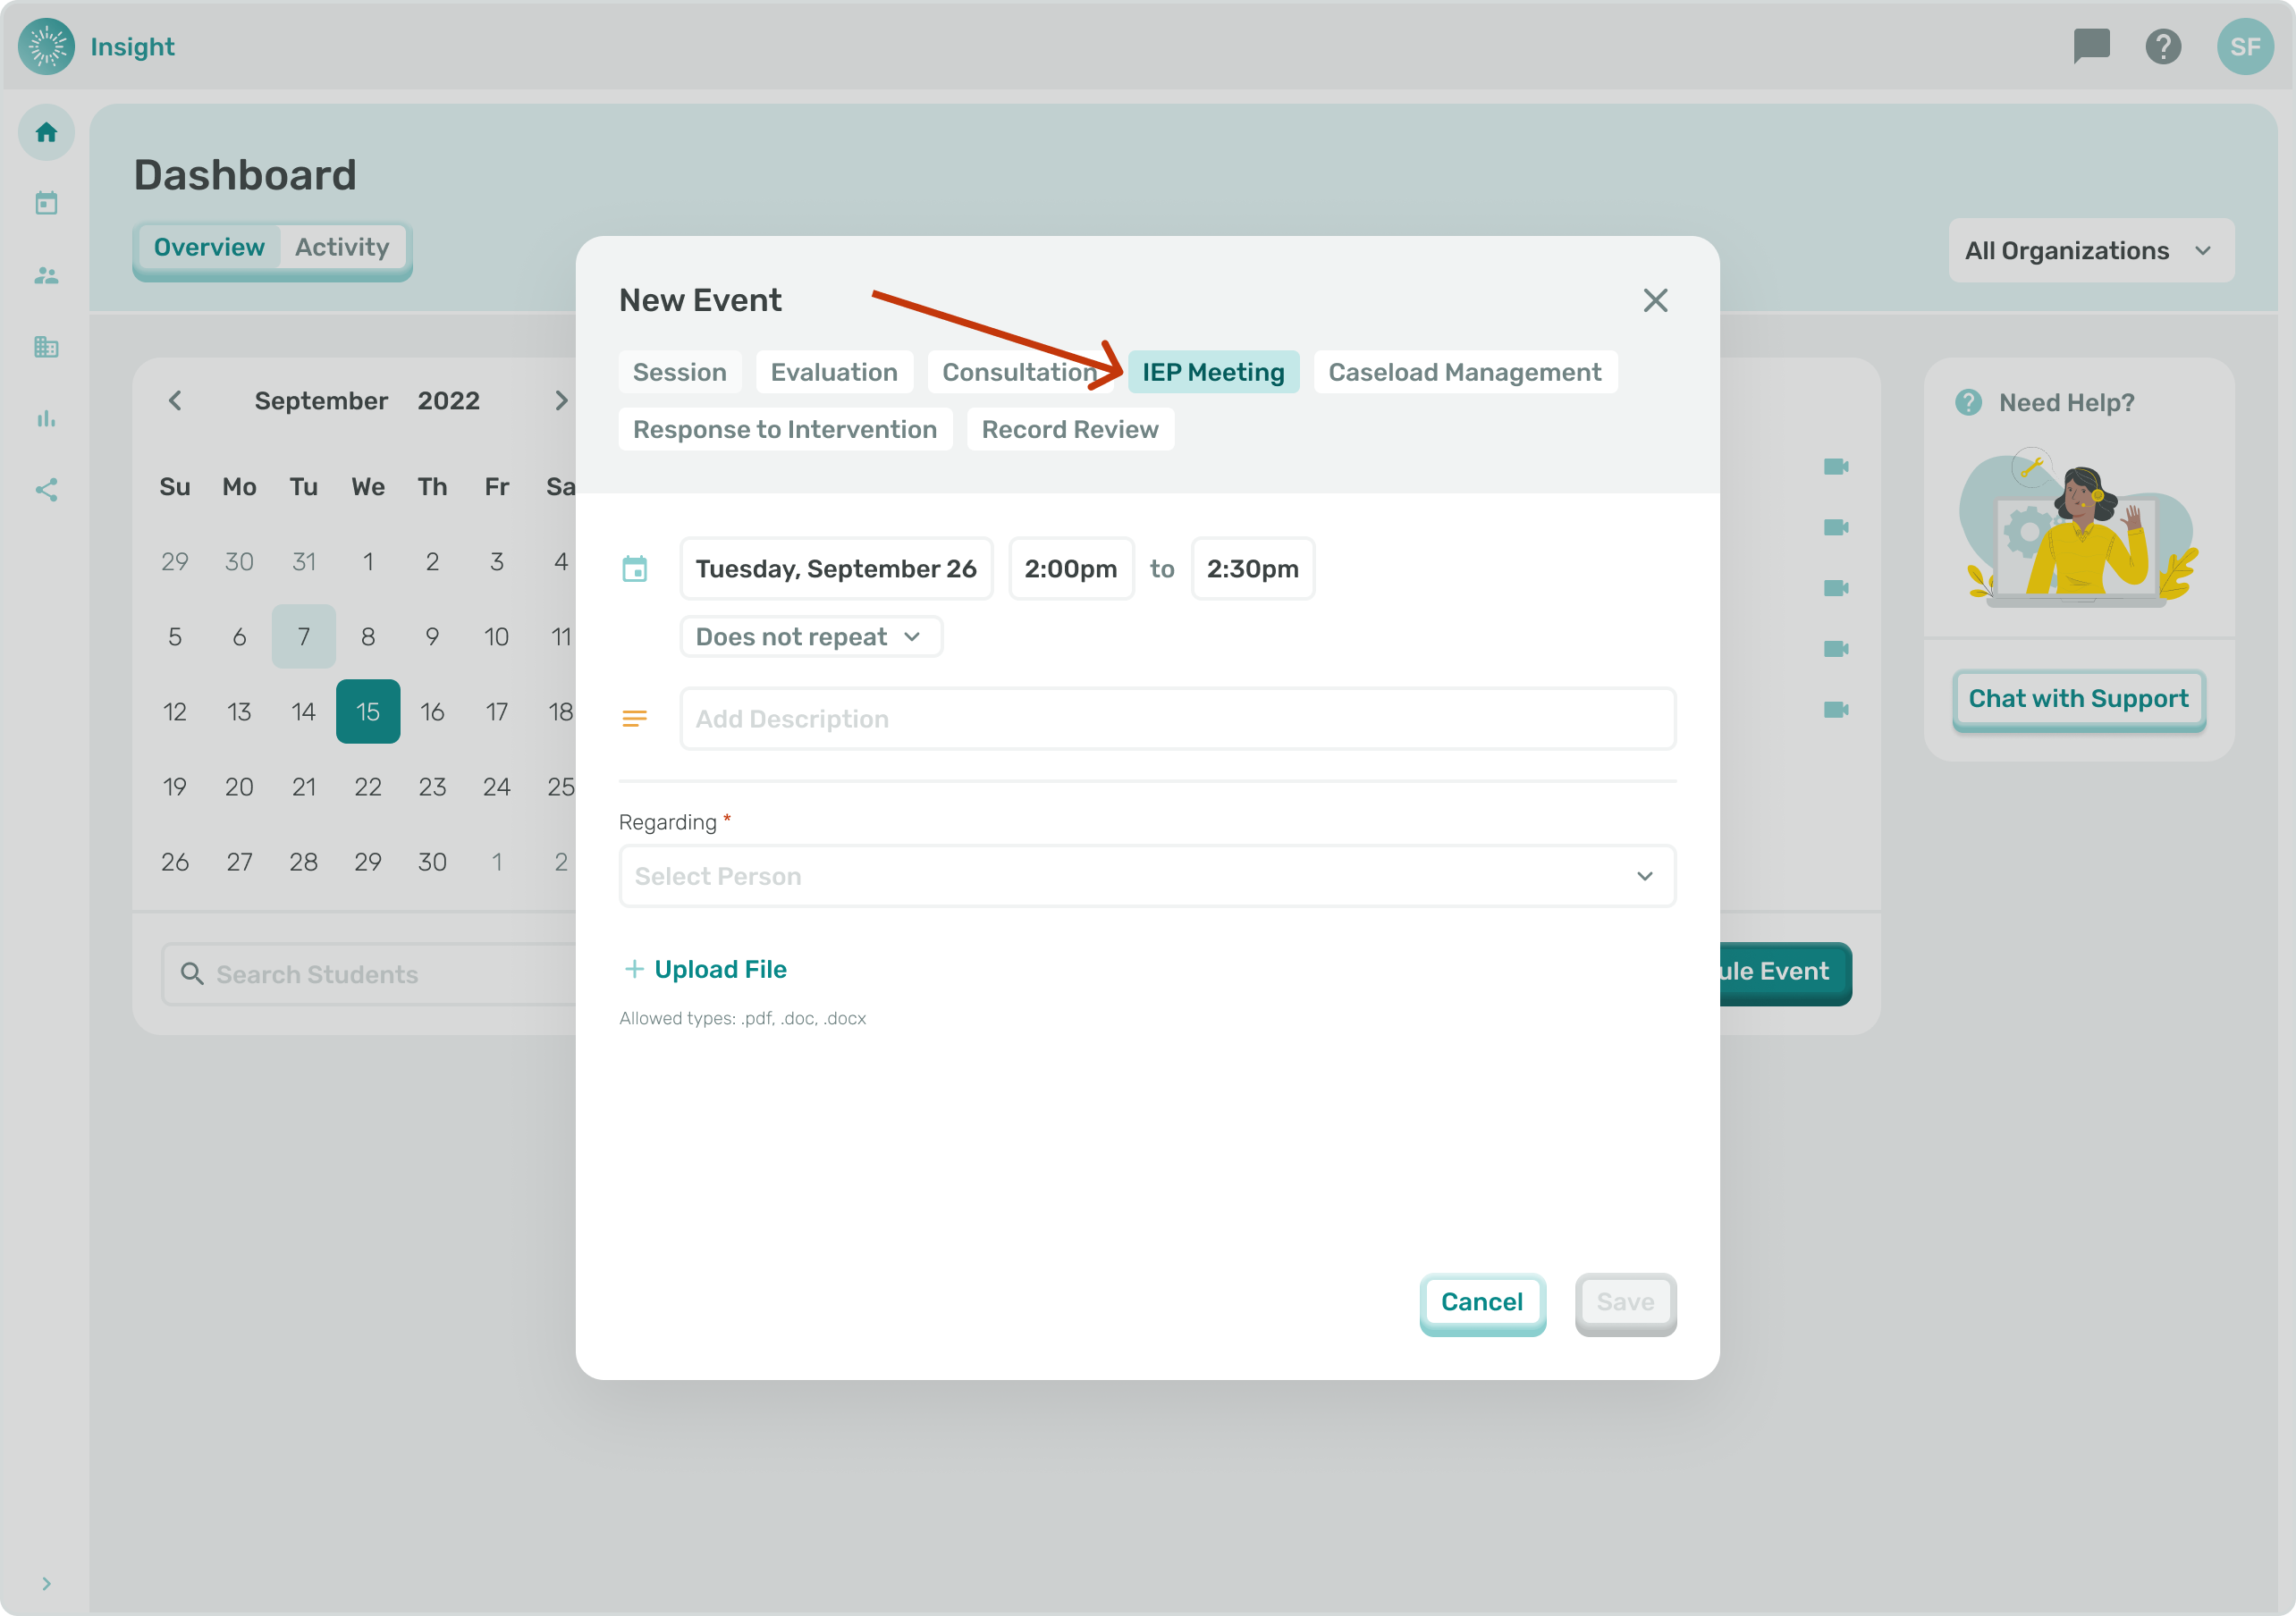
- Under the Date, Day there will be a 'Does not repeat' box with a drop down menu for you to determine if this Event 'Does not repeat' or if it is a recurring Event.
- If your Event does not recur no updates are needed in the 'Does not repeat' box.
- For additional information and instructions go to the related article 'Scheduling a Recurring Event'.
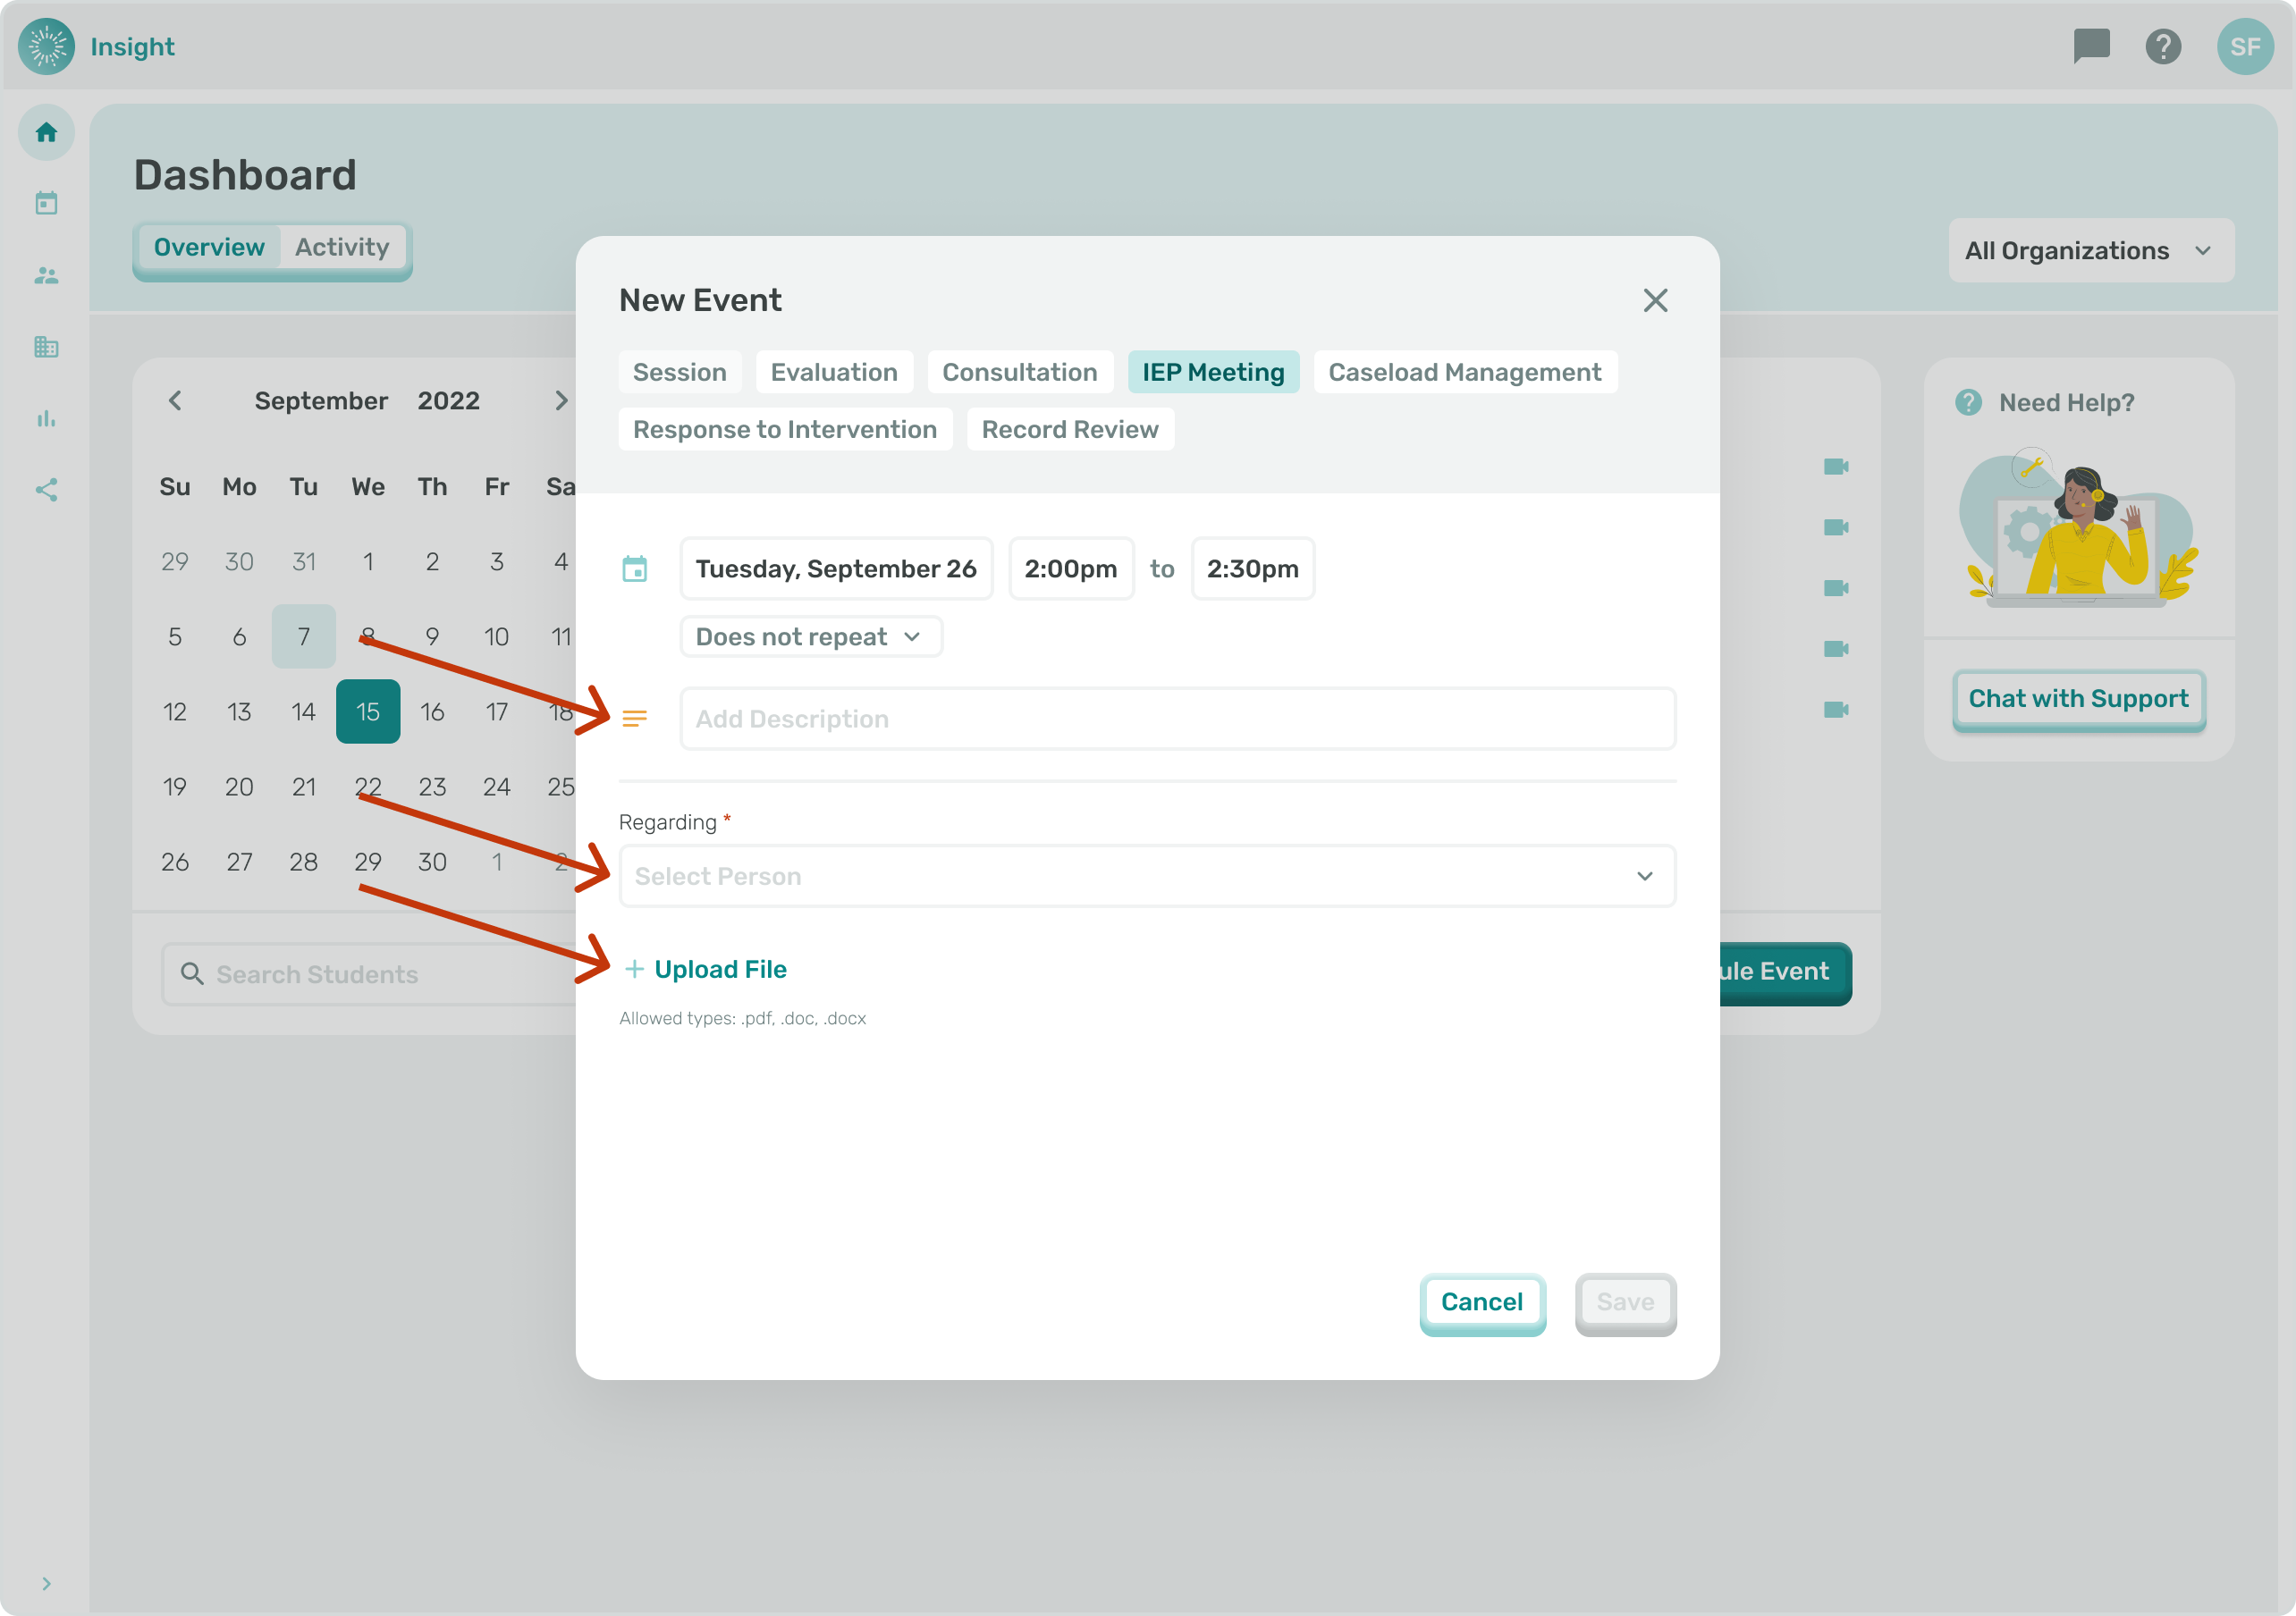
3a. Click in the 'Add description' box to add details and information about the Event.
3b. Click in the 'Select person' box to view the list of available Students.
- You can either enter the Student's name to search the system or scroll down through the list of names to select the Student for the Event.
- Once selected the Student's name will populate in the box.
- If you want to remove a Student that you selected you can click on the circle with an 'X' at the end of their name.
3c. Click in the 'Add description' box to add details and information about the Event.
- There is an option at the bottom to 'Upload file'. The acceptable file types to Upload are PDF, DOC or DOCX.
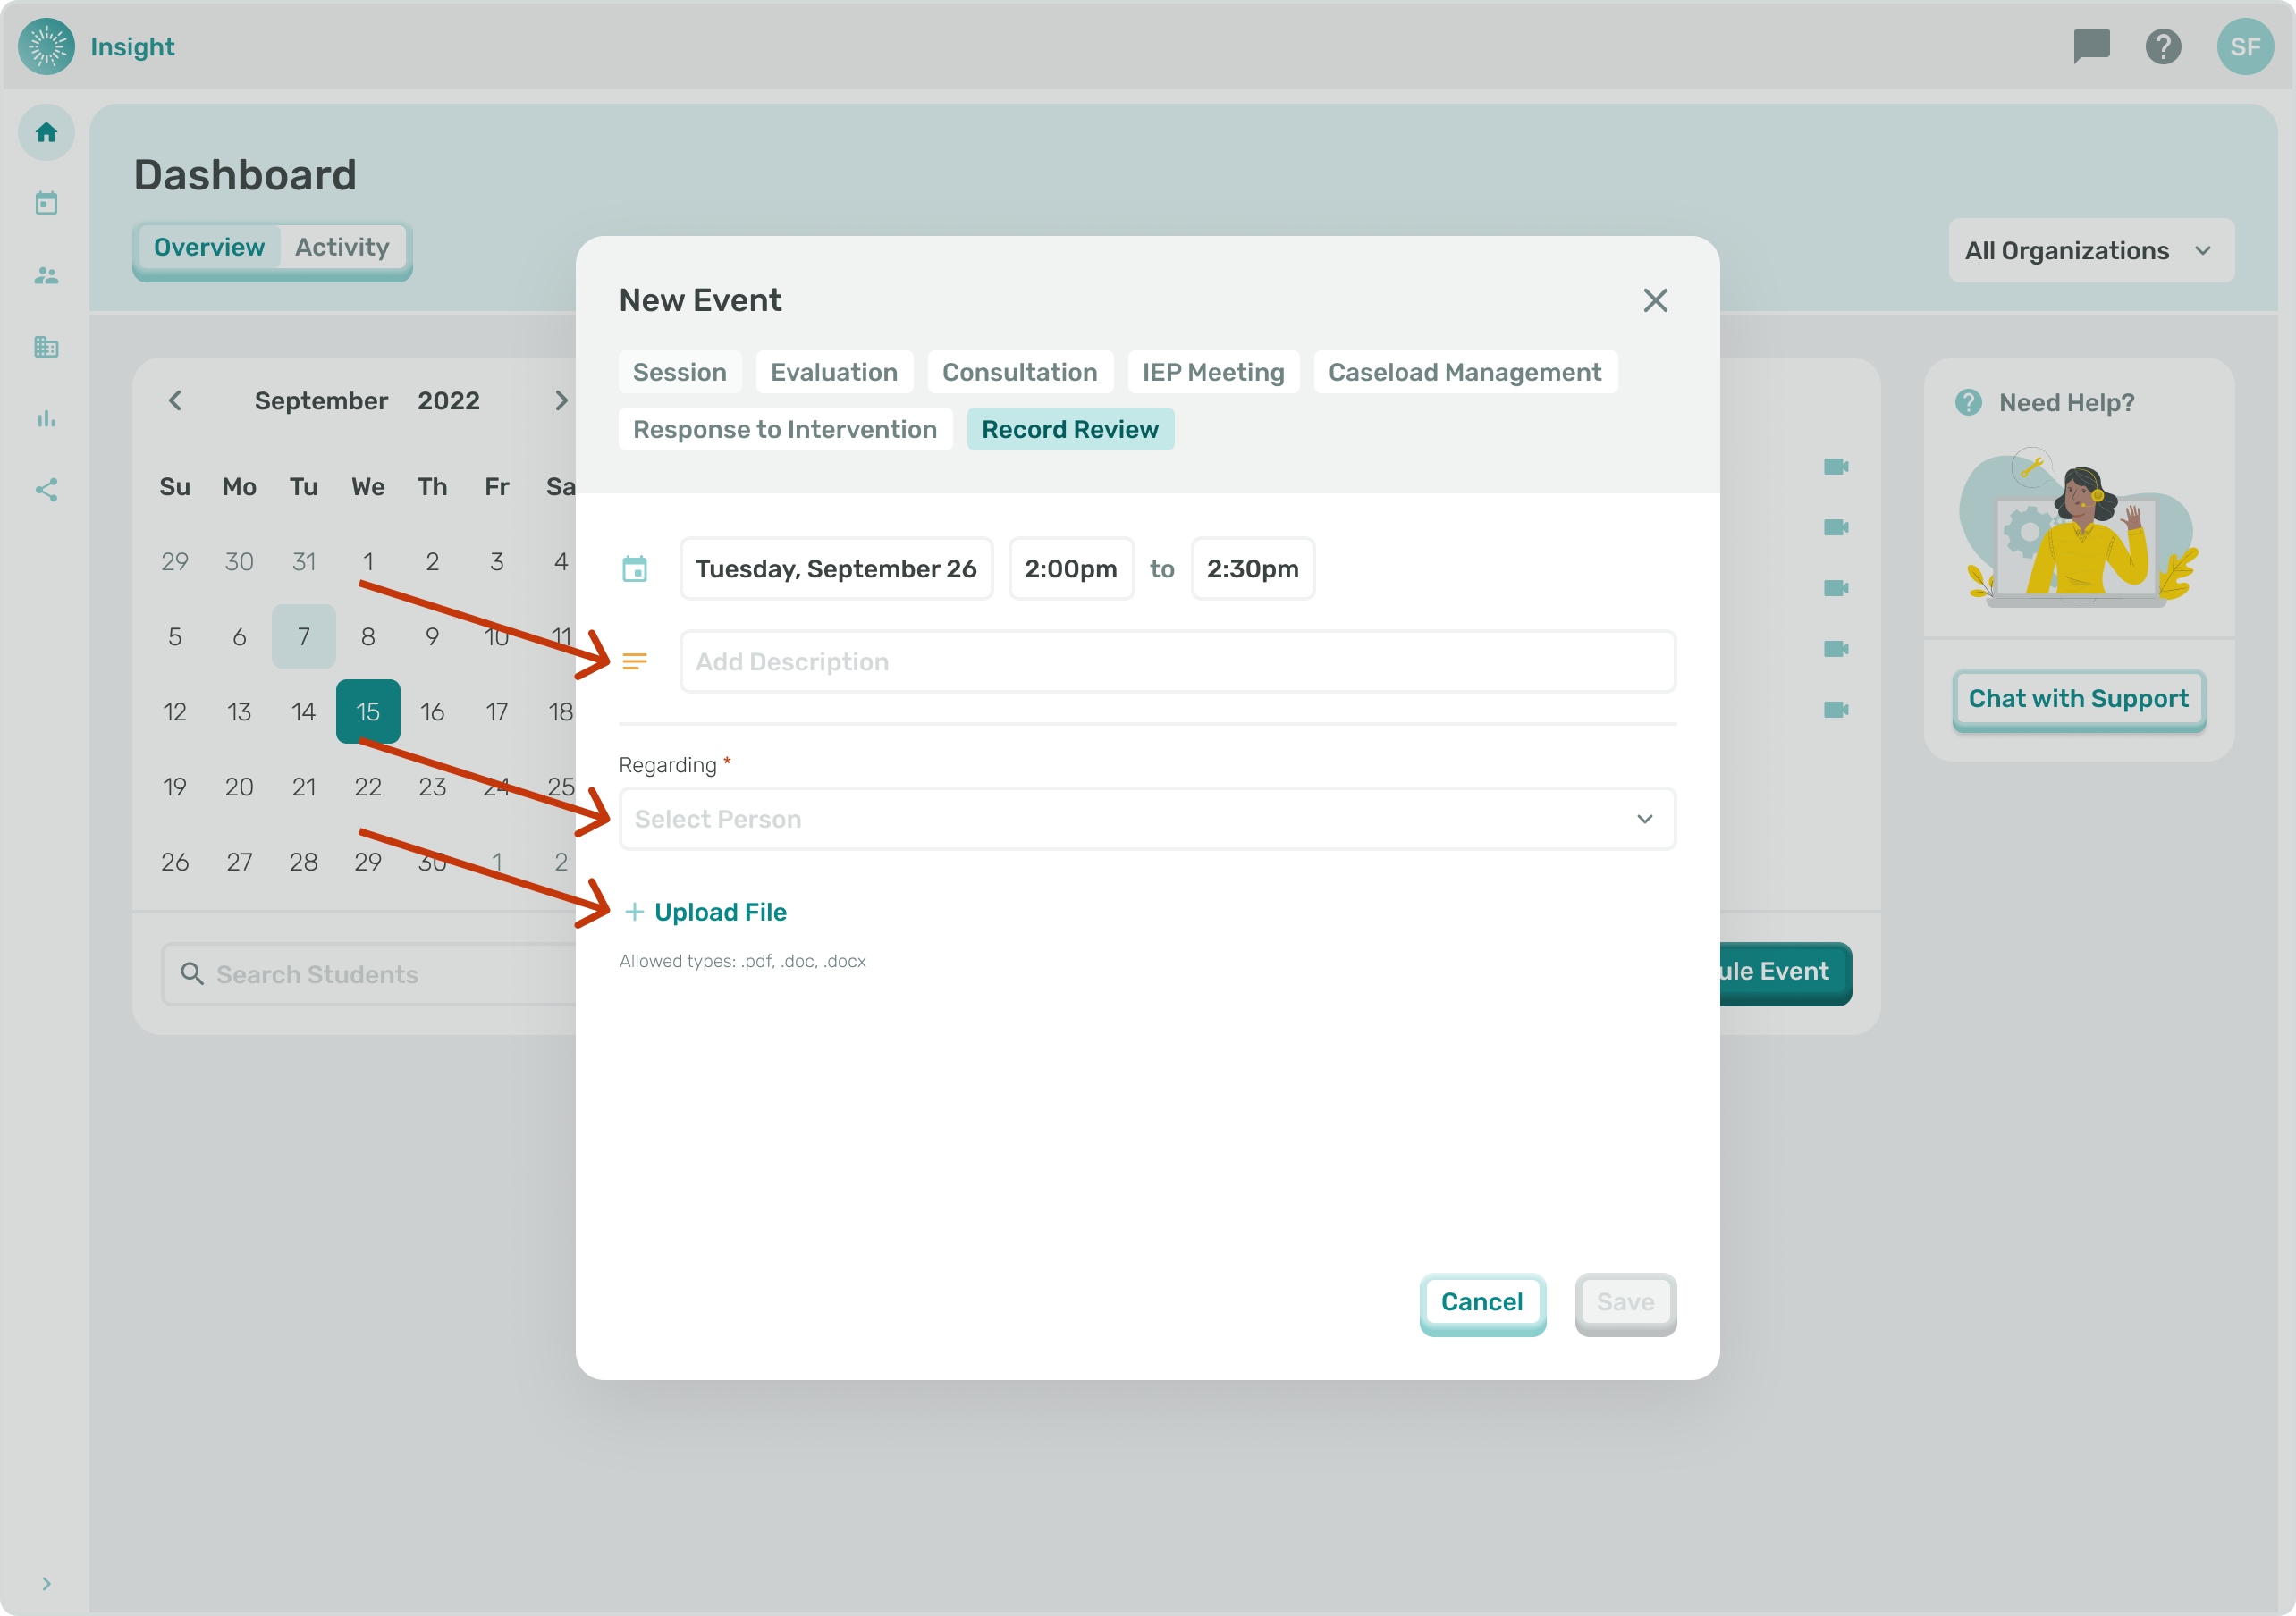
***if the Event type is ‘Record Review’:
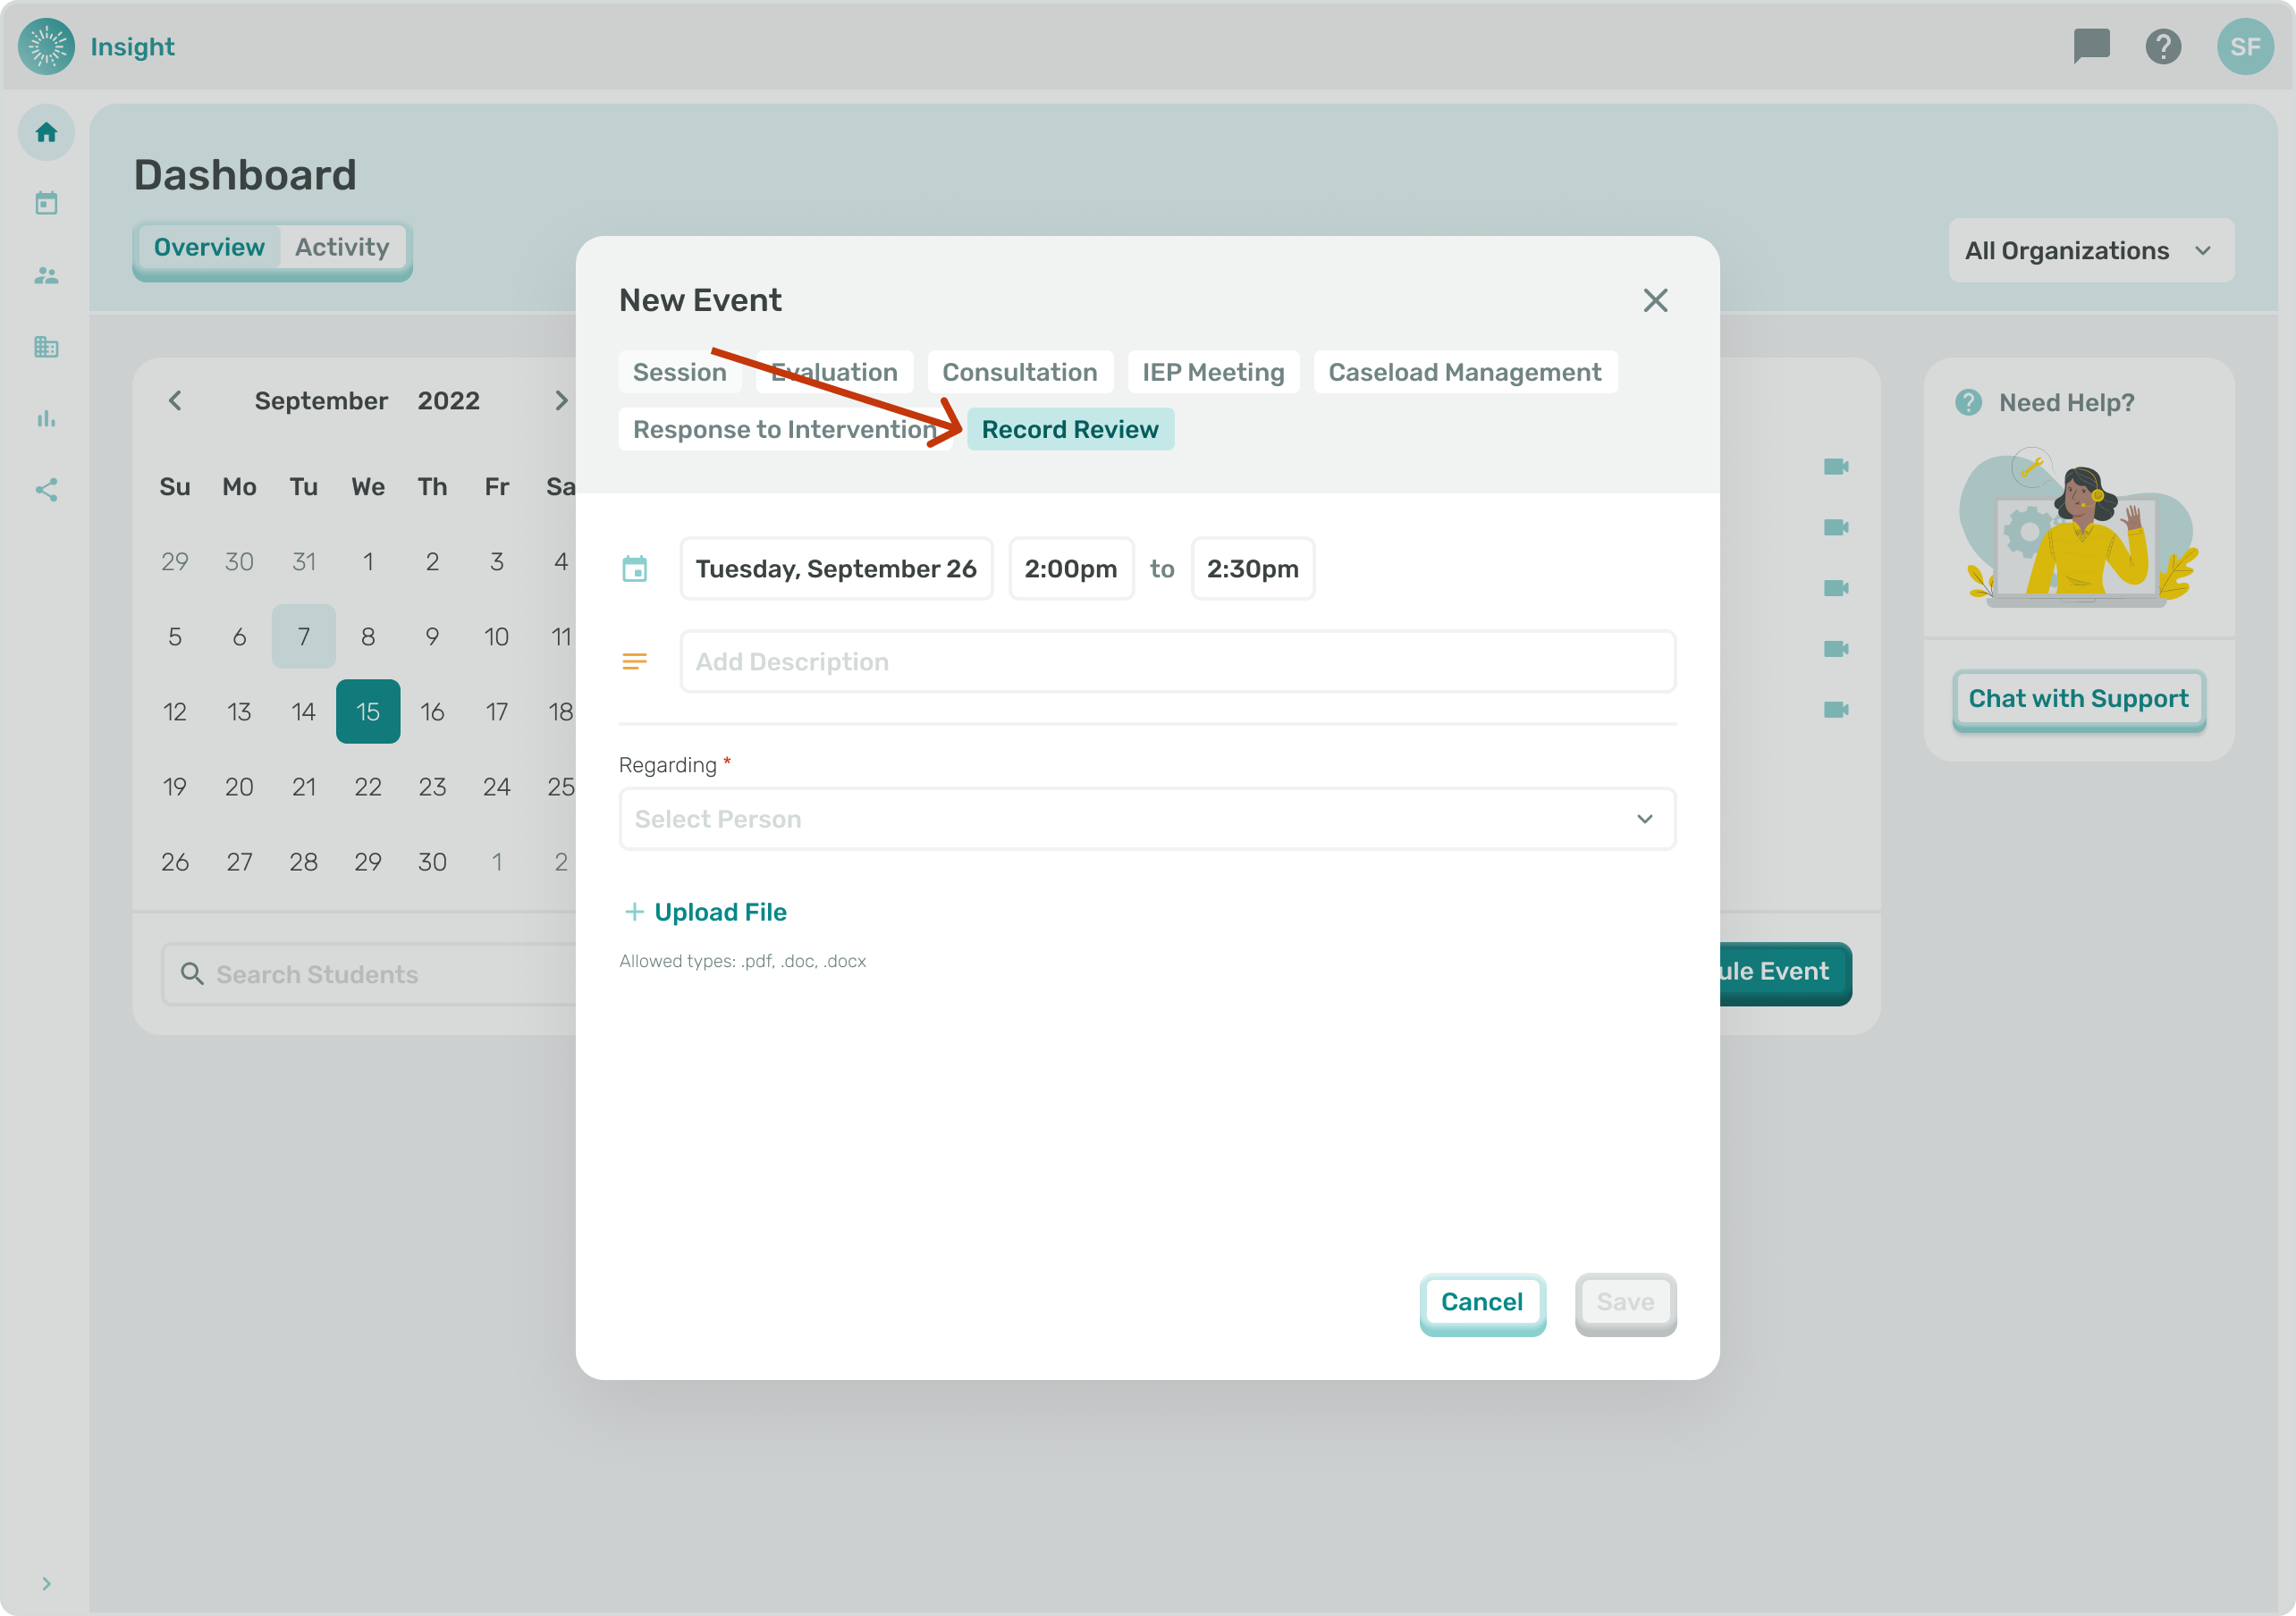
4a. Click in the 'Add description' box to add details and information about the Event.
4b. Click in the 'Select person' box to view the list of available Students.
- You can either enter the Student's name to search the system or scroll down through the list of names to select the Student for the Event.
- Once selected the Student's name will populate in the box.
- If you want to remove a Student that you selected you can click on the circle with an 'X' at the end of their name.
- There is an option at the bottom to 'Upload file'. The acceptable file types to Upload are PDF, DOC or DOCX.
***If the Event is a 'Response to Intervention' type:
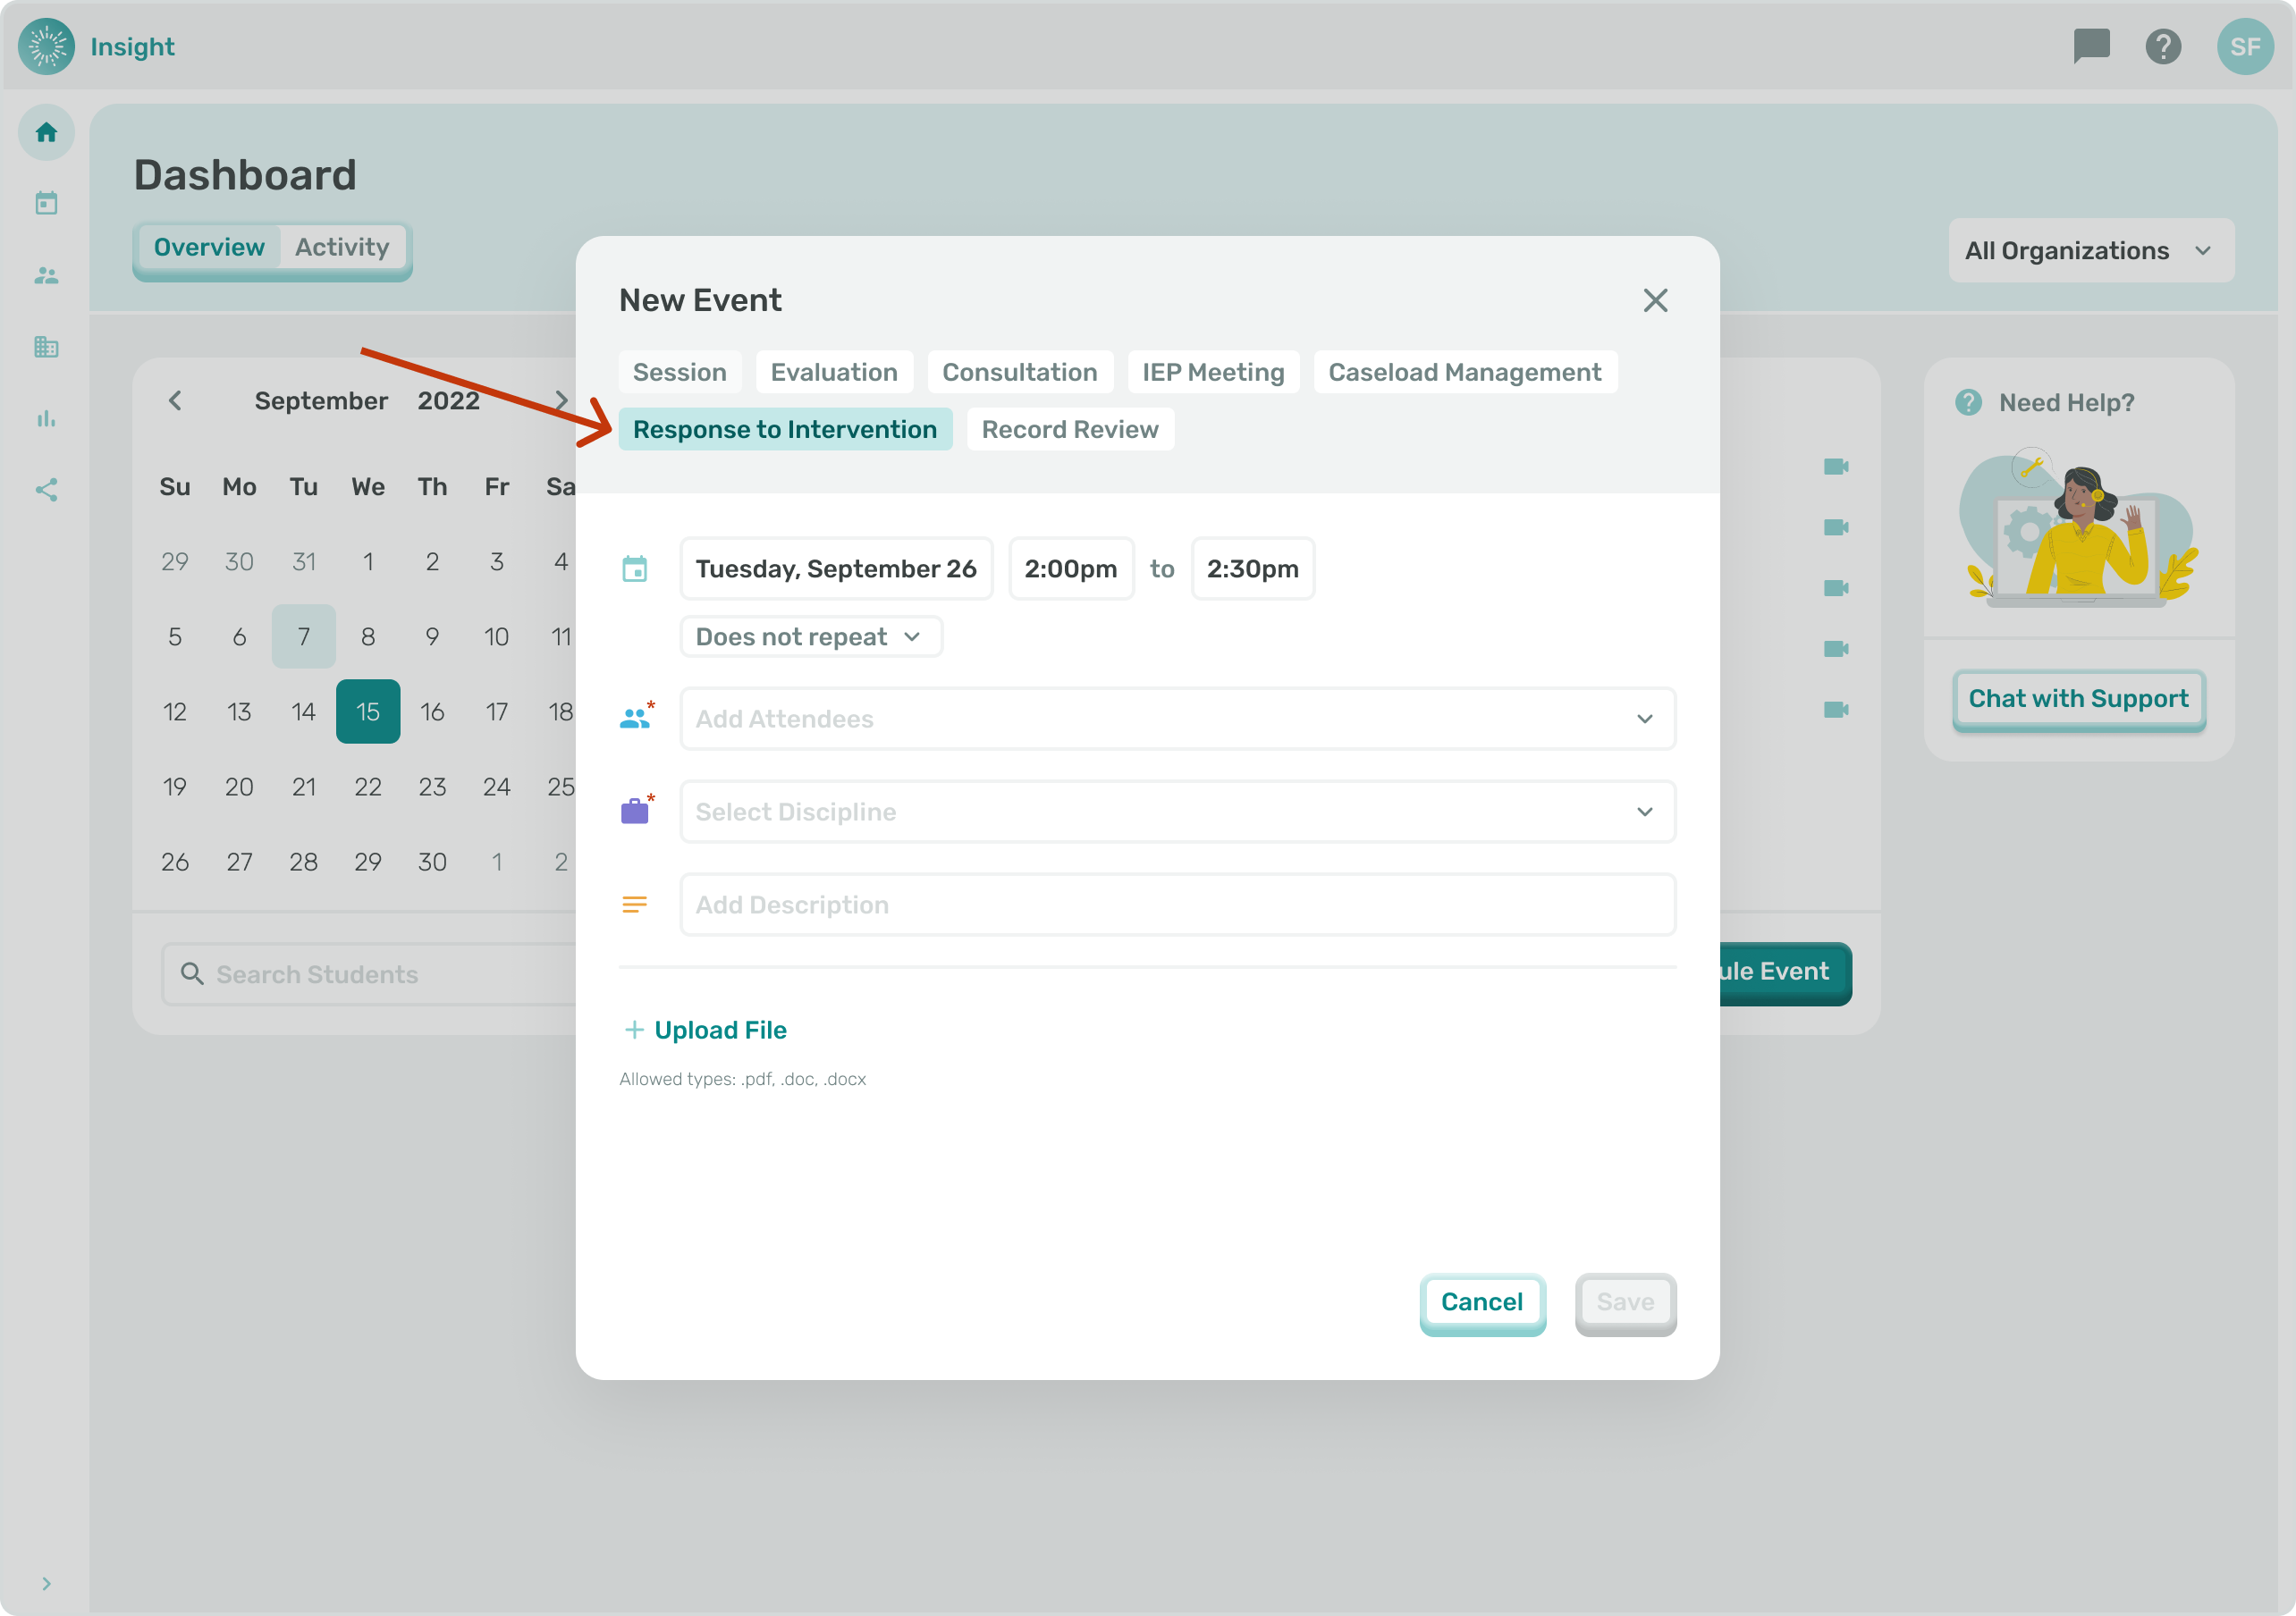
- Under the Date, Day there will be a 'Does not repeat' box with a drop down menu for you to determine if this Event 'Does not repeat' or if it is a recurring Event.
- If your Event does not recur no updates are needed in the 'Does not repeat' box.
- For additional information and instructions go to the related article 'Scheduling a Recurring Event'.
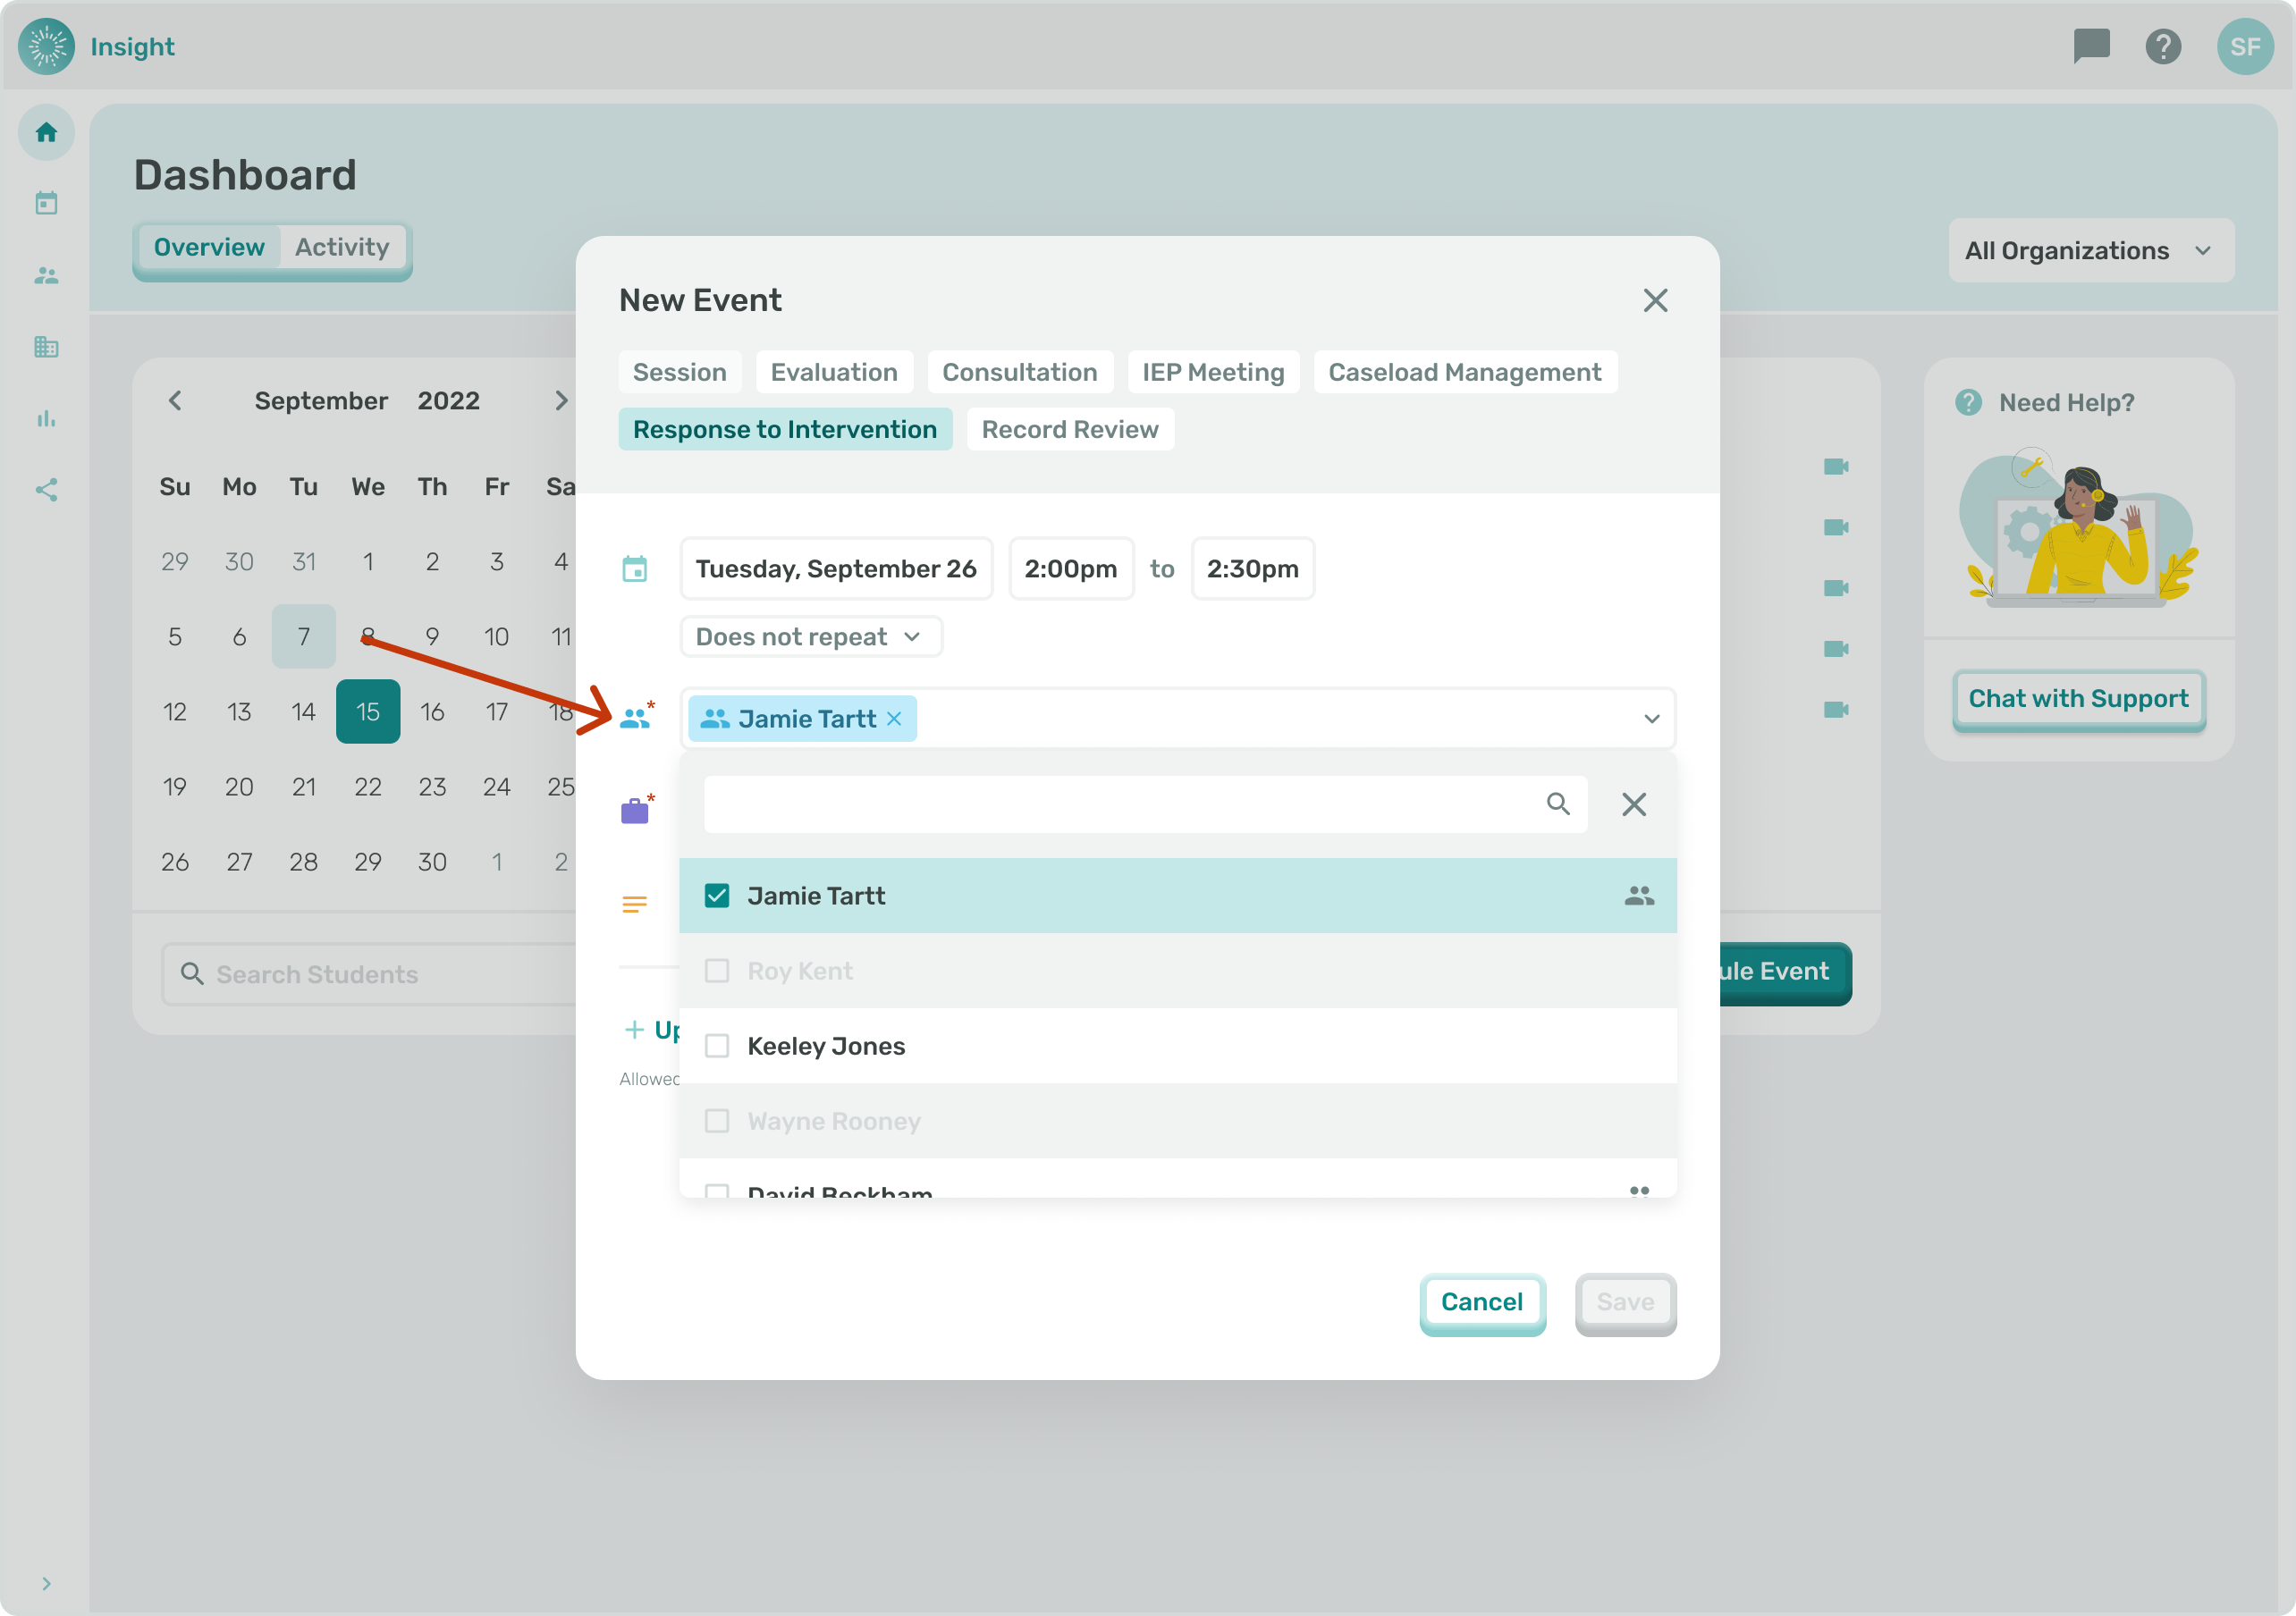
5a. Click on the 'Select Attendees' drop down box.
- You can either enter the Student's name to search the system or scroll down through the list of names to select the Student for the Event.
- Once selected the Student's name will populate in the box.
- If you want to remove a Student that you selected you can click on the circle with an 'X' at the end of their name.
- In order for a Student's name to be included in this list they need to be Connected to you in both your Profile and their Profile.
- Go to the related article 'Scheduling a Group Event' for additional instructions if needed.
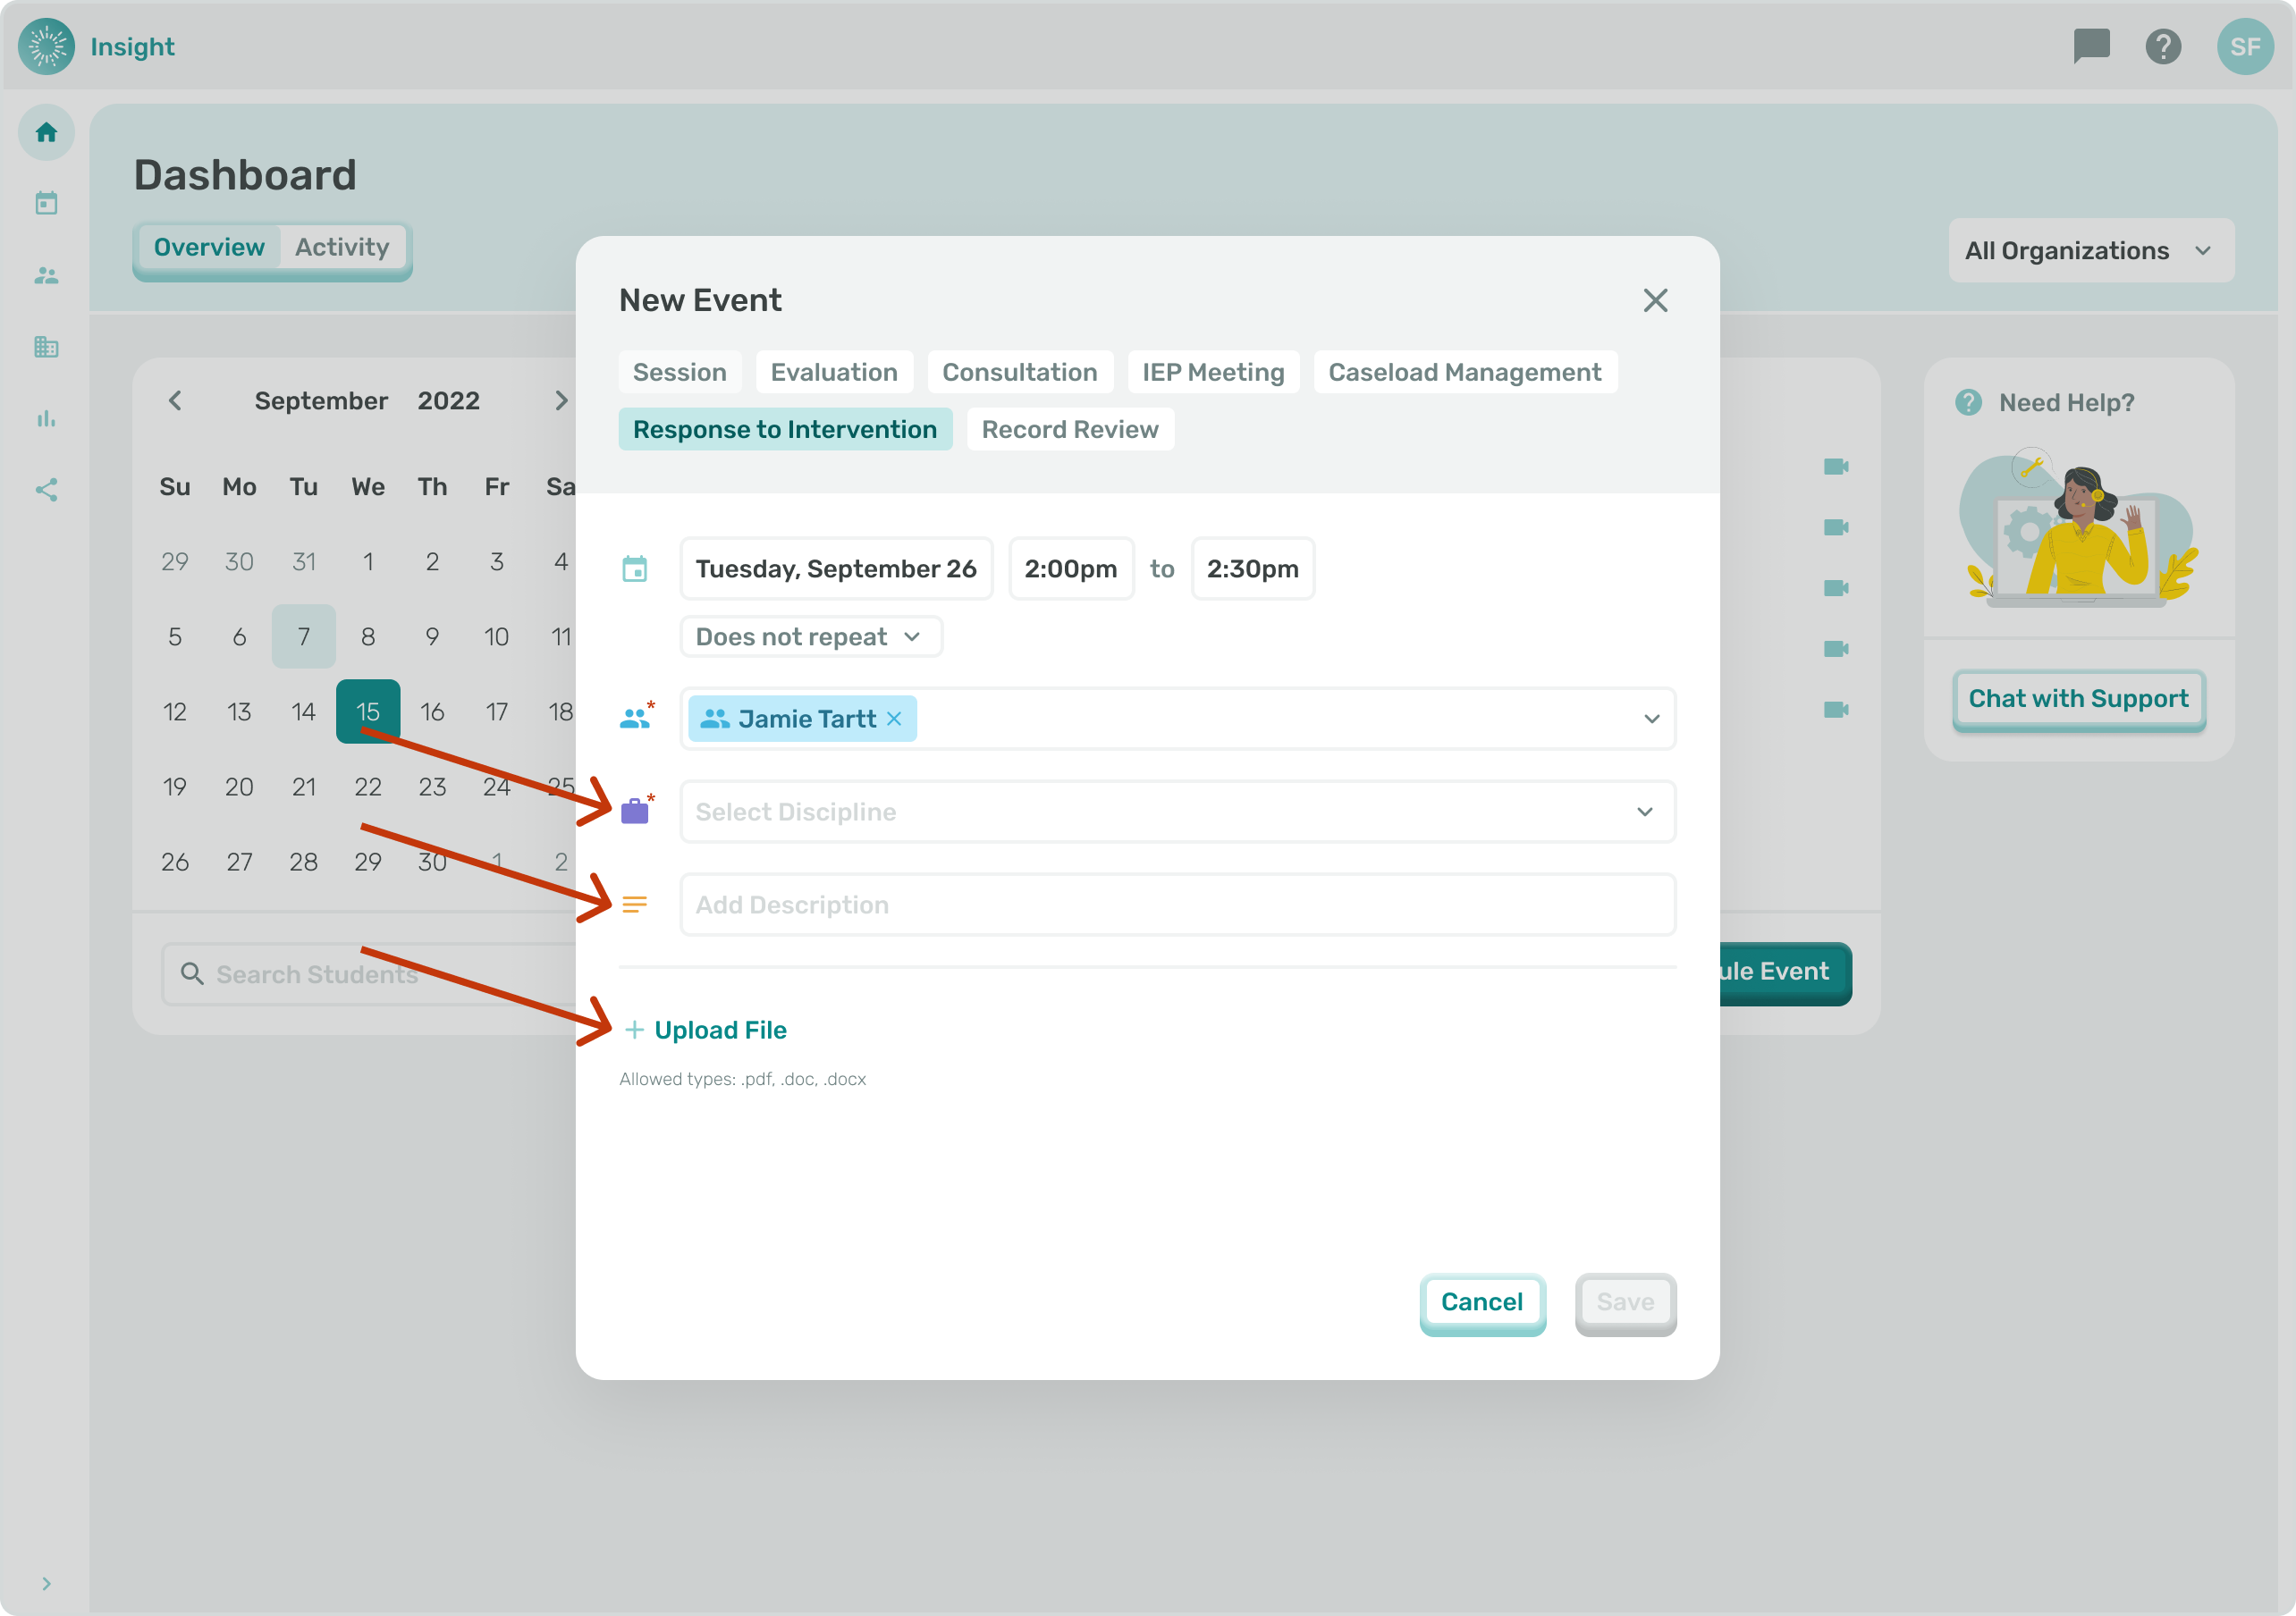
5b. Click on the correct Discipline for the Event.
- The list of Disciplines will vary for each Student as this is based on each Student's Services and Treatment Plan.
- Depending on the Student's Service(s) in their Treatment Plan the options to select from include:
- Behavioral Intervention
- Occupational Therapy
- Physical Therapy
- Psychology
- Social Work/Counseling
- Speech or Language.
5c. Click in the 'Add description' box to add details and information about the Event.
- There is an option at the bottom to 'Upload file'. The acceptable file types to Upload are PDF, DOC or DOCX.
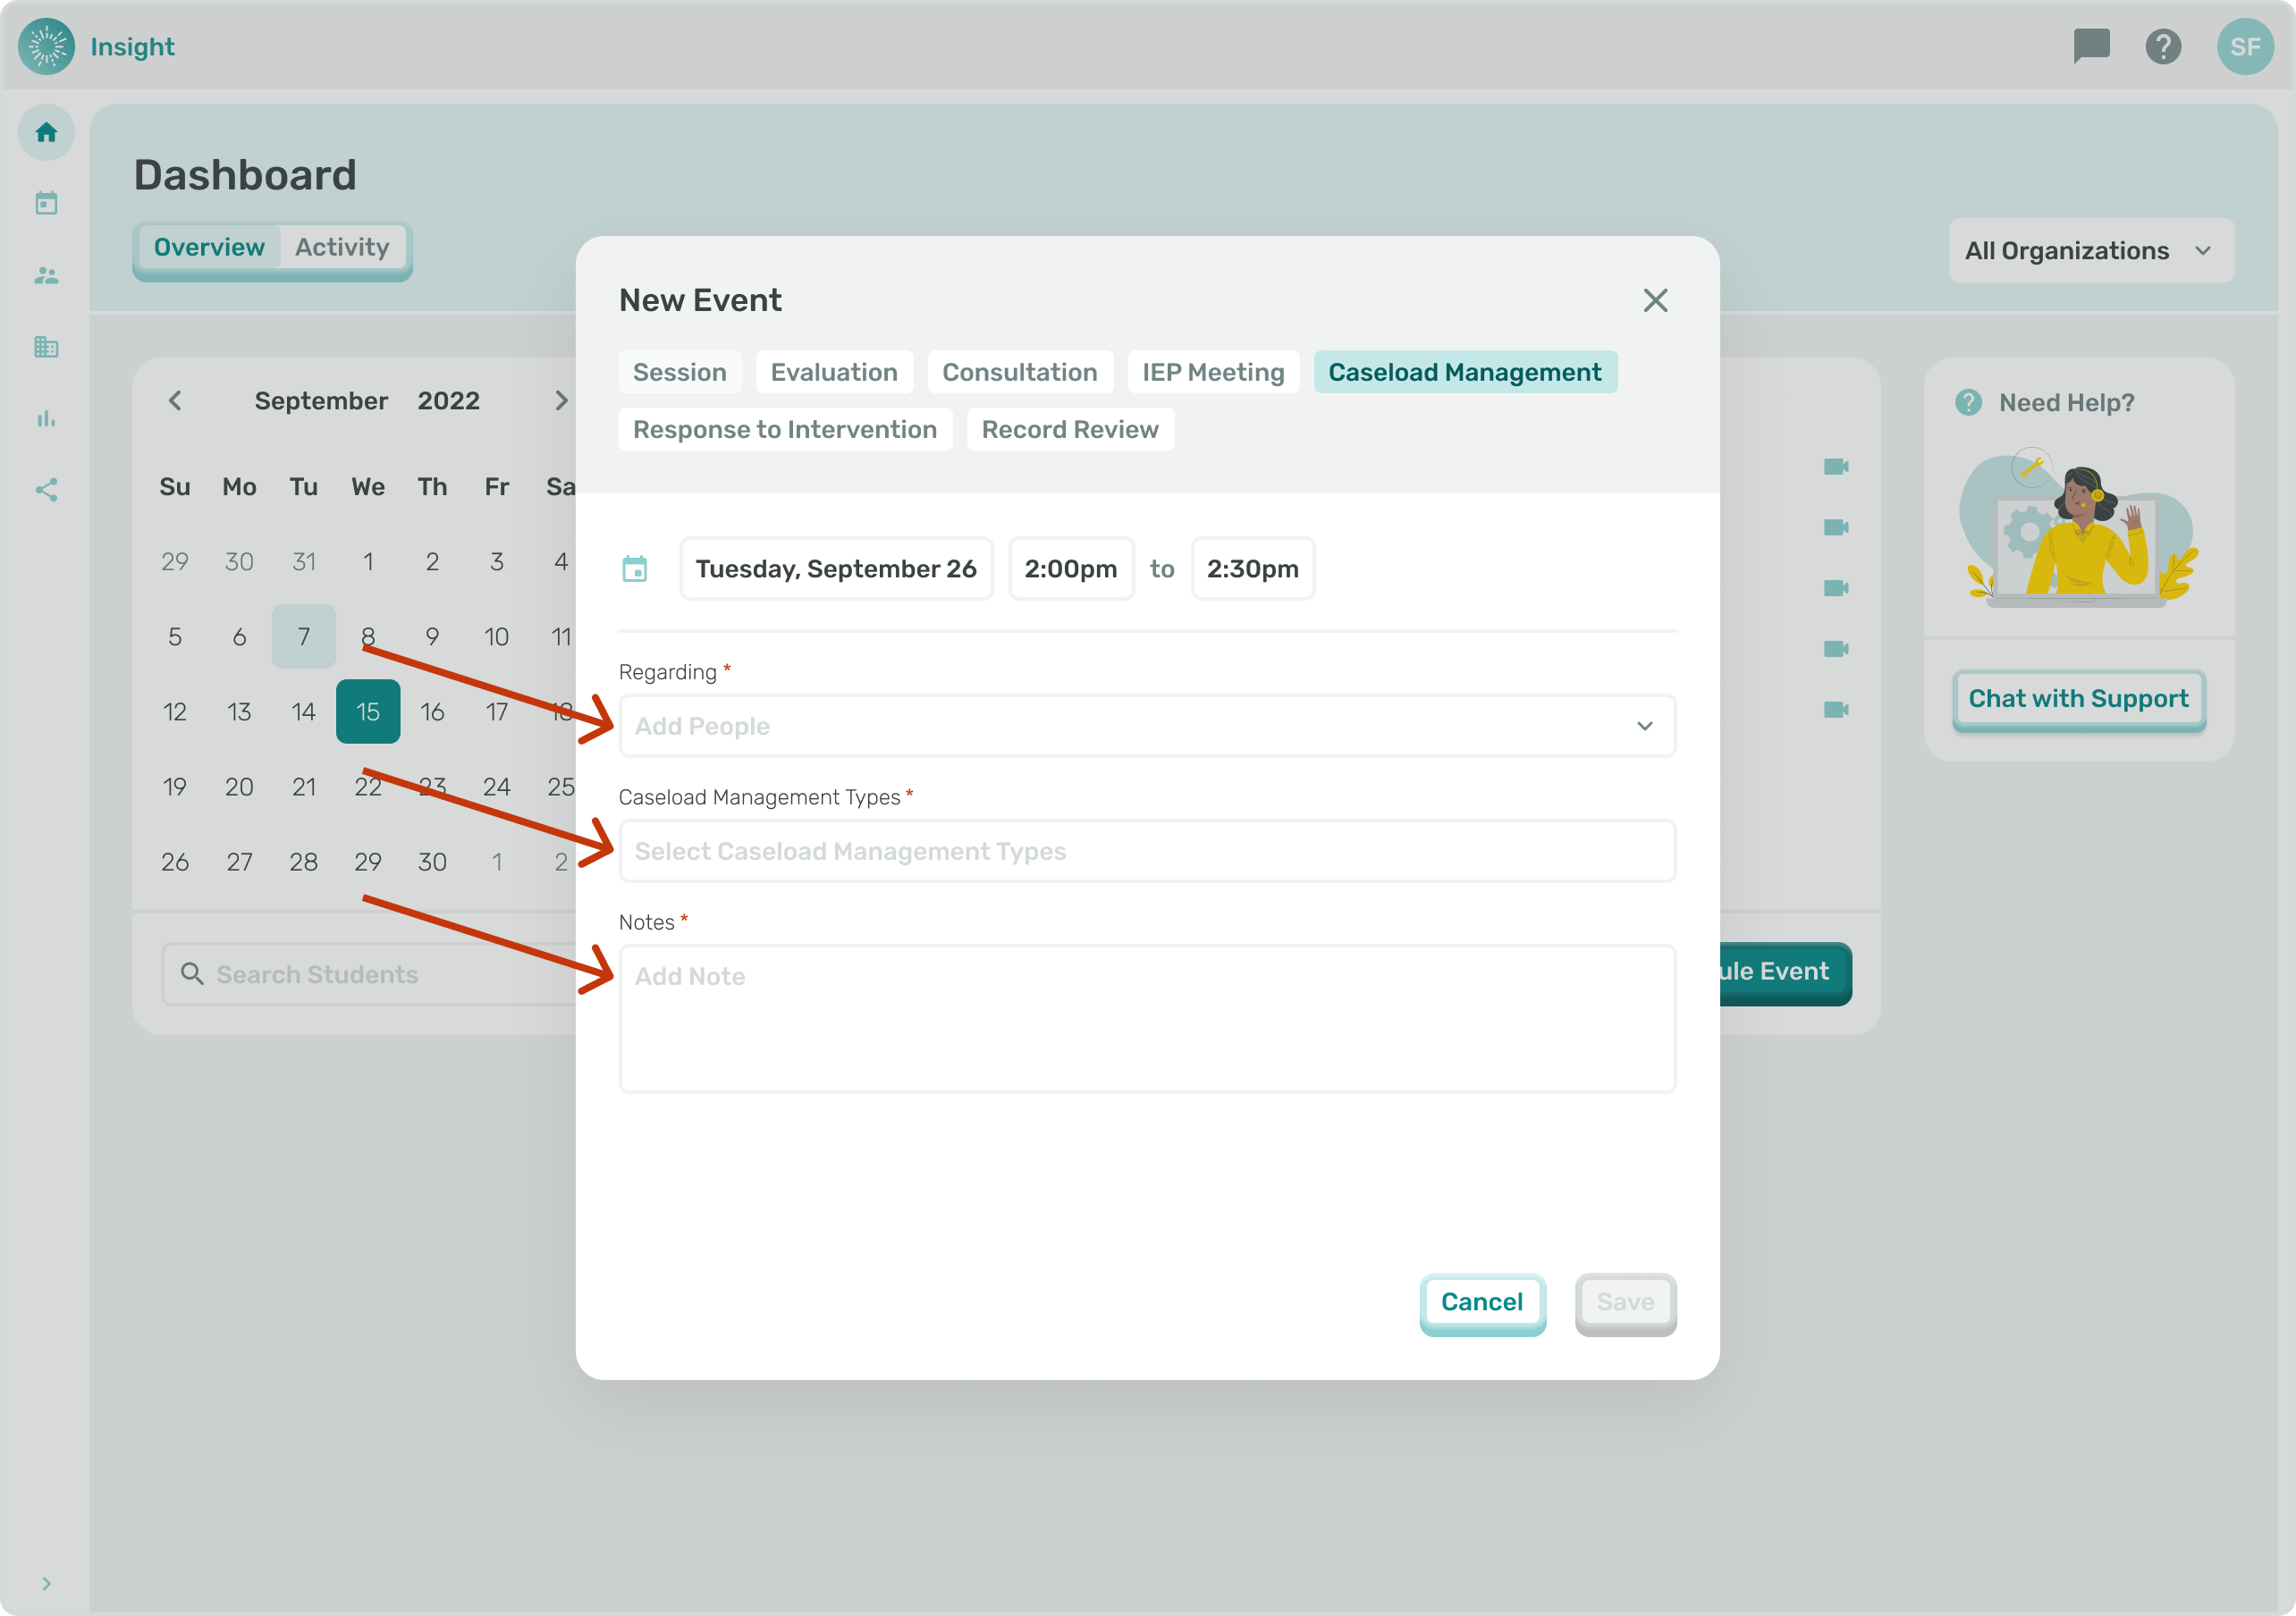
***If the Event type is 'Caseload Management':

The Event type 'Caseload Management' is not a required Service in a Student’s Treatment Plan. This Event is for Service Providers to schedule time for themselves or members of the Care Team. Use this link to review Event Types: Event Types and Subtypes Defined
6a. Click in the 'Add people' box to view the list of Students in your Caseload and whom the Event is Regarding.
- You can either enter the Student's name to search the system or scroll down through the list of names to select the Student(s).
- Once selected the name will populate in the box.
- If you want to remove a name that you selected you can click on the circle with an 'X' at the end of their name.
- Go to the related article 'Scheduling a Group Event' for additional instructions if needed.
6b. Click on the 'Select Caseload Management types' box to select (1) from the drop down list:
- Planning/Prep/Paperwork. Used for activities such as emailing teachers, scheduling, or prep for sessions
- Progress Reports. Used when completing progress reports per the school’s data reporting schedule
- Evaluation Reports. Used when completing any indirect activities pertaining to an evaluation, such as scoring assessments, interpreting results, and report writing
- Supervision. Used when completing supervision tasks as outlined in your Statement of Work
Meeting. This event type is used for school meetings that are not student-specific. Examples: School software training or school staff meetings
- The 'Notes' box is a required field to add additional information for this Event.
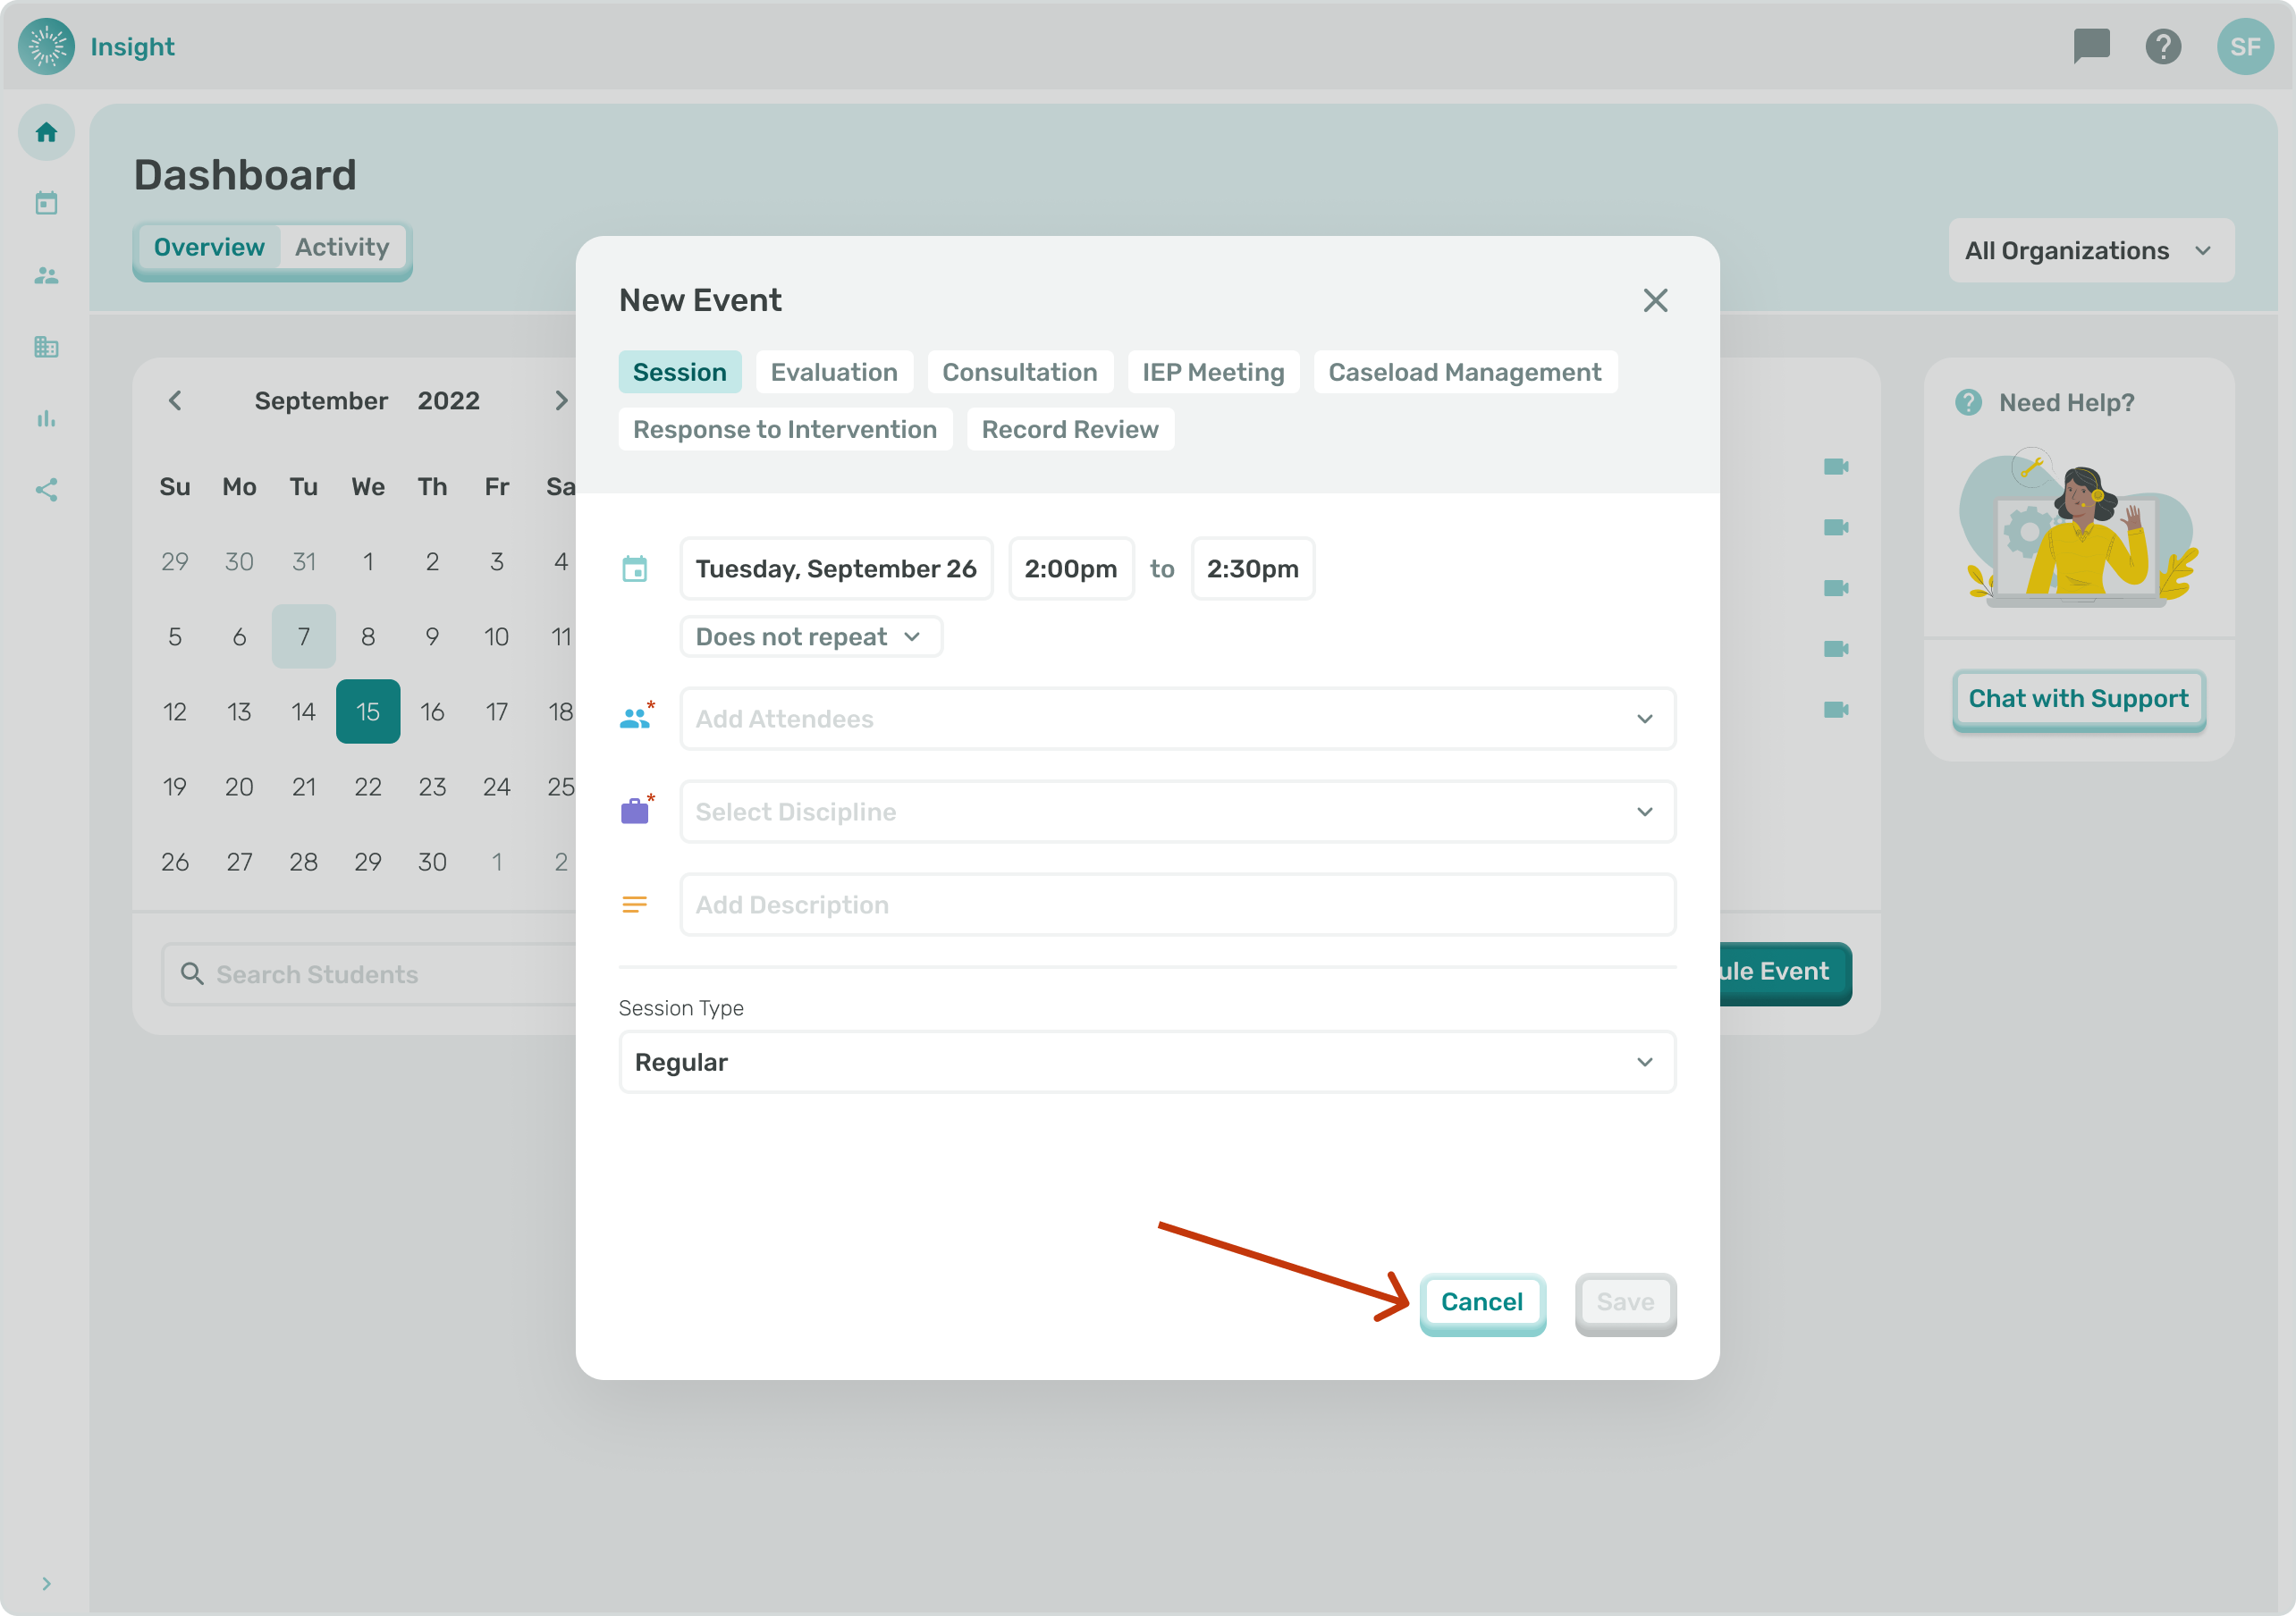
- To Exit the New Event modal at any time and not Save your Documentation
- click on the Cancel button at the bottom right corner of the modal.
- Once clicked you will go back to the Calendar without making any updates to your Events.
- The remainder of instructions are the same as outlined in the article Scheduling an Event.
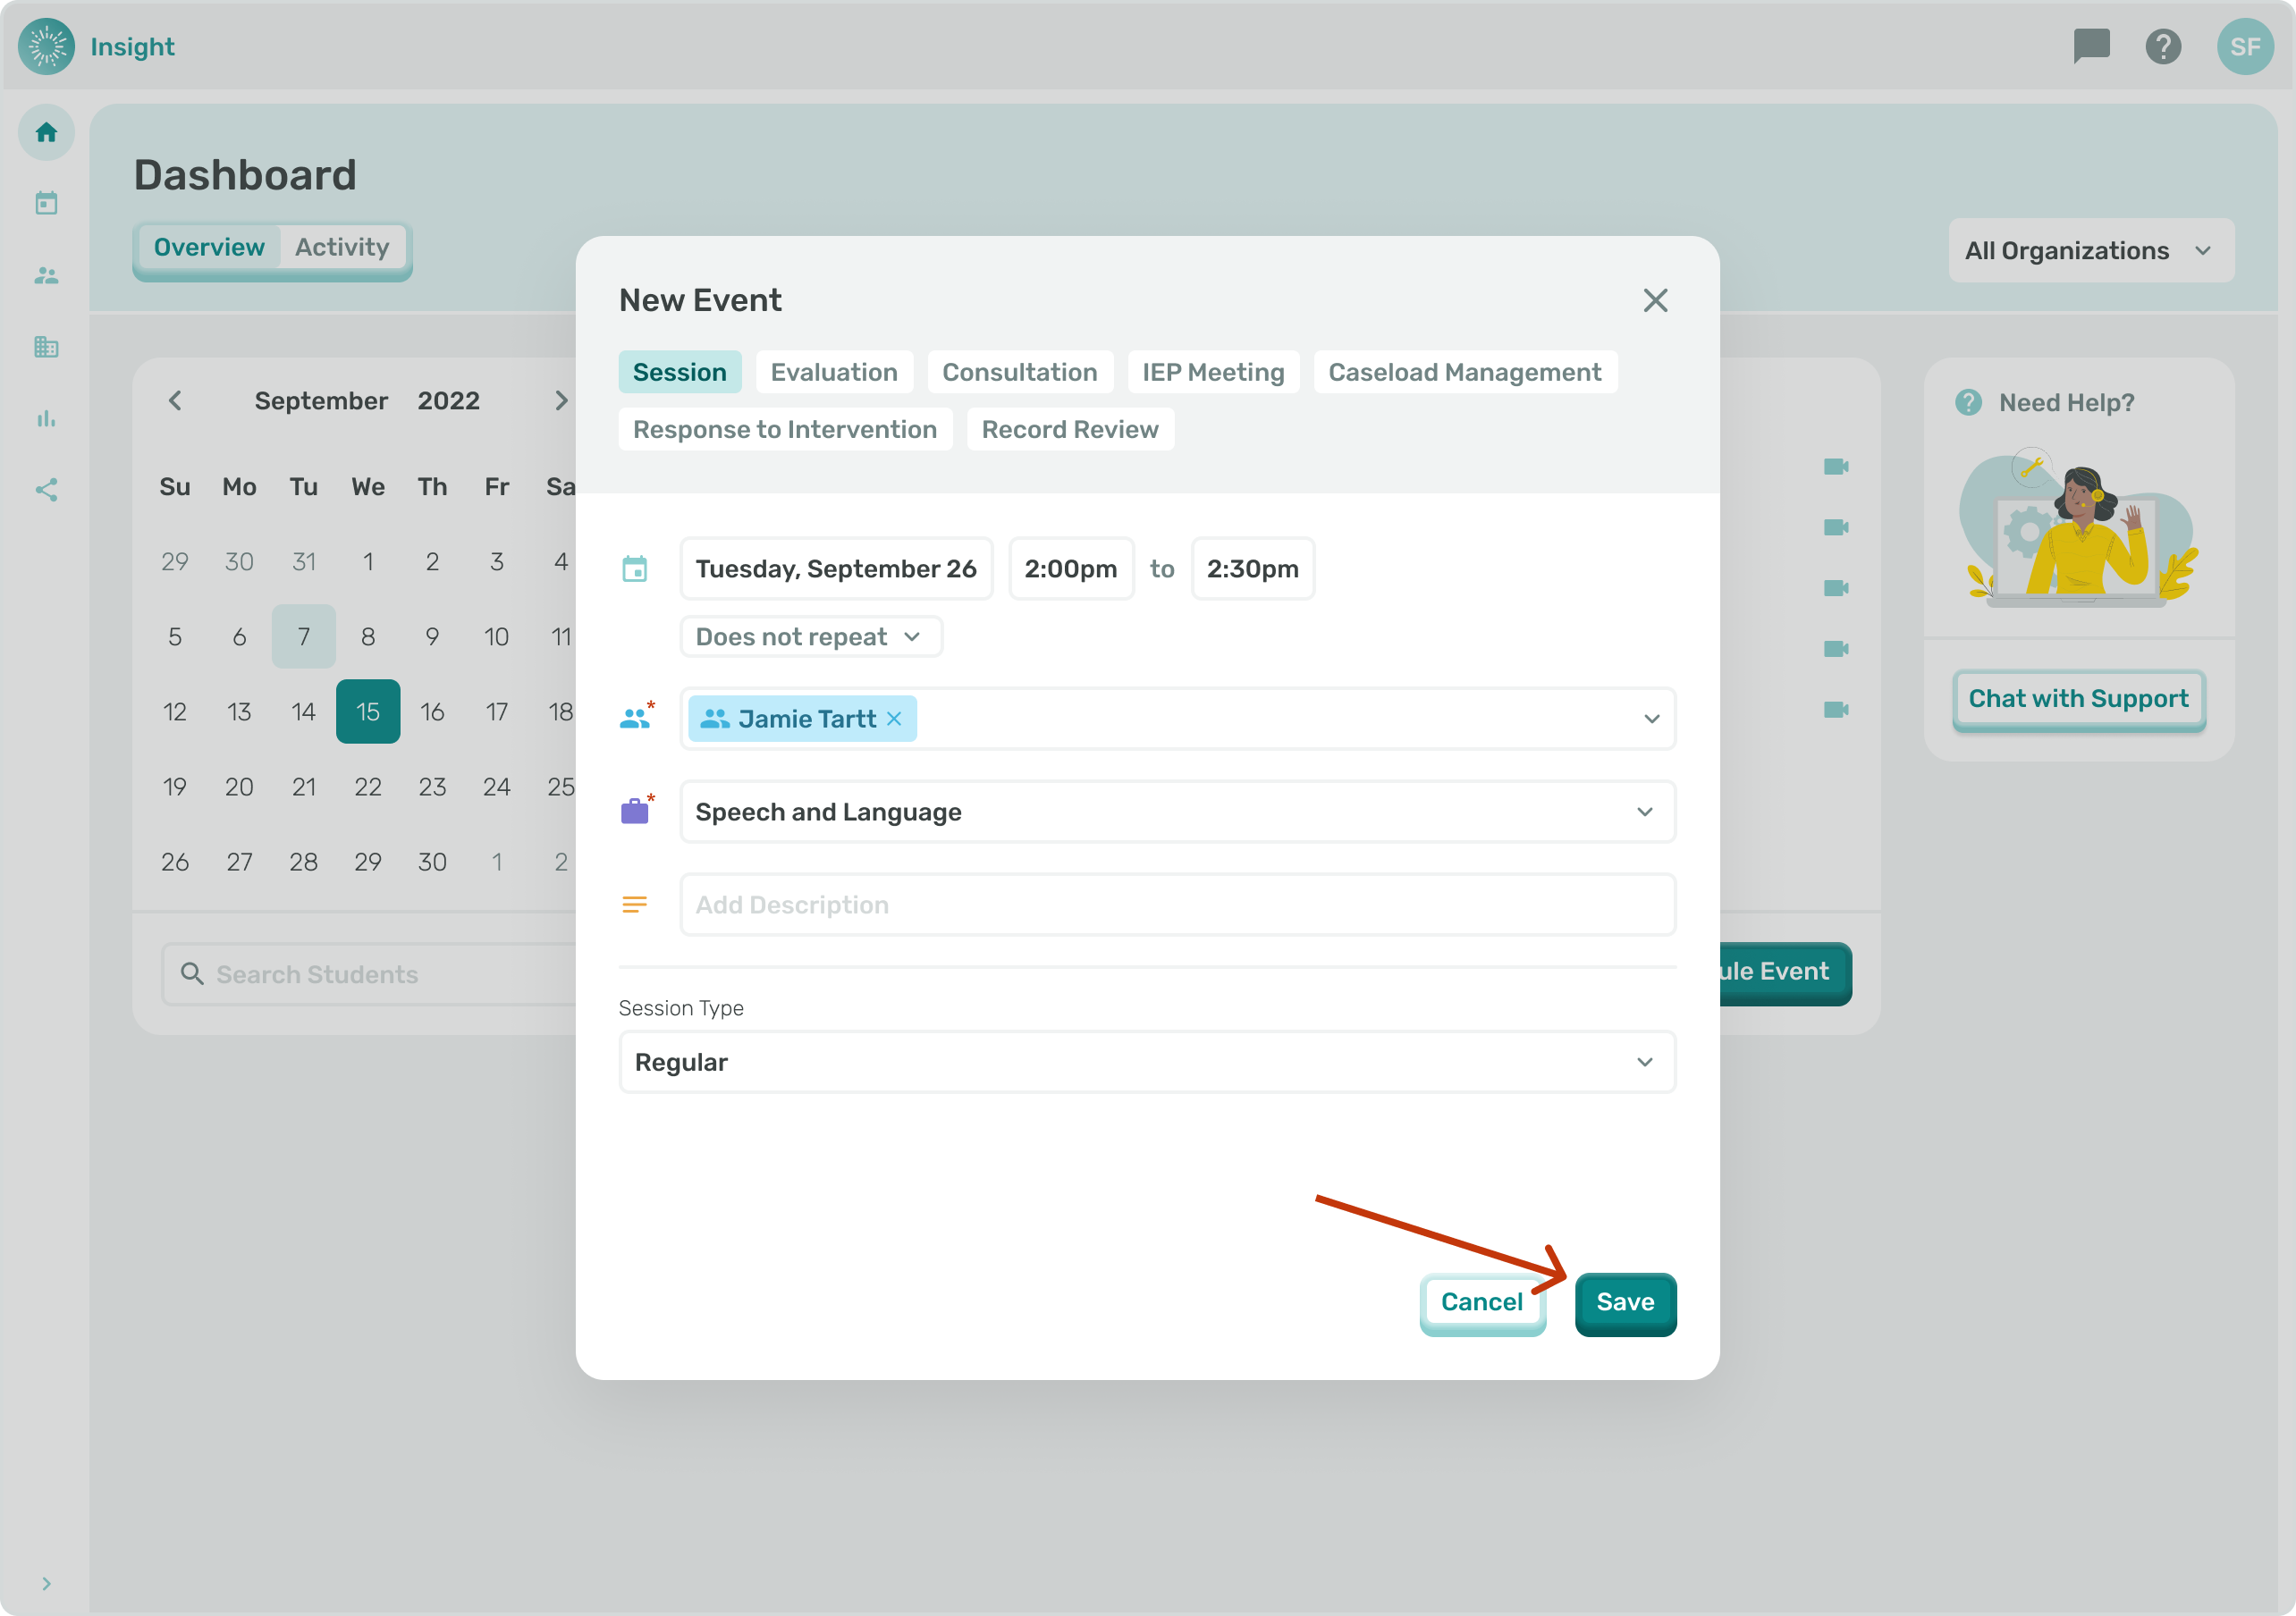
6c. When all the required information has been added to the New Event the ‘Save’ button at the bottom right corner is enabled and will “light up” so you can click it.
- You will immediately see a Confirmation message at the top of your screen “Event Created. Your Event has been successfully created!”
- *Additionally, as soon as a ‘Caseload Management’ Event is created, it is automatically Documented and will not require additional Documentation.
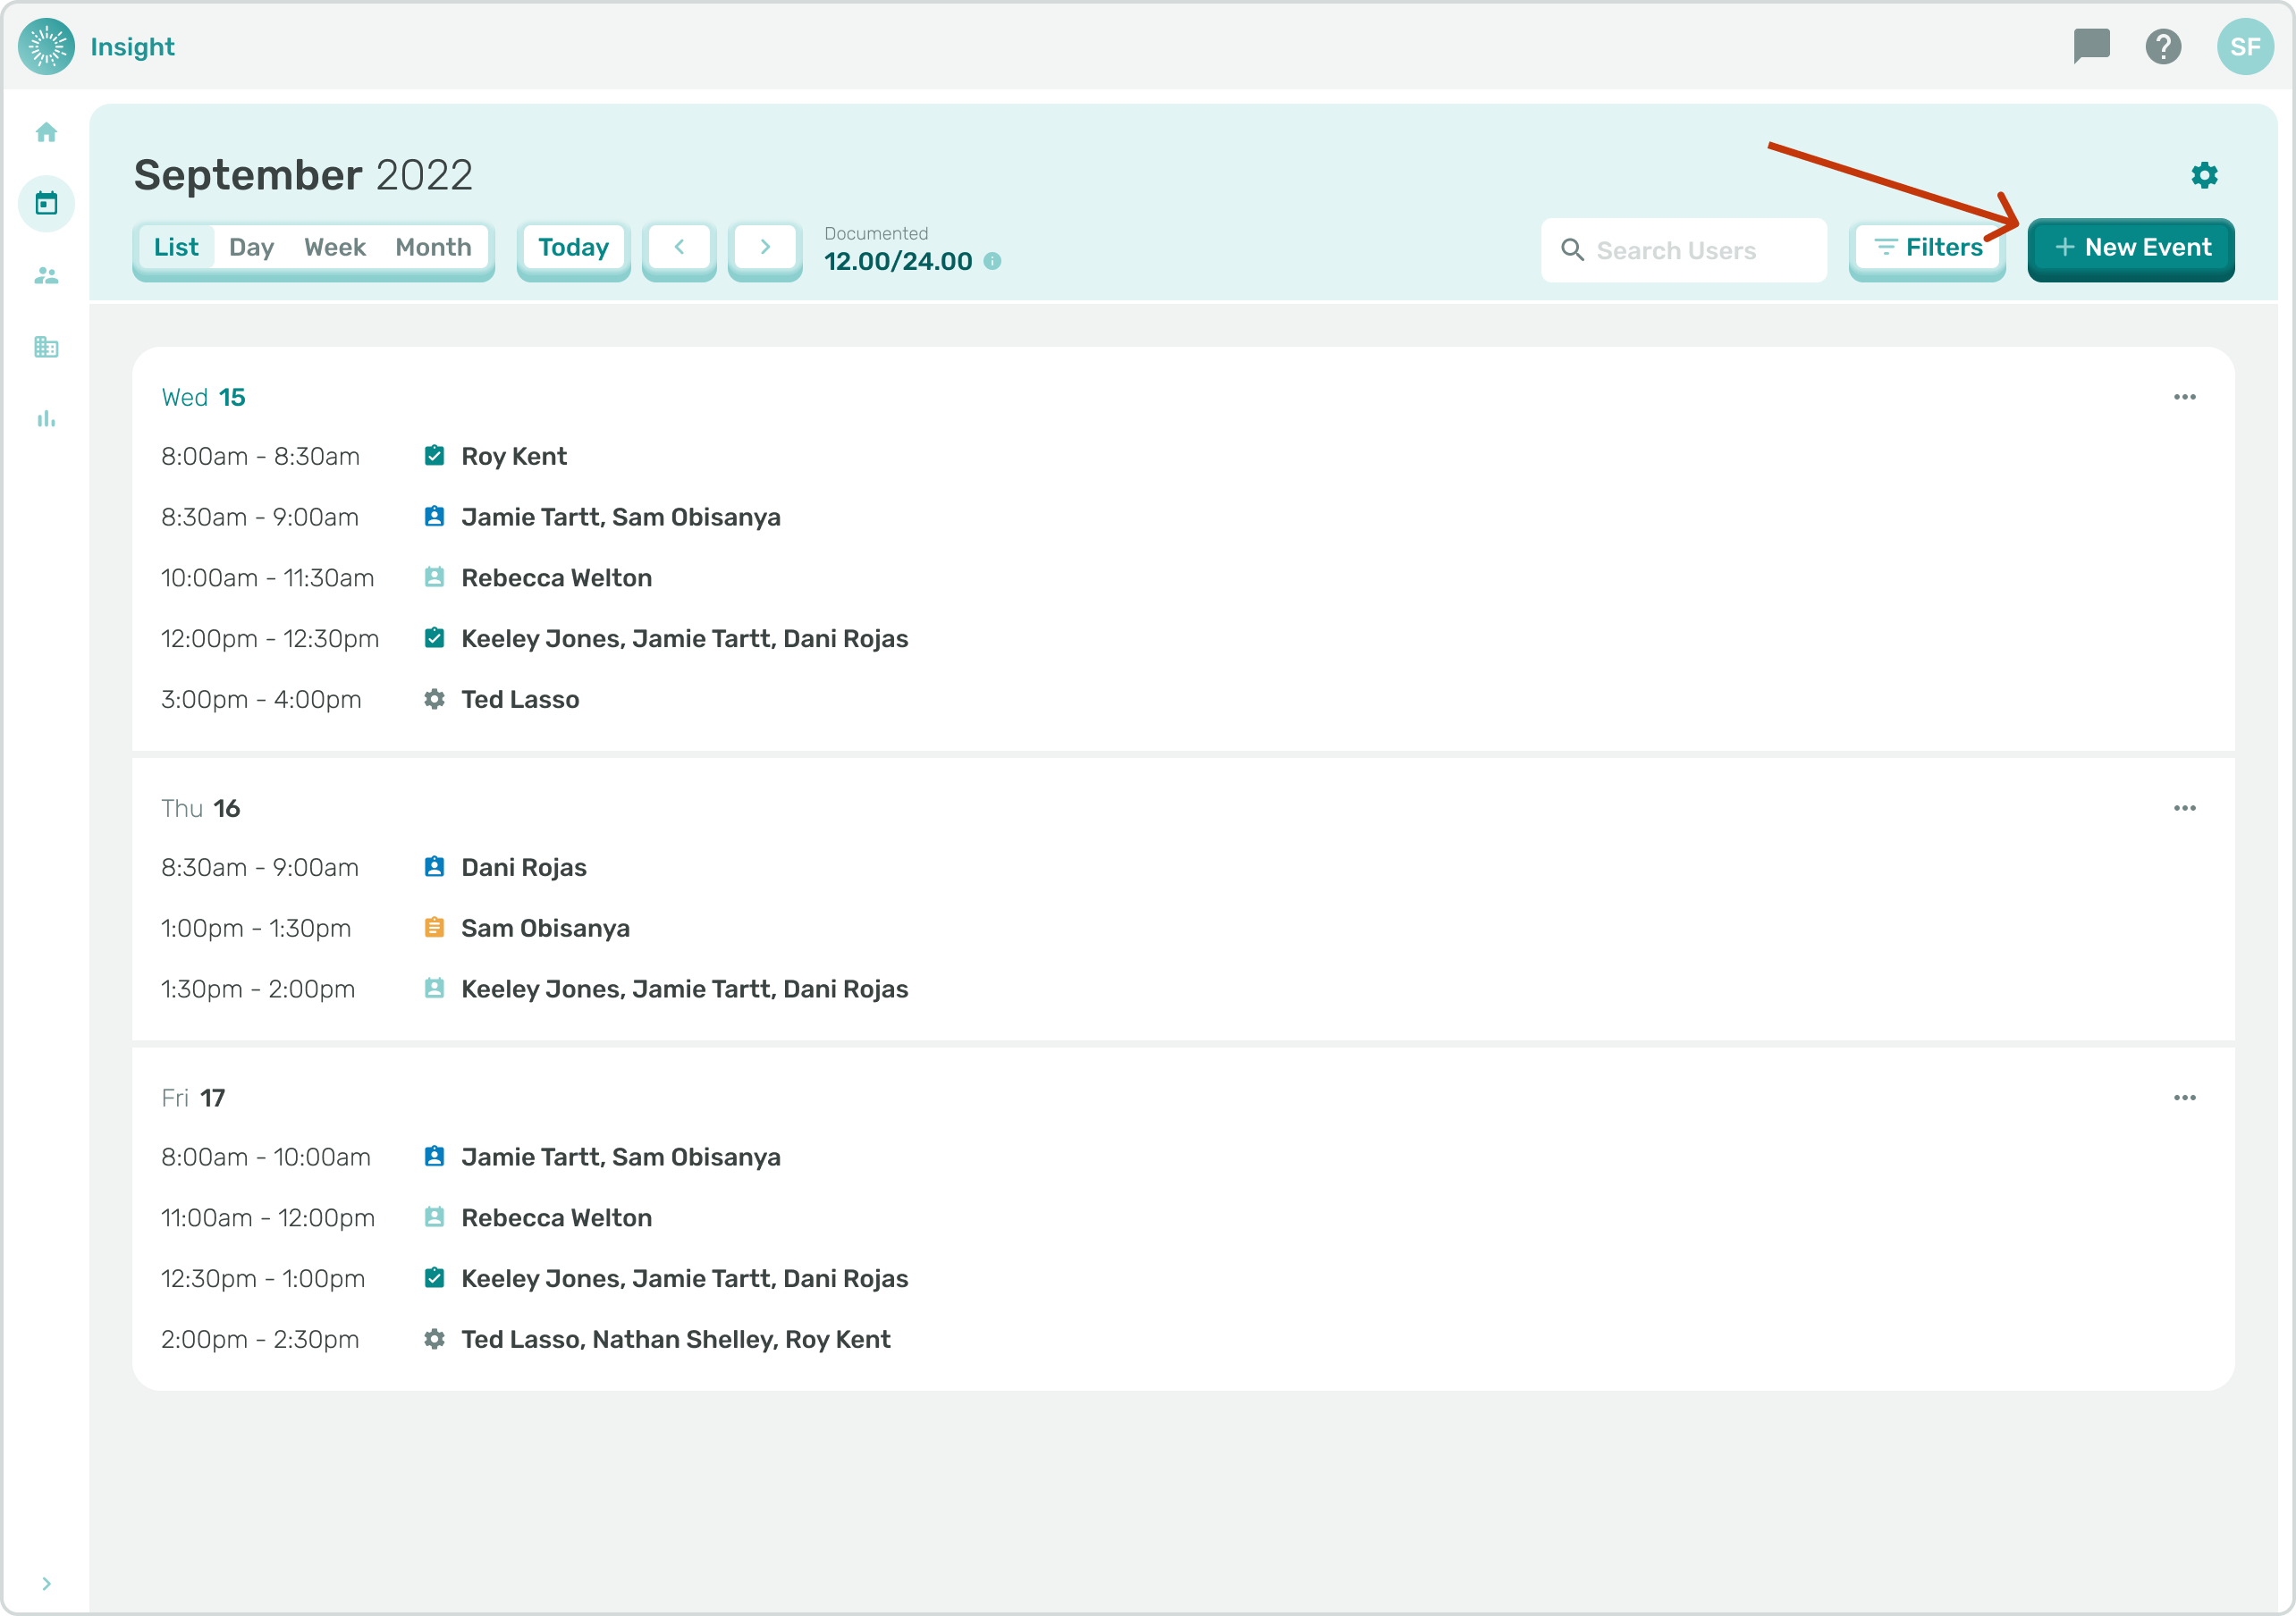
II. For the second location to schedule an Event Navigate to the 'Calendar Page' which is located in the side menu.
- Click on the '+New Event' button which is at the top right corner of the page.
- Scroll back to the top of this Article where it says “Select the 'Event type' you are creating by clicking in the gray banner at the top of the modal.
- The same steps and rules to Scheduling an Event apply on the 'Calendar Page'.