- As a Service Provider, there are two locations where you can Document a Group Event:
- The Dashboard Page
- The Calendar Page
- Both locations require the same steps to Document a Group Event.
- The instructions for Documenting a Group Event begins with the same steps as Documenting an Event.
- The following instructions start from when you click on the Group Event from the Calendar that you need to Document and the Document Group Session modal opens.
- For additional instructions go to the related article 'Documenting an Event'.
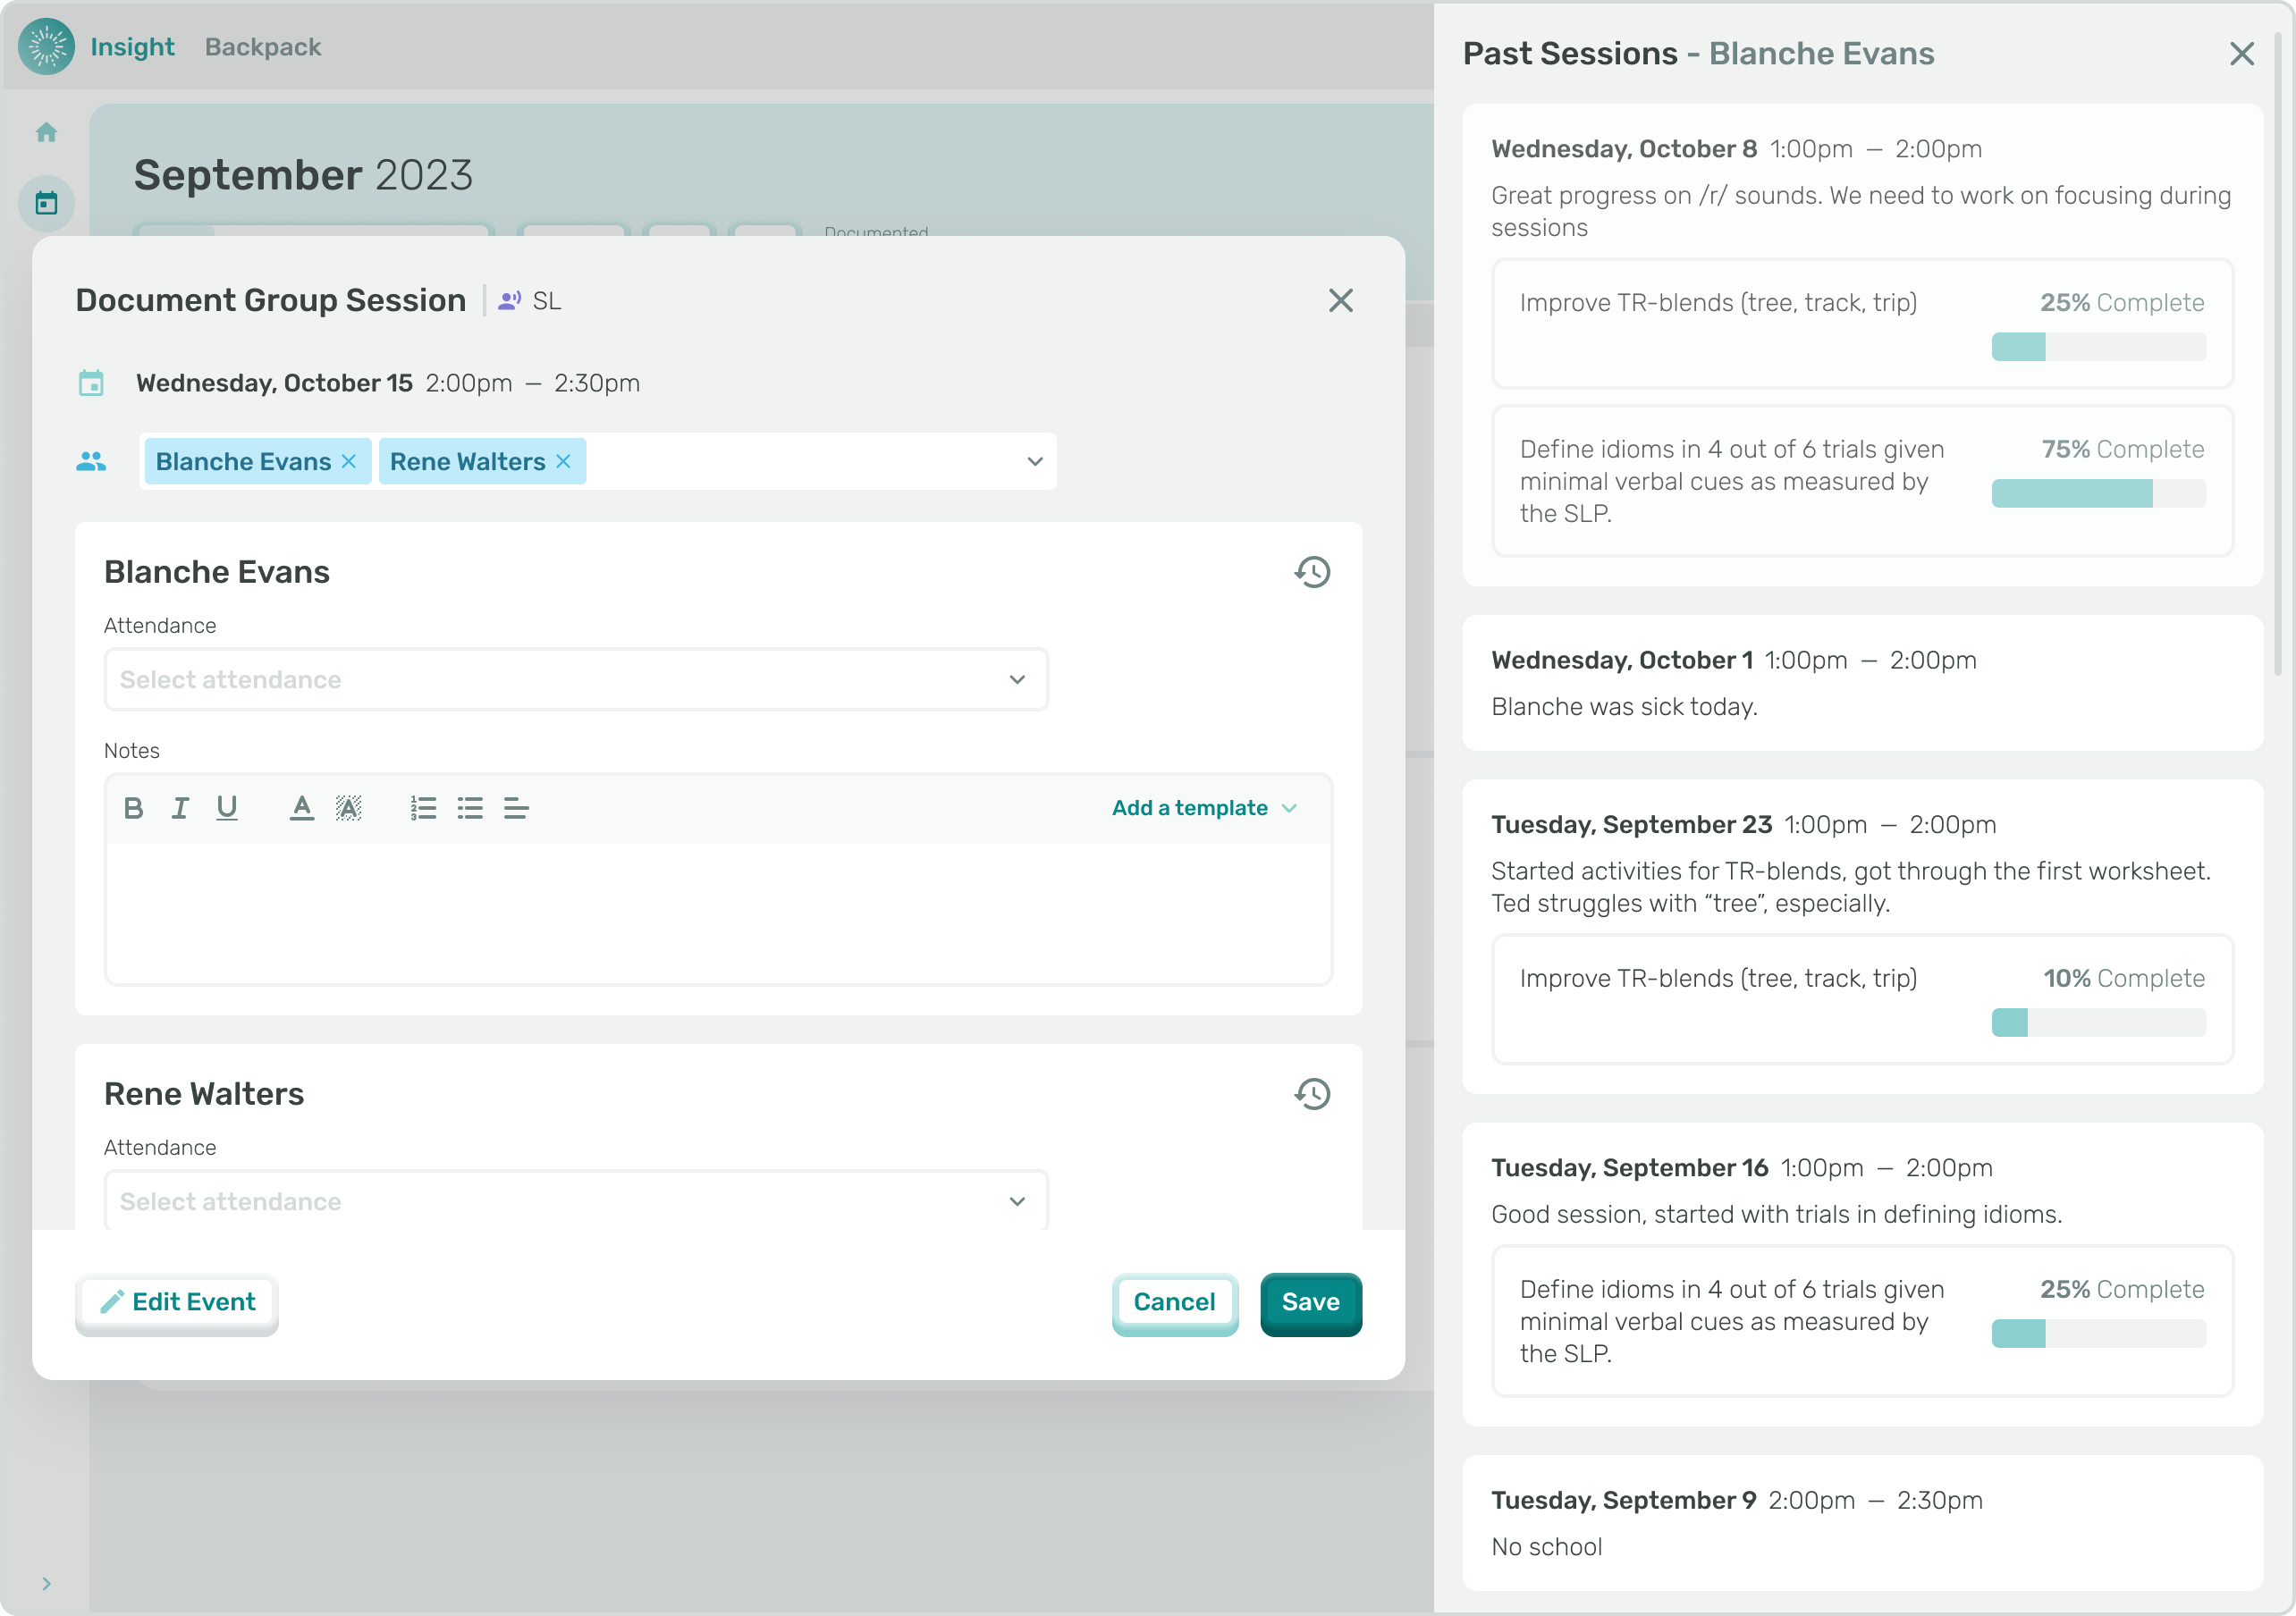
- When Documenting Events for Individuals or Groups, when you click on an Event and the modal pops-up there is a small clock icon to the right of the Student’s name.

- Clicking on the clock opens the ‘Past Sessions’ modal and lists the Student’s past sessions including the completed past Documentation.
- If there are no Past Sessions for the Student there will be a note indicating “No past sessions to display.”
- To close this modal click on the “X” in the upper right corner.
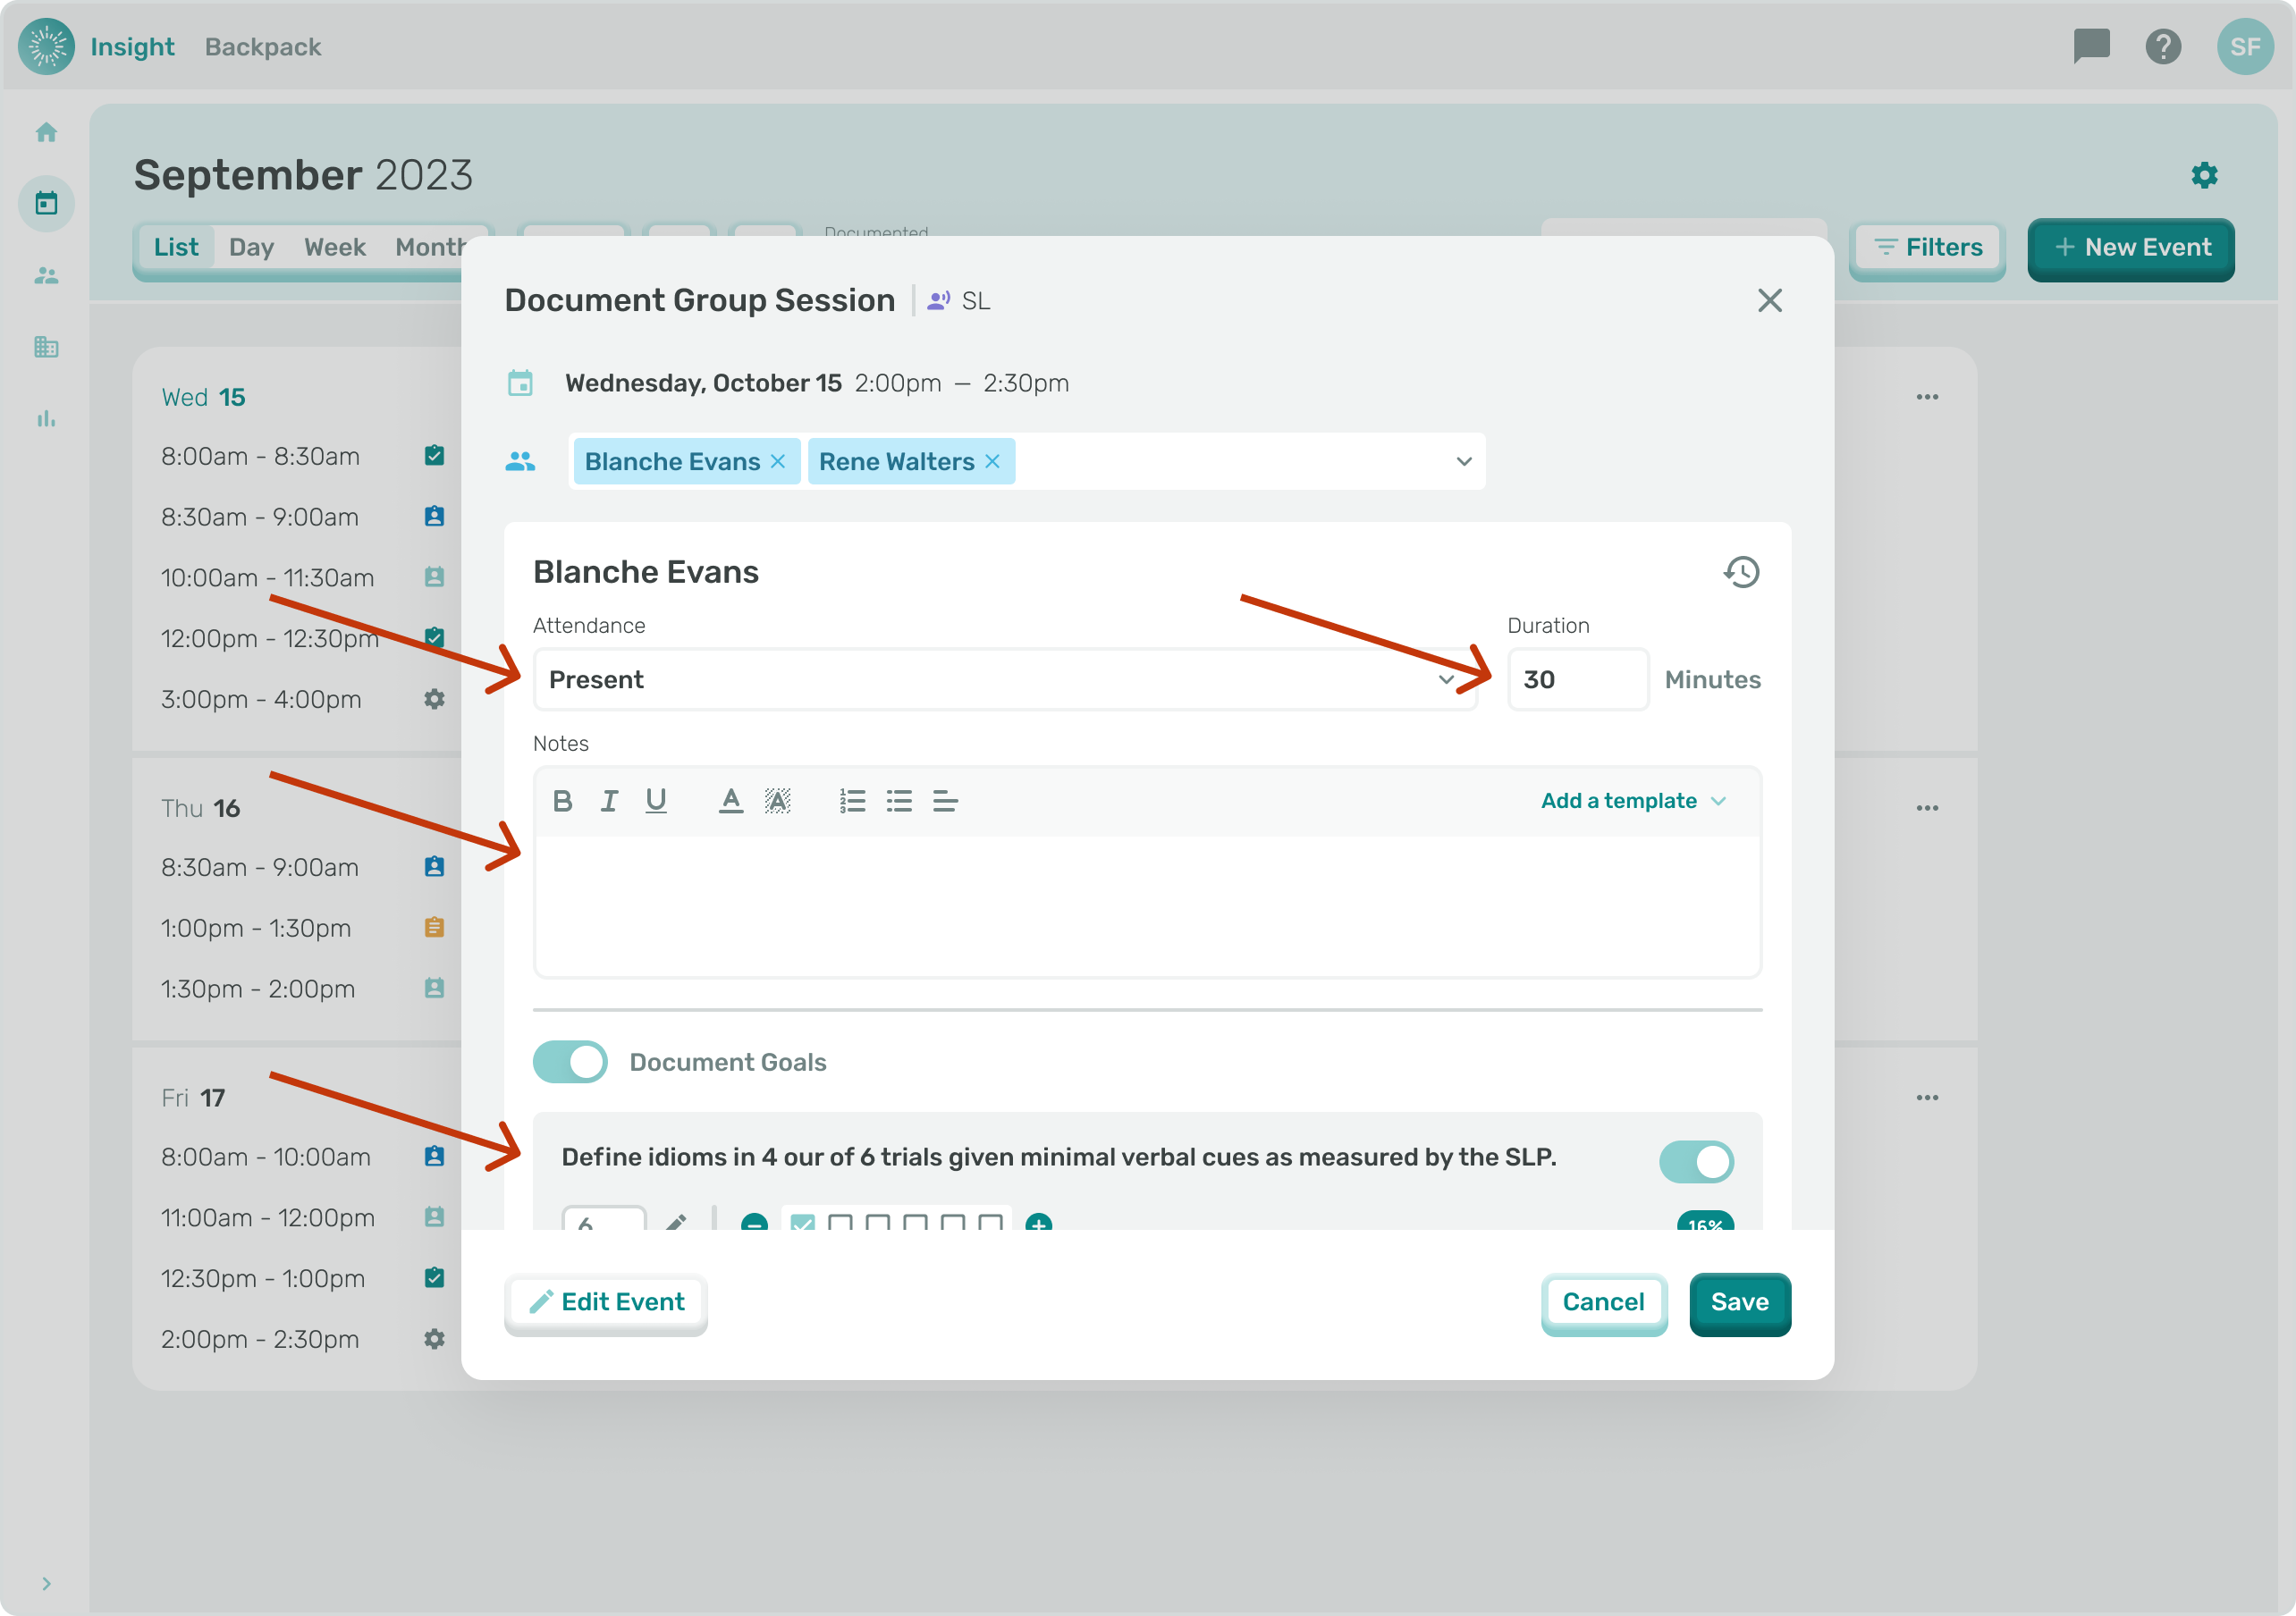
- When Documenting a Group Event with more than one Student, there is a separate section for each of your Students to Document their details:
- Attendance (required): the options are:
- Present
- No Show
- No School
- Service Provider Cancelled
- Late Cancel
- Notes section (required):
- In the notes header you can click on ‘Add a template’ to select either the Progress Notes or SOAP (Subject Data, Objective Data, Assessment Information, Plan Details) templates to add your notes
- Or you can freely type your notes and comments.
- Duration (required):
- This box will be pre-filled with the Event duration in minutes and can be updated if the Event was different than the planned Duration of the Event.
- Goals (for Sessions only and they are not required):
- Once the Attendance for the Event has been updated with ‘Present’ a Goals button will appear under the Duration box if the Student has Goals.
- When displayed, click the ‘Goals’ button to enable the list to open.
- Each Goal will also have a button to click which will allow you to update each individual Goal.
- Attendance (required): the options are:
- For additional instructions go to the related article 'Documenting Goal Progress'.
- Once you have Documented the first Student the second Student’s section will be next, and so on until you have completed the sections for all Students scheduled for the Event.
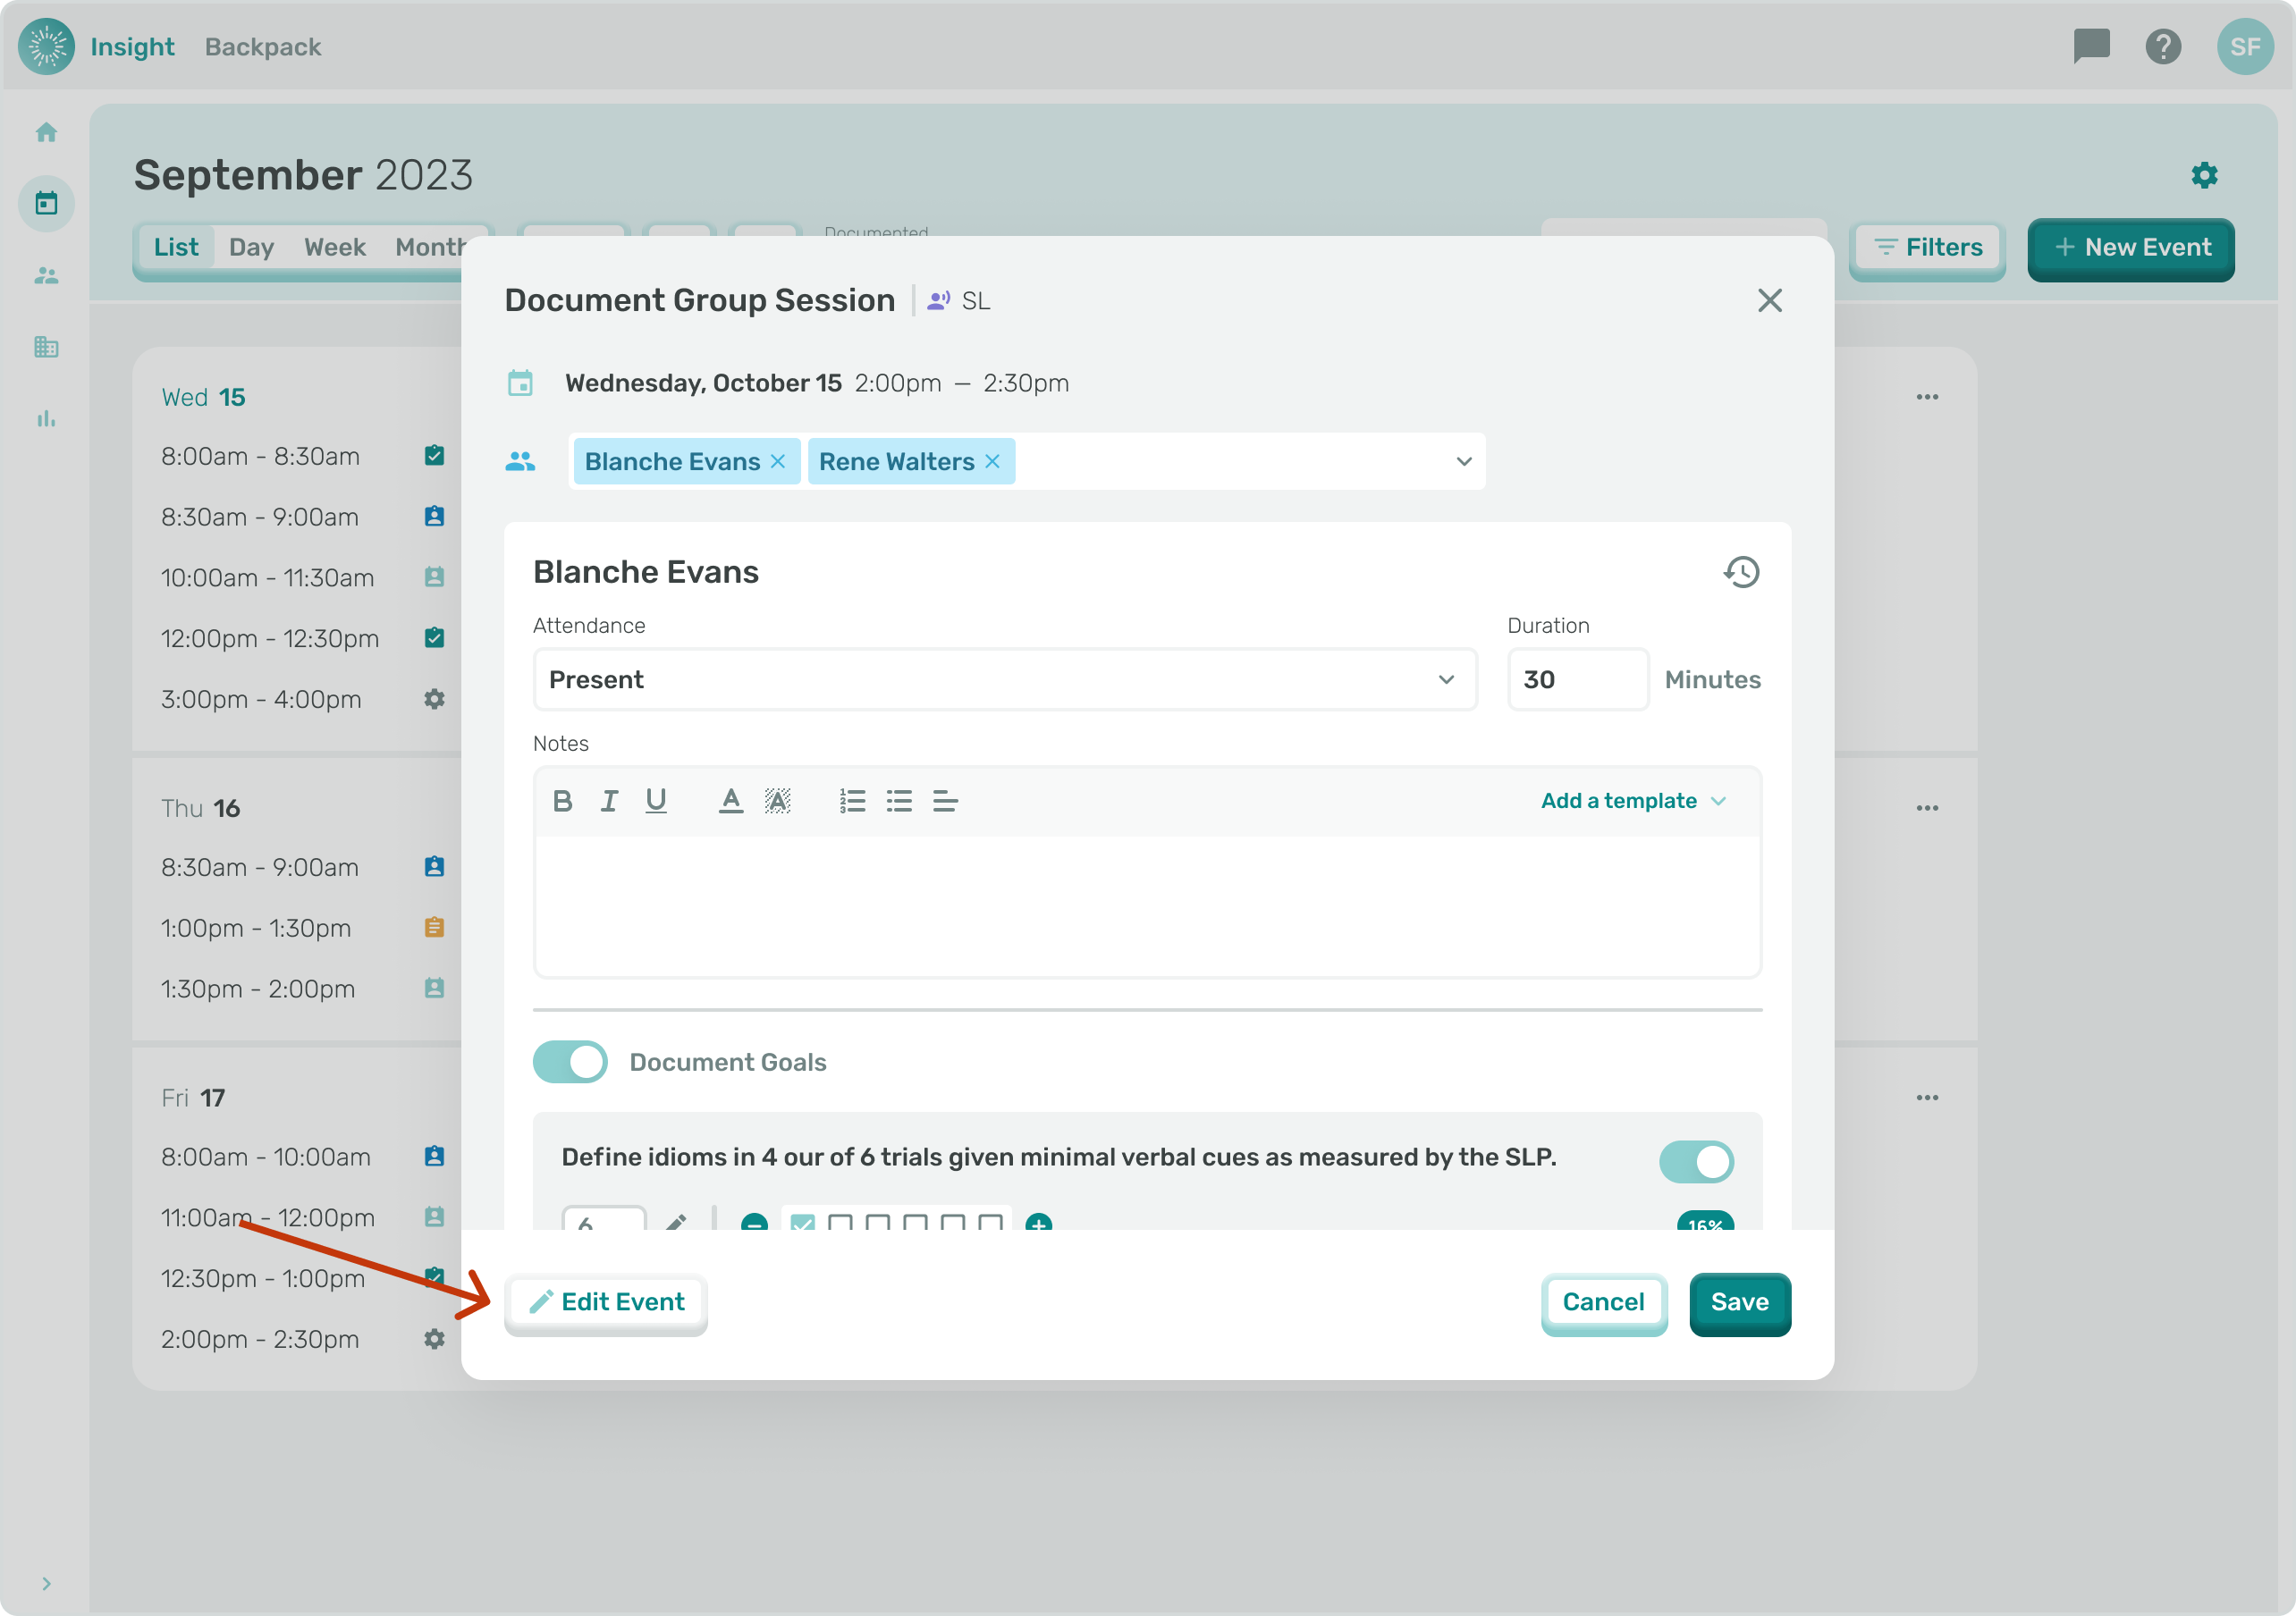
4a. The ‘Edit Event’ button on the bottom left corner will trigger the Edit Event modal screen and allow an Event in the past to be Edited.
- Once you click on the ‘Edit Event’ button a new ‘Document’ button will take the place of the ‘Edit Event’ button.
***Before toggling the buttons make sure to Save any updates needed or you will lose the updates you have already made.
***Please note, once you click on the ‘Edit Event’ button that button will switch back to the ‘Document’ button.
- For more information go to the related article 'Editing an Event'.
4b. To Exit the Edit Event modal at any time and not ‘Save’ your updates
- You can either click the “X” in the top right corner or click the Cancel button at the bottom right corner of the modal.
- Once clicked you will go back to the Calendar without Documenting your Event.

- When you are finished ‘Documenting’ and all the required fields have been updated the ‘Save’ button will be enabled
- Click on the ‘Save’ button on the bottom right corner of the modal.

***Of note, you can click ‘Save’ after only Documenting one Student. The Event will still display that Documentation is needed until all Students in the Group Event have been Documented.
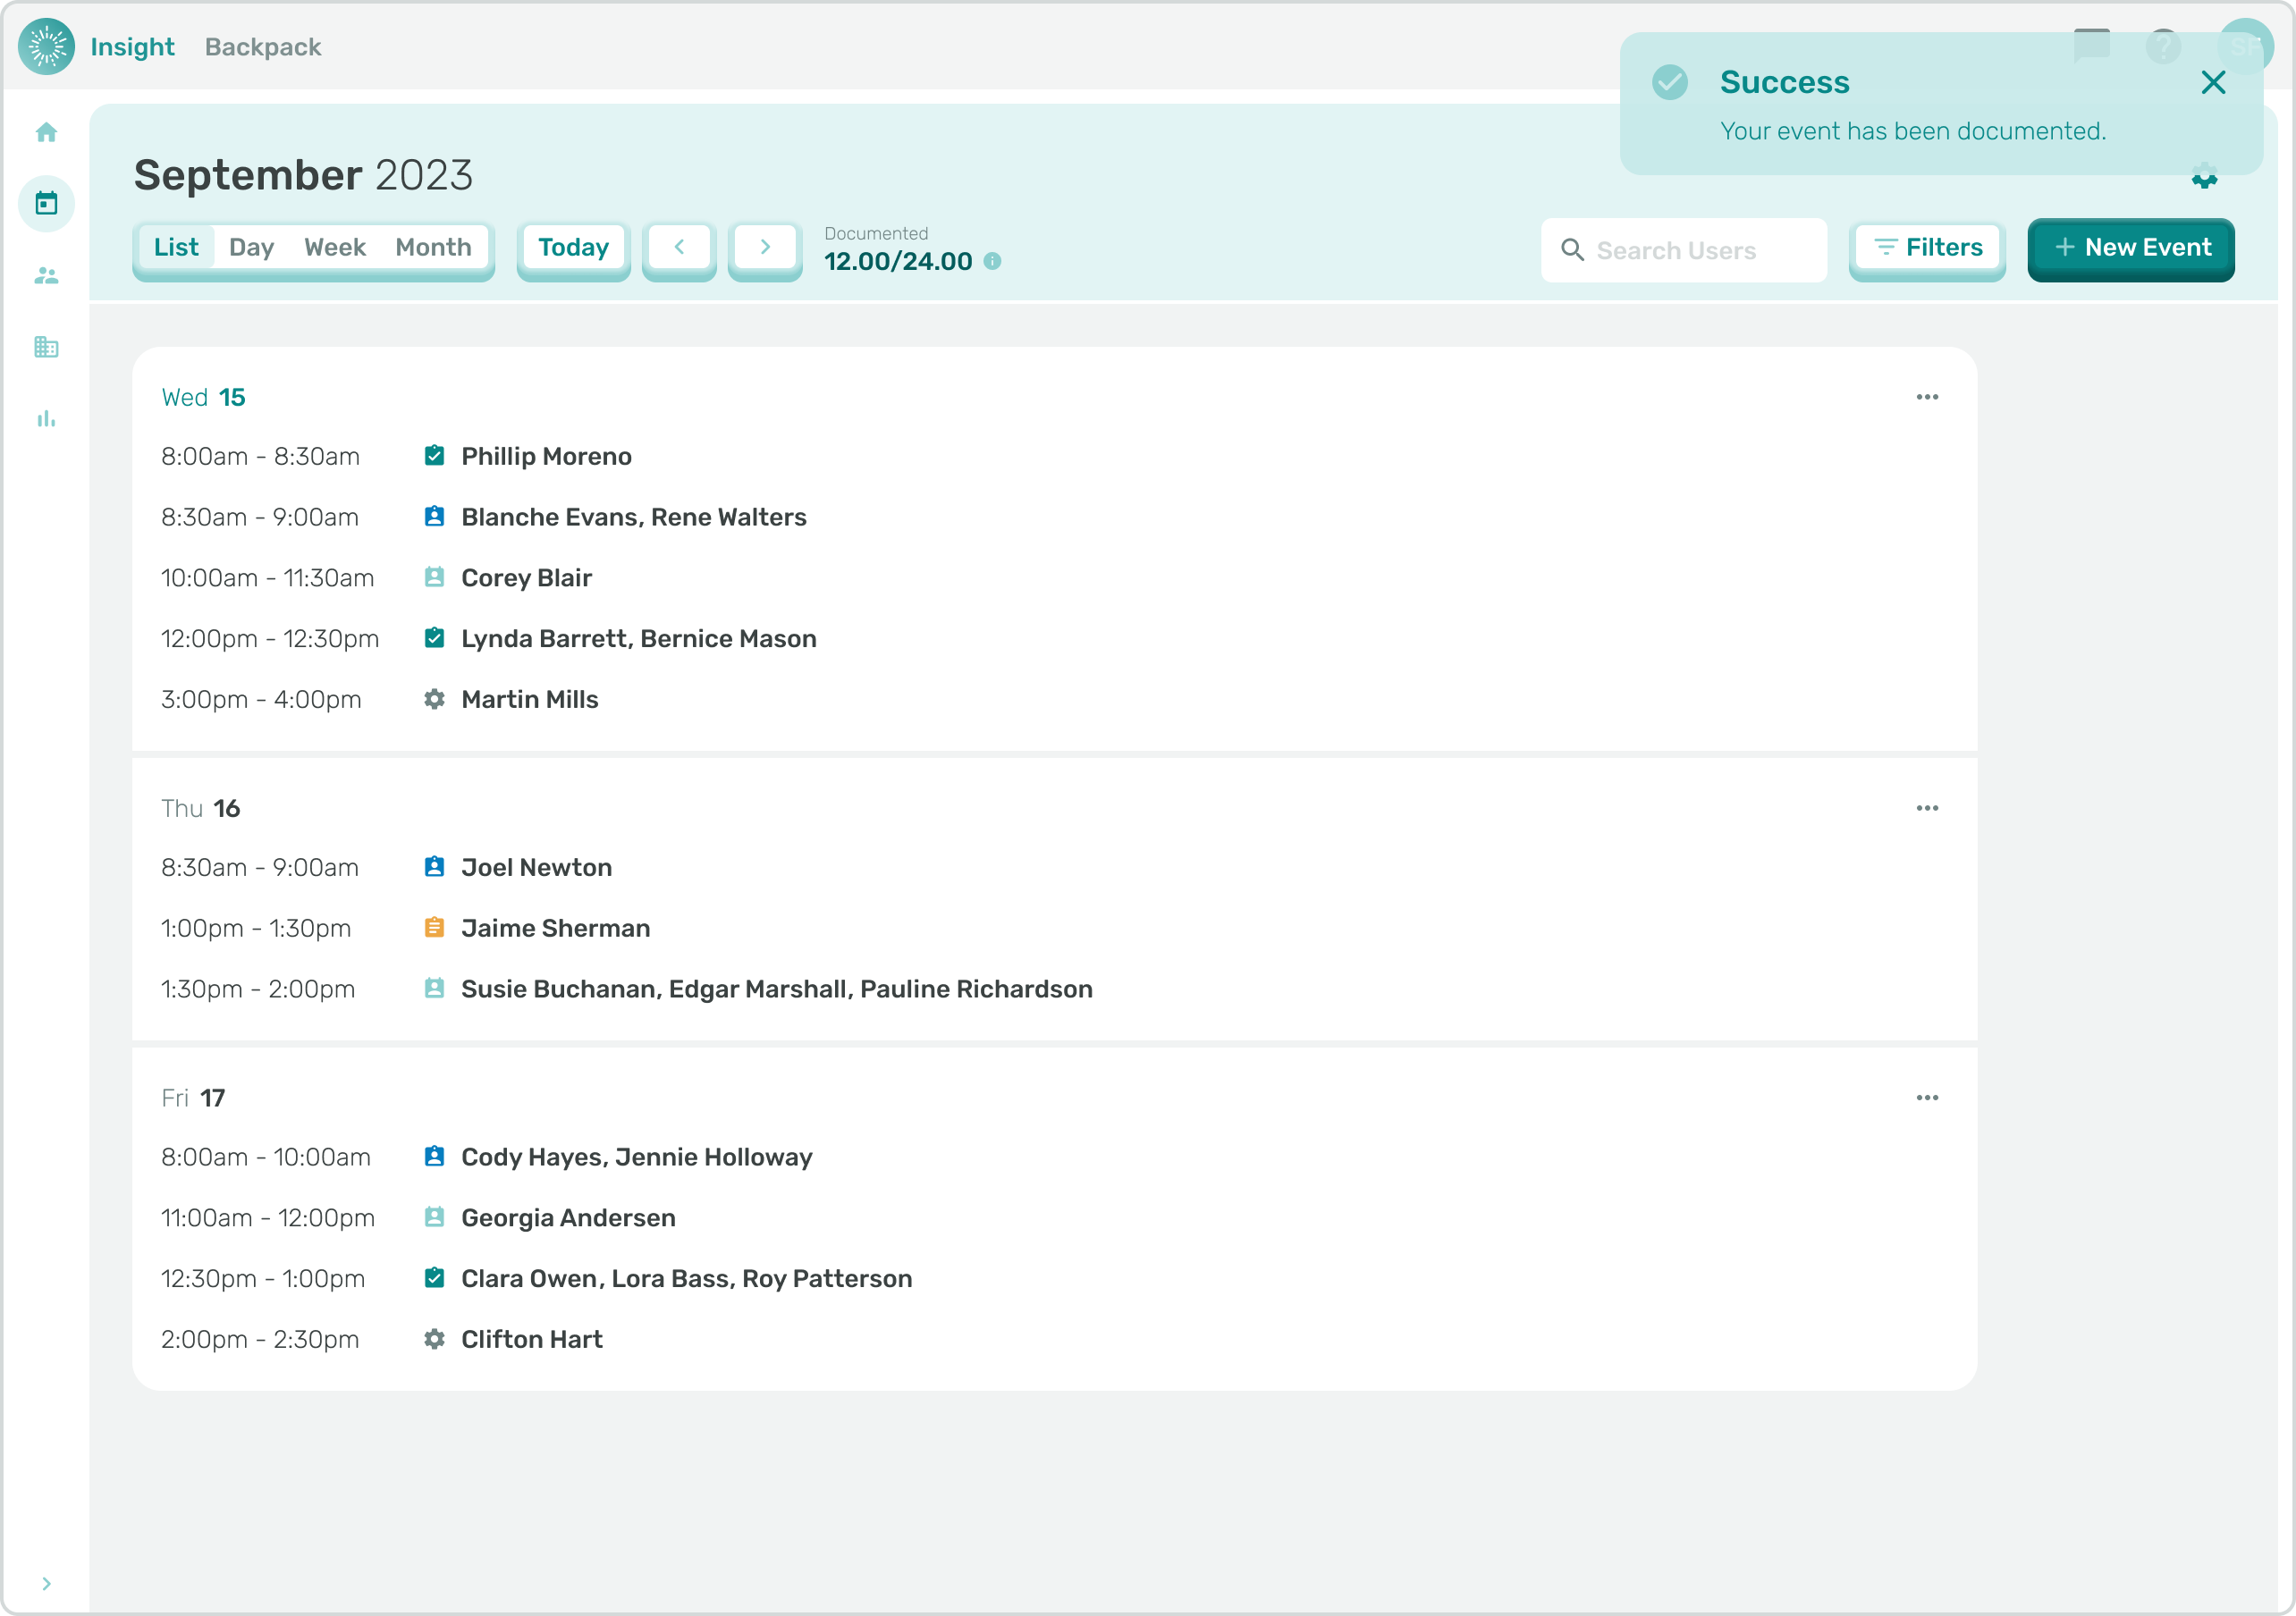
- Once you have clicked on the Save button you will see a Confirmation notification at the top of your screen briefly pop-up that says, “Success Your Event has been documented.”